Manufacturing a liquid silicone heat insulation mat involves high-precision injection molding where two-component Liquid Silicone Rubber (LSR) is mixed, metered, and injected into a heated mold to vulcanize into its final thermal-resistant form. You face significant risks when your equipment surfaces are exposed to high temperatures without proper protection. Failing to use an industrial-grade barrier leads to melting, surface degradation, and expensive downtime. You can eliminate these hazards by integrating a professional Silicone Mat into your workflow to ensure consistent safety and insulation performance.
What is a high-temperature resistant Silicone Mat?
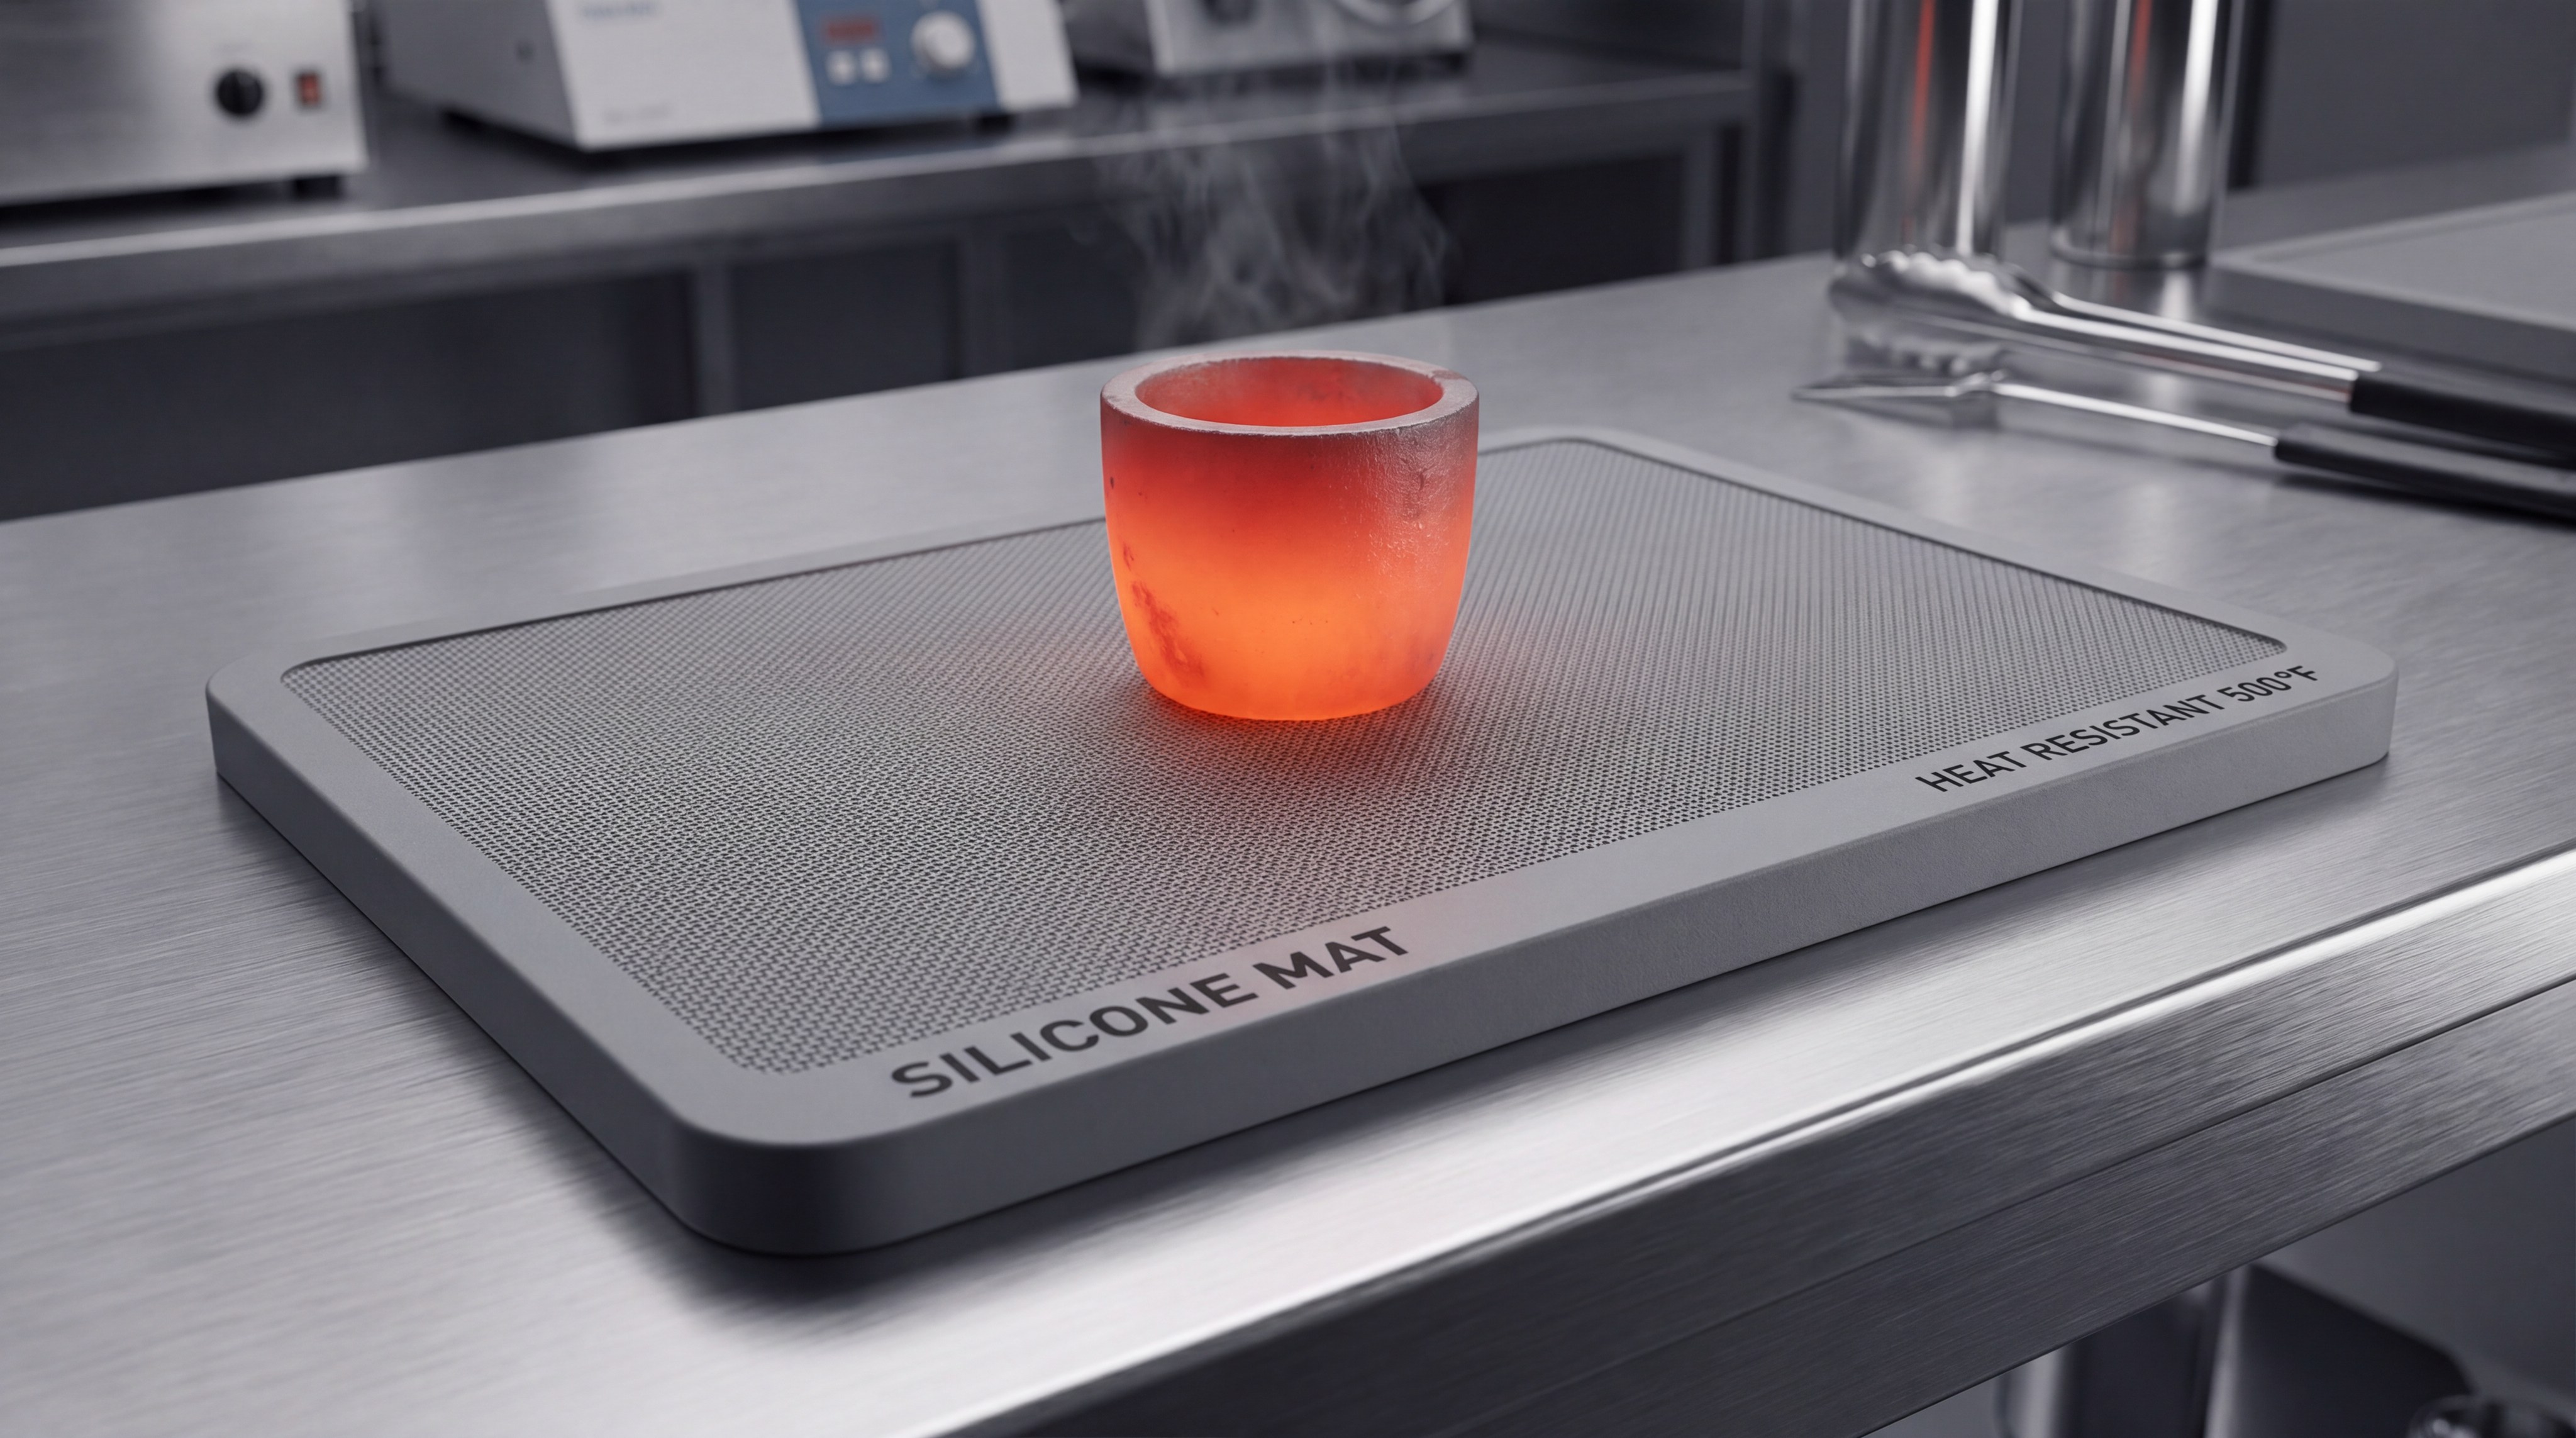
A high-temperature resistant Silicone Mat is a specialized elastomer barrier engineered to protect delicate surfaces from thermal transfer up to 250°C or higher. These products are ubiquitous in industrial and consumer settings where heat management is critical.
Standard Temperature Thresholds
You need to know that not all silicone is created equal. Standard grades handle typical kitchen heat, while industrial versions are formulated for extreme environments.
- Food-Grade: Ranges from -40°C to 230°C for safe food contact.
- Industrial-Grade: Specifically formulated to withstand up to 300°C for soldering or engine parts.
- Medical-Grade: Sterilizable mats used in high-heat autoclave environments.
Think about it.
Choosing the wrong temperature rating could result in the material becoming brittle or losing its non-slip properties over time.
Common Industry Applications
Every sector has unique requirements for thermal protection. Whether you are in the kitchenware business or electronics assembly, the mat serves as a primary safety layer.
- Kitchenware: Oven protectors, baking liners, and trivets.
- Electronics: Anti-static soldering pads and protective workstation covers.
- Automotive: Gaskets and insulation pads for engine bay components.
Believe it or not.
These mats often double as anti-slip solutions, providing mechanical stability alongside thermal resistance.
Key Takeaway:
High-temperature mats are versatile safety tools that maintain structural integrity across wide temperature ranges (-40°C to 300°C) across multiple industries.
| Application | Material Type | Max Temp (°C) | Primary Benefit |
|---|---|---|---|
| Kitchenware | Food-Grade LSR | 230 | Safe food contact |
| Electronics | Anti-static LSR | 280 | ESD protection |
| Industrial | High-Heat LSR | 300+ | Durability |
Thermal protection is the core function of these elastomer products.
Why is liquid silicone best for a Silicone Mat?
Liquid silicone rubber (LSR) is the superior choice for a Silicone Mat because its molecular structure provides incredible thermal stability and low thermal conductivity. Unlike plastic or low-grade rubber, liquid silicone does not melt or off-gas toxic chemicals when exposed to heat.
You should consider that the liquid nature of the raw material allows for much tighter tolerances during the manufacturing phase. This ensures that the insulation thickness remains perfectly consistent across the entire surface of the product.
Material Stability Advantages
The chemical makeup of LSR makes it highly resistant to thermal aging. It remains flexible and does not crack even after thousands of heating and cooling cycles.
- Inertness: Does not react with chemicals or oils at high temperatures.
- Flexibility: Maintains its shape without permanent deformation.
- Longevity: Outlasts traditional rubber by years in high-usage environments.
Wait, there’s more.
Liquid silicone is naturally hydrophobic, meaning it repels liquids and is incredibly easy to clean after industrial use.
Safety and Compliance Benefits
For brands targeting the consumer or medical markets, safety is a non-negotiable factor. Liquid silicone is naturally BPA-free and doesn’t harbor bacteria due to its non-porous surface.
- Biocompatibility: Safe for skin contact and medical applications.
- FDA Compliance: Meets strict regulations for food-safe manufacturing.
- Flame Retardancy: Many LSR grades are naturally self-extinguishing for added fire safety.
Here is the kicker.
The automated nature of LSR molding removes the risk of human contamination during the production process.
Key Takeaway:
LSR is the industry standard for heat mats due to its chemical inertness, high thermal stability, and inherent safety for food and medical use.
| Property | Liquid Silicone (LSR) | Solid Rubber (HCR) | Benefit |
|---|---|---|---|
| Heat Resistance | Superior | High | Long-term stability |
| Detail Accuracy | Excellent | Moderate | Complex textures |
| Curing Speed | Fast | Slow | High-volume efficiency |
LSR offers a balanced mix of performance and manufacturing speed.
How do you select material for a Silicone Mat?
Selecting the right material for your Silicone Mat requires balancing Shore A hardness, temperature requirements, and intended environmental exposure. You must choose a grade that provides enough cushioning while remaining rigid enough to support heavy hot objects.
You generally find that a hardness of 40 to 60 Shore A is ideal for most insulation applications. This range provides the perfect tactile feel and mechanical strength for daily industrial or consumer use.
Hardness and Flexibility Scales
Shore A hardness determines how the mat feels and how it responds to pressure. If the mat is too soft, it may tear easily; if it is too hard, it won’t grip surfaces effectively.
- 30-40 Shore A: Very soft and flexible, ideal for wrapping or folding mats.
- 50-60 Shore A: Standard industrial hardness for workstation pads and trivets.
- 70+ Shore A: High-rigidity mats used for heavy industrial equipment mounting.
The best part?
You can customize the hardness to match specific mechanical requirements without sacrificing any heat resistance properties.
Additives and Specialized Grades
Sometimes standard LSR isn’t enough for specialized B2B applications. You can integrate various additives during the mixing phase to enhance specific performance metrics.
- Fiberglass Reinforcement: Prevents stretching and improves dimensional stability in large mats.
- Thermal Fillers: Can be used to either increase or further decrease thermal conductivity.
- Color Pigments: High-temperature stable pigments that won’t fade or leach during use.
Make no mistake.
Using the wrong grade of material can lead to premature product failure and liability issues for your brand.
Key Takeaway:
Material selection centers on Shore A hardness (typically 40-60) and the inclusion of additives like fiberglass for stability or thermal fillers for performance.
| Grade | Hardness (Shore A) | Best Use Case | Material Cost |
|---|---|---|---|
| Soft Grade | 30 – 40 | Flexible liners | Medium |
| Standard | 50 – 60 | Kitchen/Industrial pads | Competitive |
| High-Density | 70+ | Equipment mounts | High |
Selecting the correct hardness ensures long-term product usability and safety.
Which design features improve a Silicone Mat?
Design engineering plays a massive role in how effectively a Silicone Mat dissipates heat and protects the underlying surface. You cannot rely on material thickness alone; the physical geometry of the mat’s surface determines its ultimate insulation value.
You will see that air is one of the best insulators available. By designing patterns that trap air, you create a secondary barrier that significantly slows down the transfer of heat from a hot object to the table.
Surface Texture and Airflow
The geometry on the top and bottom of the mat serves several functional purposes. It is not just about aesthetics; it is about managing the thermal path.
- Honeycomb Patterns: Trap air pockets to provide maximum insulation with less material.
- Ribbed Structures: Allow for airflow under the mat to cool the surface faster.
- Raised Studs: Reduce the contact area between the hot object and the mat surface.
Let’s dive deeper.
A textured surface also provides an anti-slip function, which is vital when handling hot, heavy industrial components or cookware.
Strategic Edge and Thickness Design
The perimeter of the mat should be engineered to prevent spills and handle the mechanical stresses of being moved frequently. Different thicknesses serve different insulation needs.
- Spill-Guard Edges: Raised lips that contain liquids or crumbs during use.
- Graduated Thickness: Thicker in the center for heat, thinner at the edges for flexibility.
- Hanging Holes: Molded-in features that allow for easy storage in professional environments.
Believe it or not.
A 5mm thick mat with a honeycomb pattern can often insulate better than a 10mm solid mat while using less raw material.
Key Takeaway:
Effective mat design uses trapped air (honeycomb/ribs) and surface textures to enhance insulation and safety while optimizing material usage.
| Feature | Primary Function | Secondary Benefit |
|---|---|---|
| Honeycomb | Air insulation | Weight reduction |
| Anti-Slip Ribs | Grip | Surface cooling |
| Raised Rim | Spill containment | Rigidity |
Geometric design is just as important as material selection for thermal performance.
What mold tooling is required for a Silicone Mat?
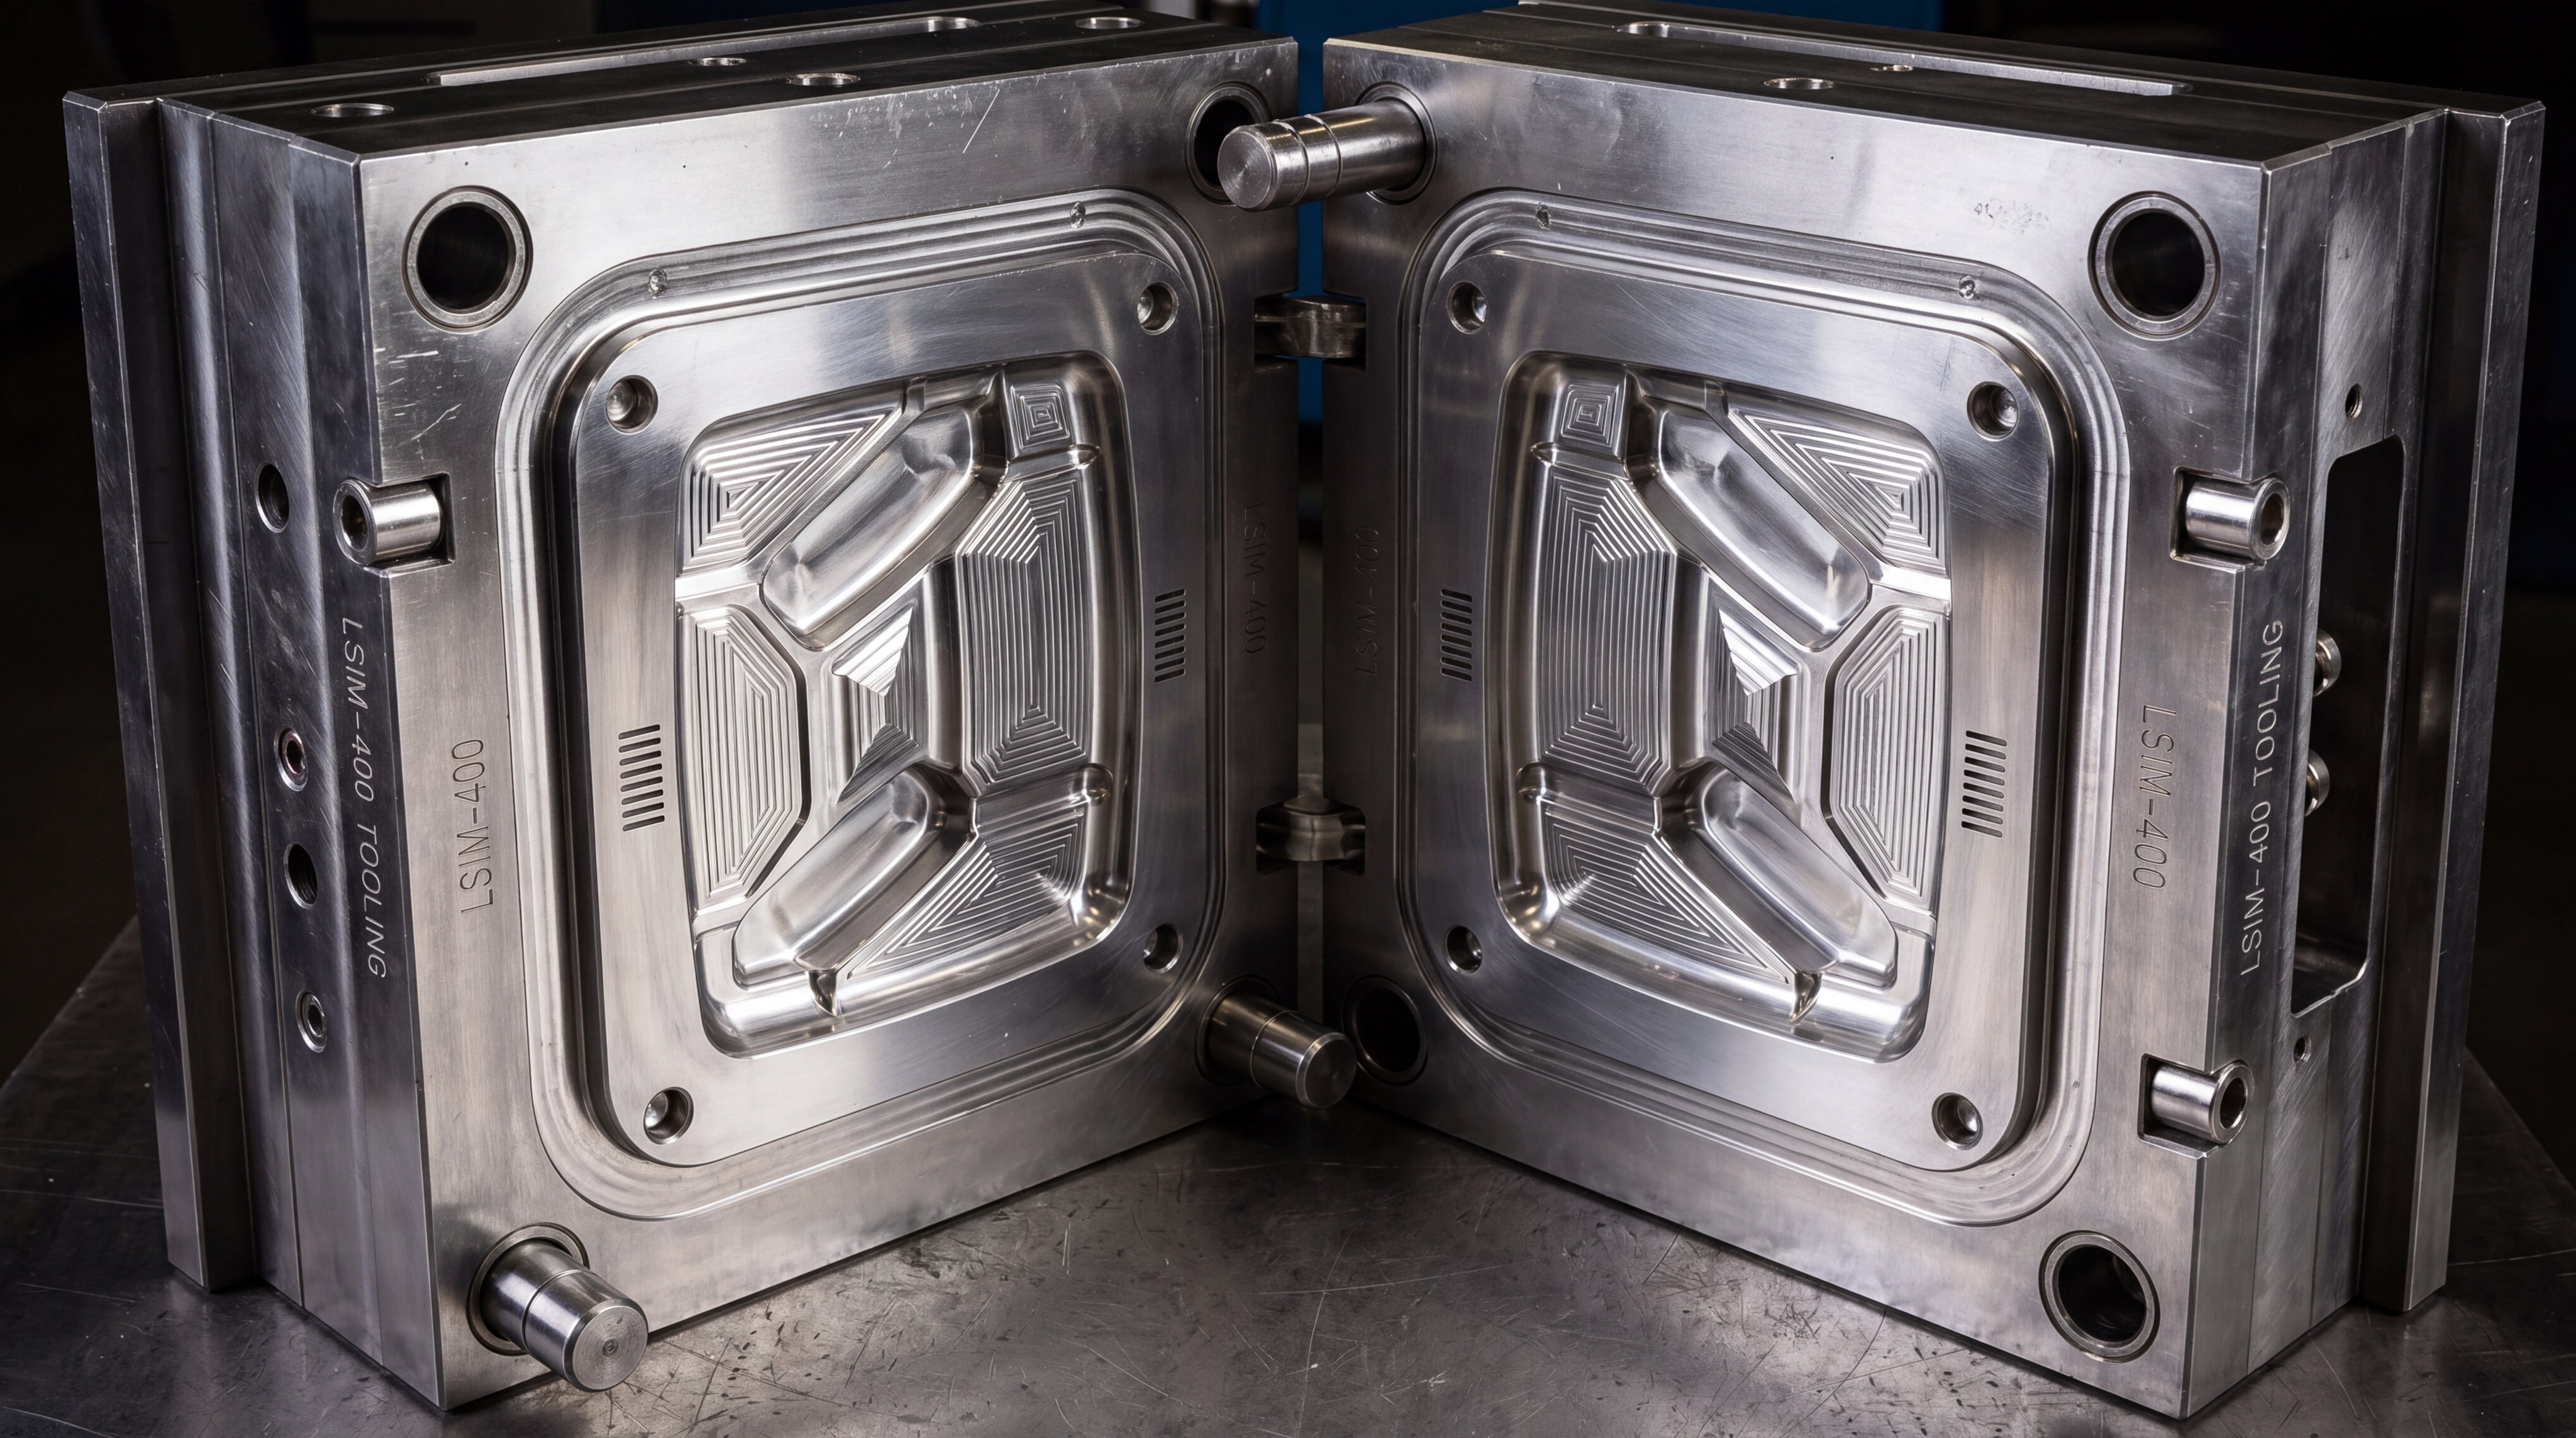
The precision of your Silicone Mat is entirely dependent on the quality of the stainless steel mold used in the injection process. You must invest in high-grade tooling to ensure that the complex surface textures are reproduced perfectly in every single shot.
You need to use S136 or similar corrosion-resistant stainless steel for LSR molds. Silicone curing involves high temperatures and pressures, and inferior steels will quickly degrade or lead to surface finish issues.
Precision CNC and Surface Finishing
The mold cavities must be machined using high-precision CNC equipment to achieve the fine details required for anti-slip patterns. The finish of the steel translates directly to the finish of the mat.
- Mirror Polishing: Creates a glossy, suction-like grip on the bottom of the mat.
- Sandblasted Texture: Results in a matte, high-friction finish that prevents objects from sliding.
- Laser Engraving: Used for permanent branding and thermal rating labels directly in the mold.
Here is the truth.
A poorly finished mold will result in “flash” or excess material that requires expensive manual trimming later.
Venting and Injection Systems
Managing the flow of liquid silicone into the mold is a delicate science. Because silicone is thin before it cures, the mold must be perfectly sealed while still allowing air to escape.
- Cold Runner Systems: Reduce material waste by keeping the silicone in the nozzles cool.
- Micro-Venting: Specialized channels that allow air to exit without letting silicone leak out.
- Automatic Ejection: Pins or air blasts that remove the cured mat from the tool without damage.
It gets better.
High-quality tooling can last for hundreds of thousands of cycles, making the initial investment highly cost-effective for mass production.
Key Takeaway:
Tooling must utilize high-grade stainless steel (S136) and precision venting to ensure bubble-free products and minimize secondary trimming labor.
| Tooling Component | Recommended Material | Purpose |
|---|---|---|
| Mold Base | P20 or S136 Steel | Structural durability |
| Cavity | S136 Stainless | Corrosion resistance |
| Injection | Cold Runner | Waste reduction |
Quality tooling is the foundation of a high-yield silicone manufacturing line.
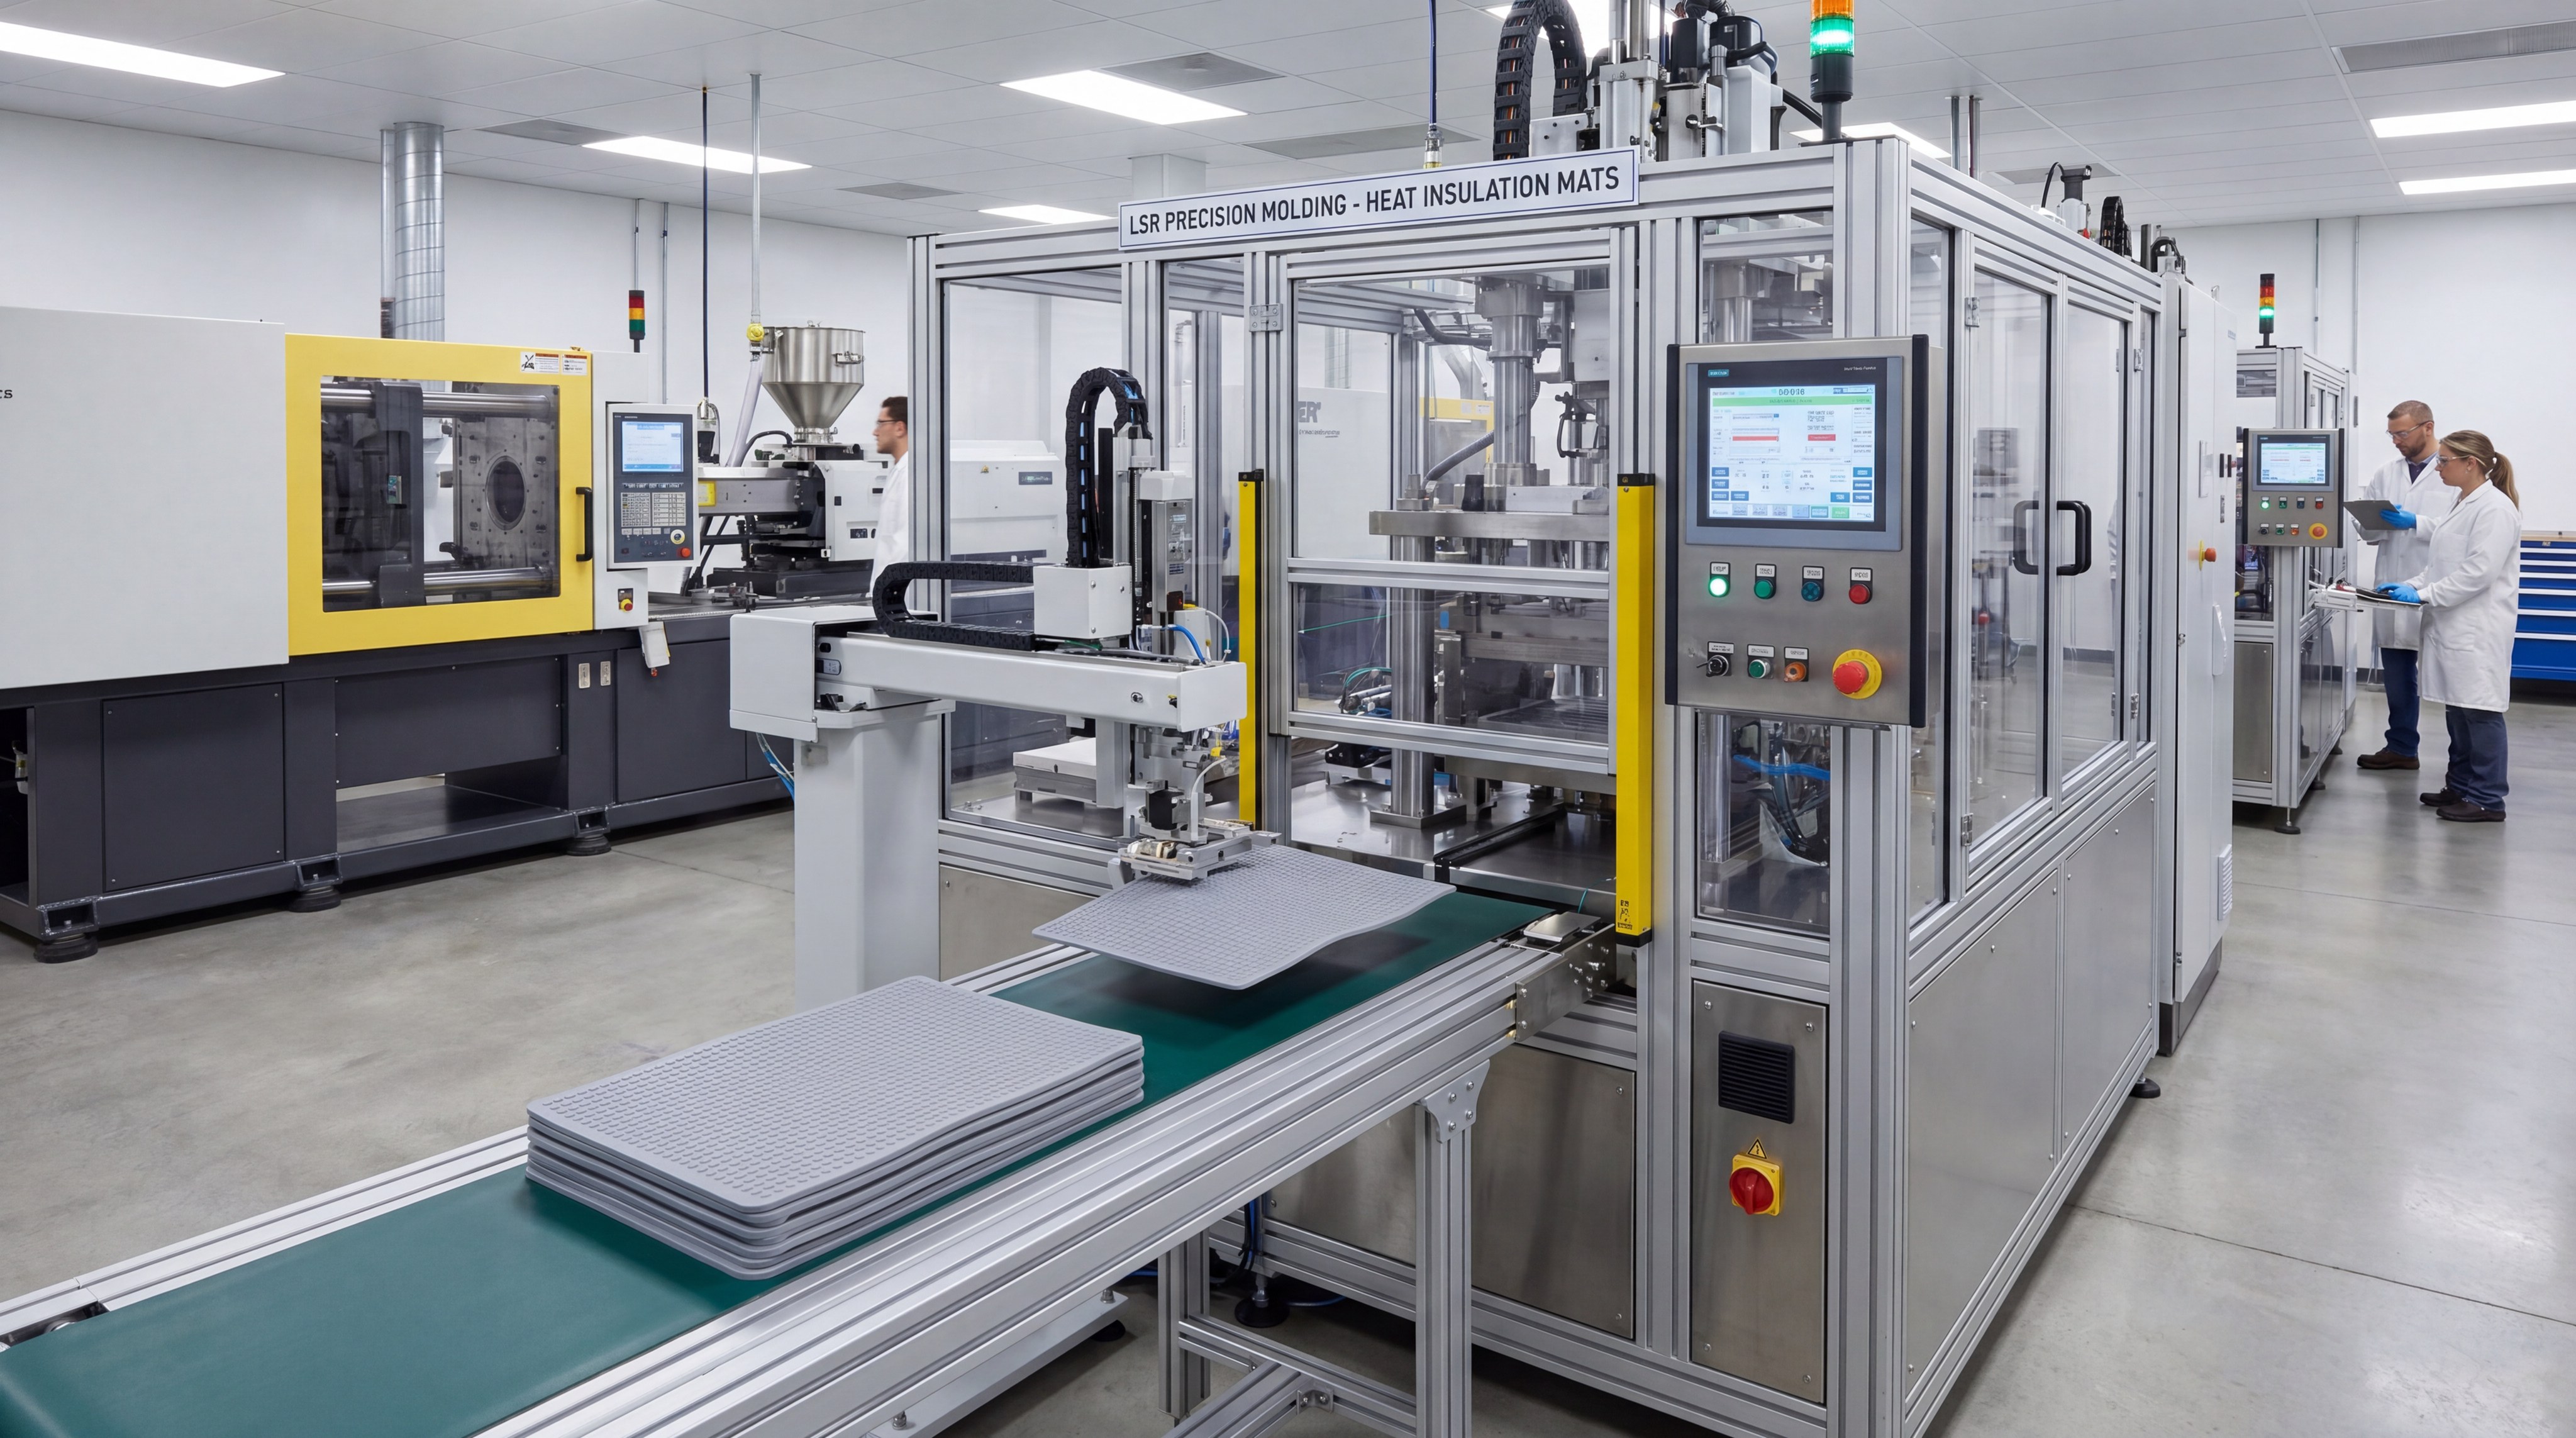
How do you manufacture a liquid Silicone Mat?
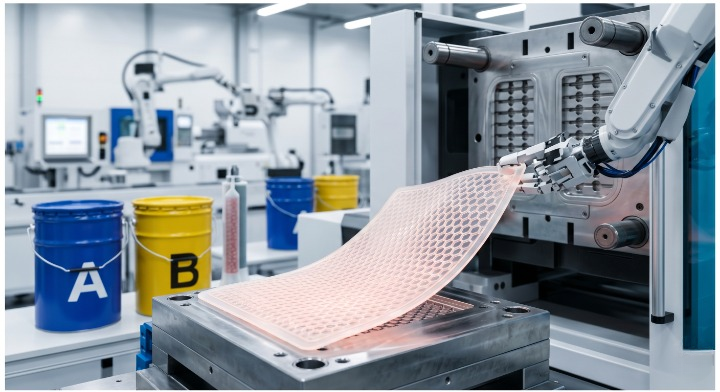
The manufacturing process for a Silicone Mat begins with the precise metering of the two liquid silicone components (Part A and Part B). You use a specialized LSR injection molding machine that pumps these parts in a 1:1 ratio into a static mixer before they enter the heated mold.
You will find that once the mixture enters the heated tool, a chemical cross-linking reaction occurs almost instantly. This process, known as vulcanization, transforms the liquid into a solid, durable elastomer in a matter of seconds.
The Injection Cycle
Efficiency in B2B manufacturing depends on cycle time. The faster you can cure the mat and eject it, the lower your per-unit cost will be.
- Clamping: The machine holds the mold halves together with several tons of force.
- Injection: The mixed LSR is forced into the cavities under high pressure.
- Curing: The heated mold (160°C – 200°C) triggers the chemical set.
Don’t overlook this.
The temperature must be perfectly uniform across the entire mold plate to prevent warped or uneven mats.
Demolding and Automation
For high-volume orders, automation is essential. Manual removal of mats is slow and can lead to surface damage if the operator is not careful.
- Robotic Pickers: Use suction or mechanical grippers to lift mats from the mold.
- Air Ejection: High-pressure air blasts the mat off the textured surface.
- Conveyor Systems: Move parts directly from the machine to the inspection station.
The point is.
Automated systems allow for 24/7 production with zero fatigue-related quality drops.
Key Takeaway:
LSR injection molding is an automated, high-speed process involving 1:1 mixing, high-pressure injection, and rapid heat vulcanization.
| Process Step | Action | Control Metric |
|---|---|---|
| Mixing | A+B 1:1 Ratio | Flow consistency |
| Injection | Cavity Filling | Injection pressure |
| Vulcanization | Heat Curing | Temperature stability |
Automation in manufacturing drives both consistency and cost-efficiency.
What secondary finishes benefit a Silicone Mat?
After the molding process is complete, your Silicone Mat often requires secondary processing to meet strict safety or branding standards. You should never assume the mat is finished the moment it leaves the injection molding machine.
You must perform a post-curing step for all mats intended for food-grade or medical use. This involves baking the mats in a specialized oven for several hours to remove any remaining volatile organic compounds (VOCs).
Post-Curing and Safety
Post-curing is the most critical secondary step for safety. It ensures the material is fully stabilized and won’t leach any odors or chemicals during use at high temperatures.
- VOC Removal: Essential for meeting FDA and LFGB food safety standards.
- Dimensional Stabilization: Helps the mat reach its final physical properties.
- Tackiness Reduction: Removes the natural “sticky” feel of fresh silicone.
Think about it.
If you skip post-curing, the mat may smell like chemicals the first time your customer uses it on a hot stove.
Branding and Surface Coatings
If your B2B project requires specific logos or a unique feel, various surface treatments can be applied after the molding stage.
- Laser Marking: Provides permanent, heat-resistant logos that cannot be scrubbed off.
- Silicone Spray Coating: Adds a silky, anti-dust finish to the surface.
- Pad Printing: Used for multi-color branding with high-temperature silicone inks.
But wait, there’s more.
Some mats receive a specialized anti-static coating if they are destined for sensitive electronic assembly environments.
Key Takeaway:
Post-curing is non-negotiable for safety (VOC removal), while laser marking and anti-dust coatings provide necessary branding and tactile improvements.
| Secondary Process | Necessity | Purpose |
|---|---|---|
| Post-Curing | High (Food/Med) | Remove VOCs / Odor |
| Trimming | Medium | Remove parting line flash |
| Laser Marking | Optional | Permanent branding |
Secondary operations transform a raw molded part into a market-ready premium product.
How is quality verified for every Silicone Mat?
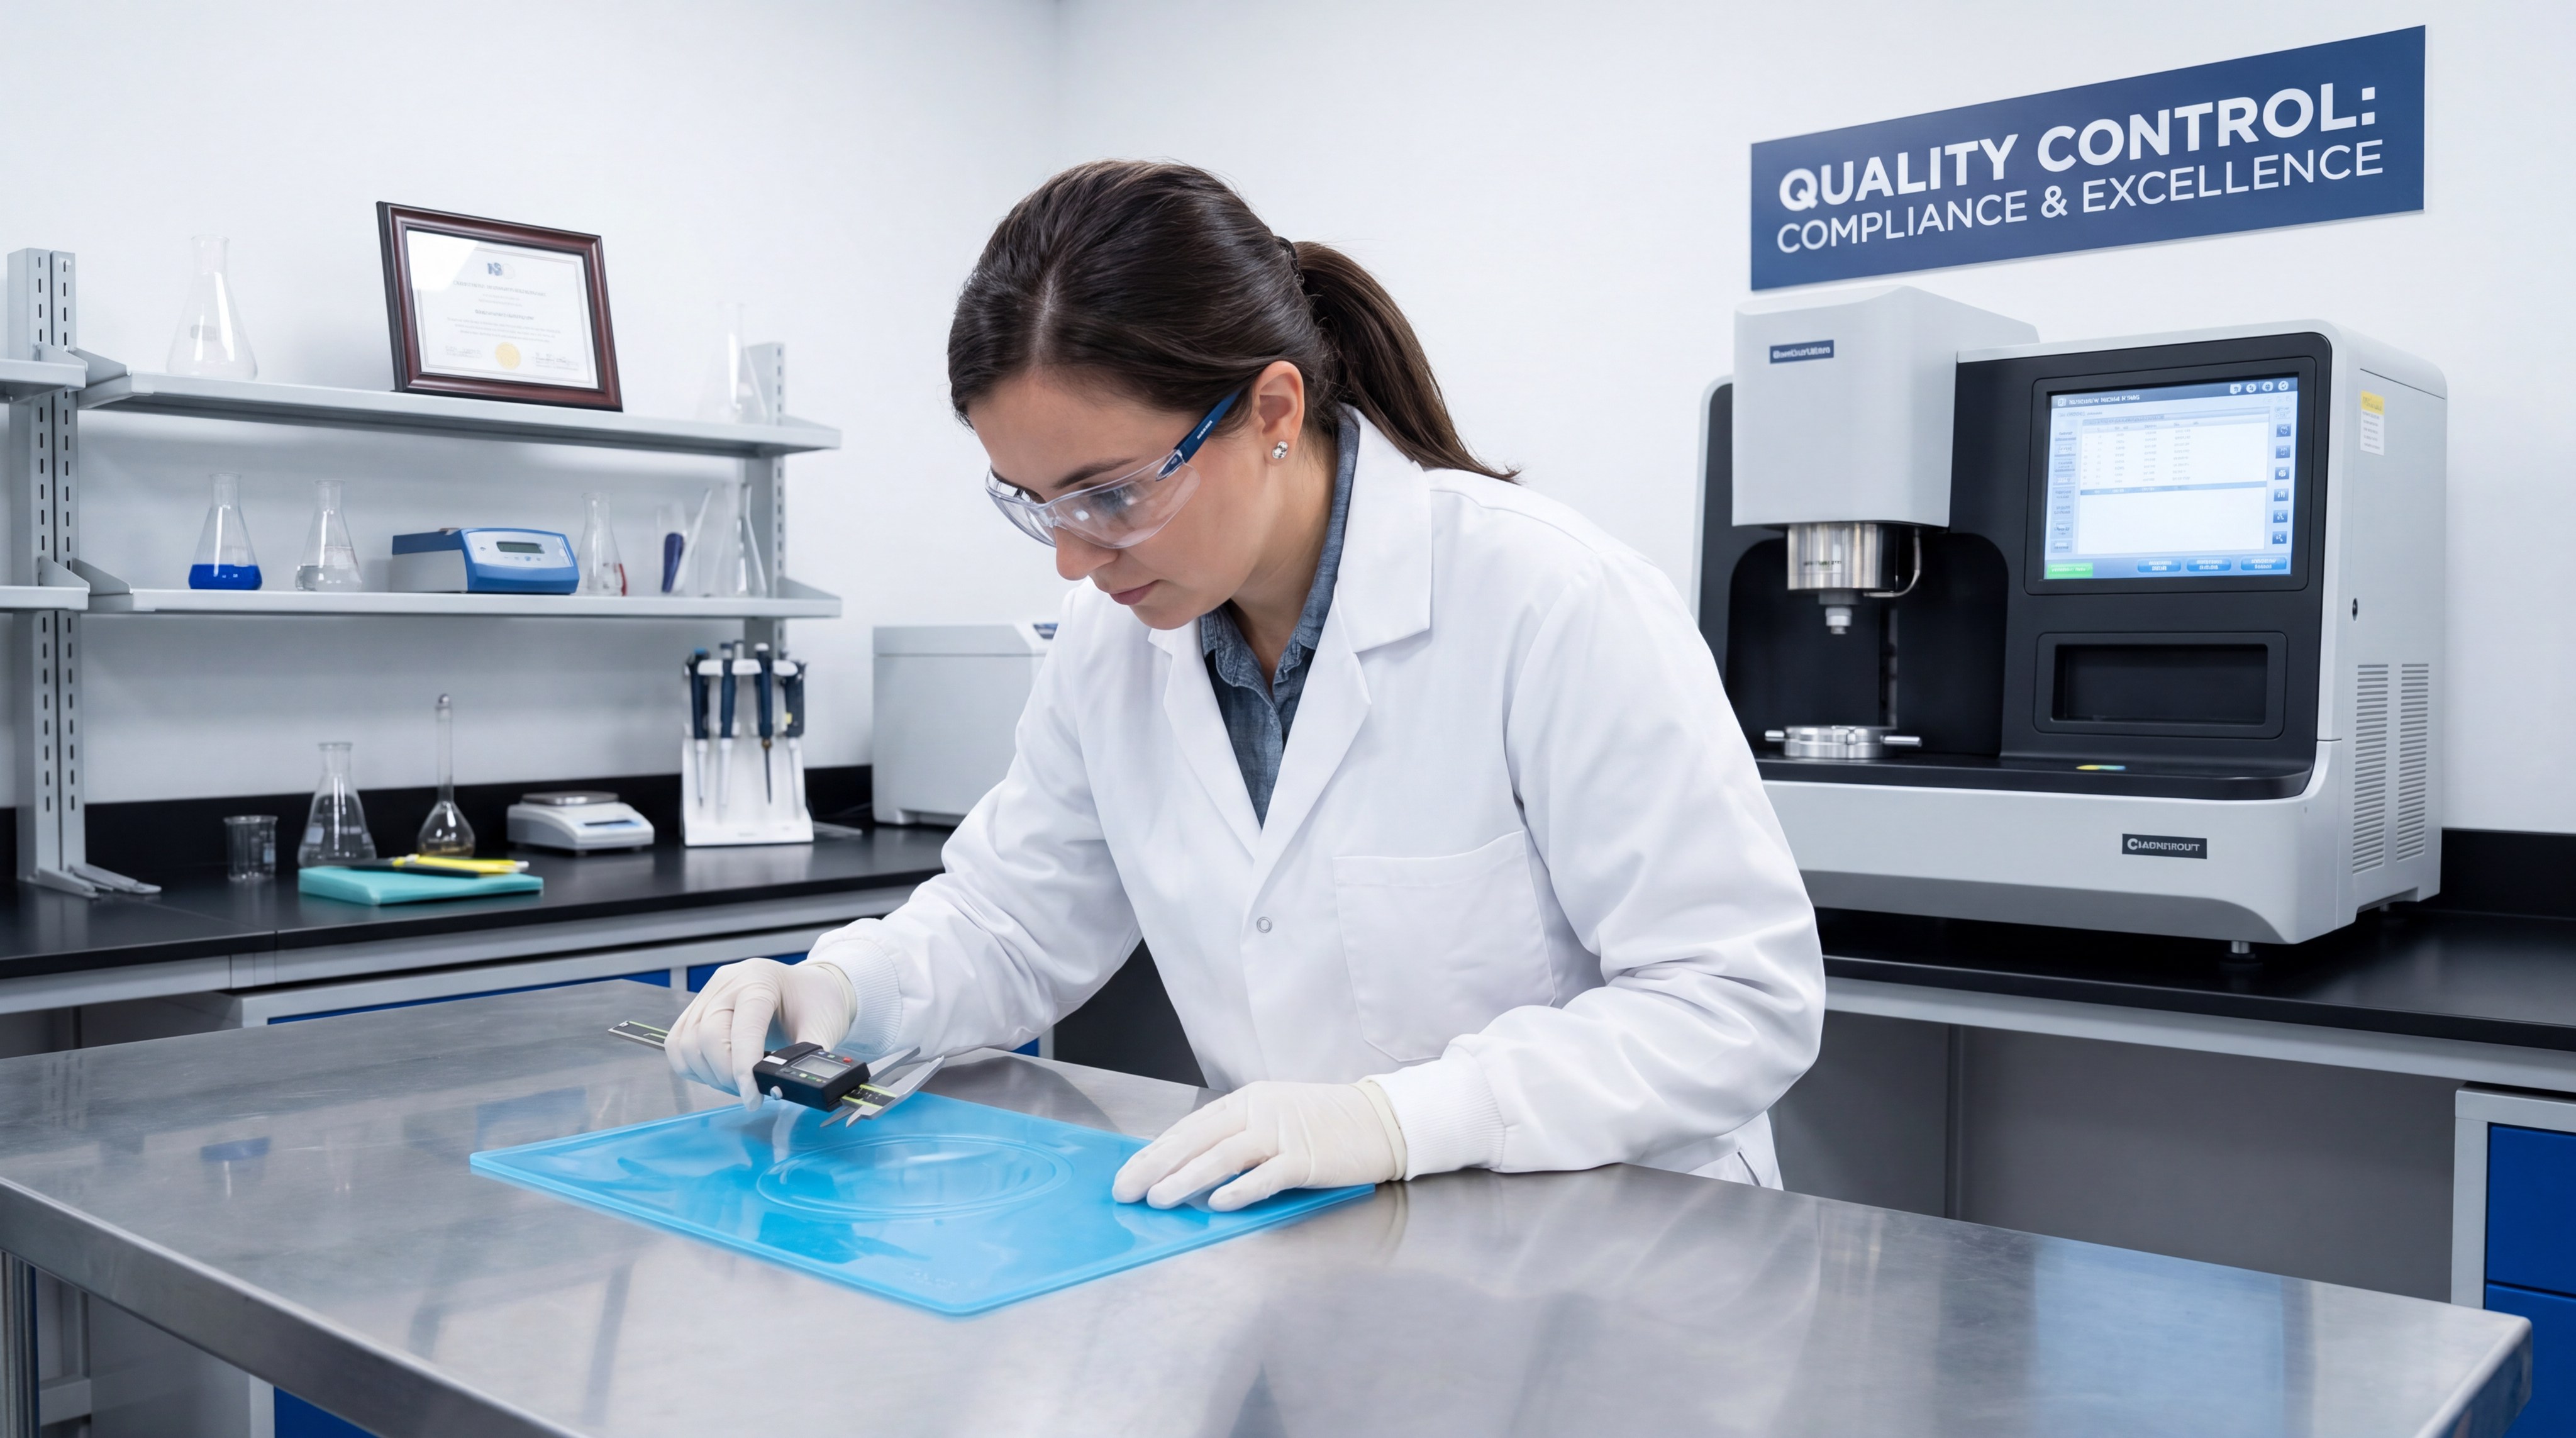
Quality control for a Silicone Mat is a rigorous process that involves testing the material’s physical limits and ensuring dimensional accuracy. You cannot afford to ship a batch of insulation mats that fail under heat, as this creates a massive liability for your clients.
You should implement 100% visual inspection alongside batch-based destructive testing. This ensures that every mat leaving the factory is free of bubbles, surface defects, or thin spots that could compromise insulation.
Thermal and Mechanical Testing
Testing is the only way to prove the mat will survive in the field. Professional labs use specialized equipment to simulate years of heavy use in a matter of days.
- Heat Aging: Baking the mats at 250°C for 72 hours to check for hardening or cracking.
- Tensile Strength: Pulling the mat until it breaks to ensure it meets durability specs.
- Compression Set: Testing how well the mat returns to its original shape after heavy pressure.
Here is the kicker.
Thermal conductivity testing is vital to verify that the mat actually meets its advertised insulation rating.
Visual and Dimensional Checks
Advanced manufacturing facilities use CCD (Charge-Coupled Device) cameras to inspect every mat for microscopic flaws that a human might miss.
- Thickness Verification: Using calipers to ensure the mat provides the specified insulation gap.
- Color Consistency: Matching every batch to a Pantone or RAL standard.
- Flash Inspection: Checking for excess material at the mold parting lines.
You’ve got this.
Maintaining strict quality standards builds long-term trust with your B2B partners and reduces return rates.
Key Takeaway:
Quality assurance must combine high-temperature aging tests, mechanical strength validation, and CCD visual inspection to ensure 100% safety.
| Test Parameter | Method | Success Criteria |
|---|---|---|
| Temp Resistance | 250°C Oven Test | No melting or smell |
| Tensile Strength | Pull Tester | No tearing under load |
| Dimension | CCD Camera | ±0.1mm Tolerance |
Rigorous testing is the only way to guarantee thermal performance in high-risk environments.
What factors influence the cost of a Silicone Mat?
The cost of producing a high-quality Silicone Mat is driven by three main factors: material weight, mold complexity, and production volume. You need to understand these drivers to optimize your budget for large-scale B2B orders.
You will find that while silicone is more expensive than plastic, its long lifespan and safety profile offer a much better return on investment (ROI). In high-heat applications, cheaper materials simply fail, leading to higher replacement costs.
Raw Material and Size
The physical size and thickness of the mat determine how much LSR is used per shot. Since silicone is sold by weight, larger industrial mats naturally carry a higher base cost.
- Volume Pricing: Buying silicone in bulk (tons vs. drums) lowers the material cost.
- Material Grade: Specialized high-heat or medical grades are priced higher than standard.
- Waste Management: Using cold runner systems can save up to 20% on material costs.
Believe it or not.
Adding 1mm of thickness to a large mat can increase the per-unit cost by 15% due to material usage.
Tooling and Labor Costs
The initial investment in a high-precision stainless steel mold is the largest upfront expense. However, once the tool is made, the per-piece cost drops significantly as you scale.
- Multi-Cavity Molds: Producing 4 or 8 mats at once dramatically lowers labor costs.
- Automation Levels: High automation reduces the need for manual trimming and packing.
- Complexity: Intricate honeycomb patterns require more expensive CNC machining for the mold.
Let’s be honest.
Choosing a cheap mold usually leads to higher costs later due to high scrap rates and constant maintenance.
Key Takeaway:
Costs are primarily influenced by material grade/weight, mold cavity count, and the use of waste-reducing cold runner systems.
| Cost Driver | Impact | Strategy to Lower |
|---|---|---|
| Material Grade | High | Match grade to actual use |
| Mold Cavities | High | Use multi-cavity for volume |
| Part Size | Medium | Optimize thickness for heat |
Balancing material performance with efficient design is the key to cost-effective B2B silicone production.
How do you plan mass production for a Silicone Mat?
Planning mass production for a Silicone Mat requires a focus on supply chain stability and automated workflow integration. You must ensure that your manufacturer has the capacity to scale from a few hundred prototypes to tens of thousands of units monthly.
You should prioritize a one-stop factory that handles everything from mold making to final assembly and export. This minimizes the risk of quality drift that occurs when parts are moved between different suppliers for secondary operations.
Capacity and Lead Times
B2B buyers need reliable timelines to manage their own inventories. Mass production scheduling must account for material lead times and mold maintenance intervals.
- Batch Tracking: Using barcodes to trace every mat back to the raw material batch.
- Buffer Stocks: Keeping a safety stock of raw silicone to avoid supply chain shocks.
- Maintenance Cycles: Scheduling mold cleaning every few thousand shots to prevent defects.
Wait, there’s more.
A professional factory will provide a Detailed Production Schedule (DPS) to keep you updated on progress.
Packaging and Logistics
The way the mats are packed is just as important as how they are made. Silicone has a high-friction surface and can attract dust if not handled properly during the final stages.
- Anti-Static Bags: Prevent dust attraction during shipping and storage.
- Vacuum Packing: Reduces shipping volume and protects the surface finish.
- Custom Retail Packing: If you are a brand owner, the factory can pack mats in ready-to-sell boxes.
It’s a win-win.
Proper packaging ensures that the mats arrive in pristine condition, ready for immediate use in an industrial or kitchen setting.
Key Takeaway:
Successful mass production relies on automated workflows, one-stop manufacturing capabilities, and dust-proof packaging solutions for global shipping.
| Phase | Duration | Focus Area |
|---|---|---|
| Tooling | 25 – 35 Days | Precision & Finish |
| Sampling | 3 – 7 Days | Approval & Verification |
| Production | 15 – 25 Days | Consistency & Volume |
Strategic planning ensures that your product launch is on time and meets all quality benchmarks.
*
Mastering Heat Management with Silicone
Manufacturing a high-performance heat insulation mat is a complex engineering task that solves the critical problem of surface damage and workplace hazards caused by extreme thermal energy. By choosing liquid silicone rubber and precision injection molding, you ensure your product offers unmatched durability, food safety compliance, and thermal stability up to 250°C.
Our brand stands as a leader in technical silicone solutions, providing B2B partners with the expertise needed to navigate material selection, complex mold design, and high-volume automation. We eliminate the risks of surface melting and chemical off-gassing through rigorous post-curing and testing protocols. Contact us today to start your project with a comprehensive DFM review and expert manufacturing support.
Frequently Asked Questions
- Can a silicone mat really handle temperatures above 250°C?
Absolutely. While standard food-grade silicone is rated for 230°C, industrial-grade LSR with specific thermal additives can withstand intermittent exposure to 300°C or higher without losing its structural integrity. - What is the best thickness for an industrial insulation mat?
It depends on the application, but 5mm to 8mm is generally the “sweet spot” for industrial workstations. This thickness provides excellent thermal insulation while maintaining the flexibility needed for the mat to sit flat on uneven surfaces. - Why is LSR better than compression molding for these mats?
LSR is vastly superior because it allows for automated production, higher dimensional precision, and thinner, more complex patterns like honeycombs that are difficult to achieve with traditional compression molding. - Does the silicone mat attract a lot of dust?
Silicone has a naturally high-friction surface that can attract dust, but this is easily solved during manufacturing. We can apply a specialized anti-static spray or coating that makes the surface smooth and dust-resistant. - How long does it take to create the mold for a custom mat?
Typically, the mold development process takes 25 to 35 days. This includes the engineering design, high-precision CNC machining, surface texturing, and initial trial shots to ensure the mats meet your exact specifications.