
Learning how to make silicone molds requires selecting the right polymer base and using a master model to create a flexible, durable negative for production. Many professional creators struggle with generic, off-the-shelf molds that fail to capture the unique identity of their brand. This lack of customization often leads to “creative stagnation,” where your products look identical to every other mass-produced item on the market. By mastering the art of custom mold fabrication at home or in the studio, you gain total control over your design language and production efficiency.
Why Silicone Molds Are The Best Choice For Resin Casting?
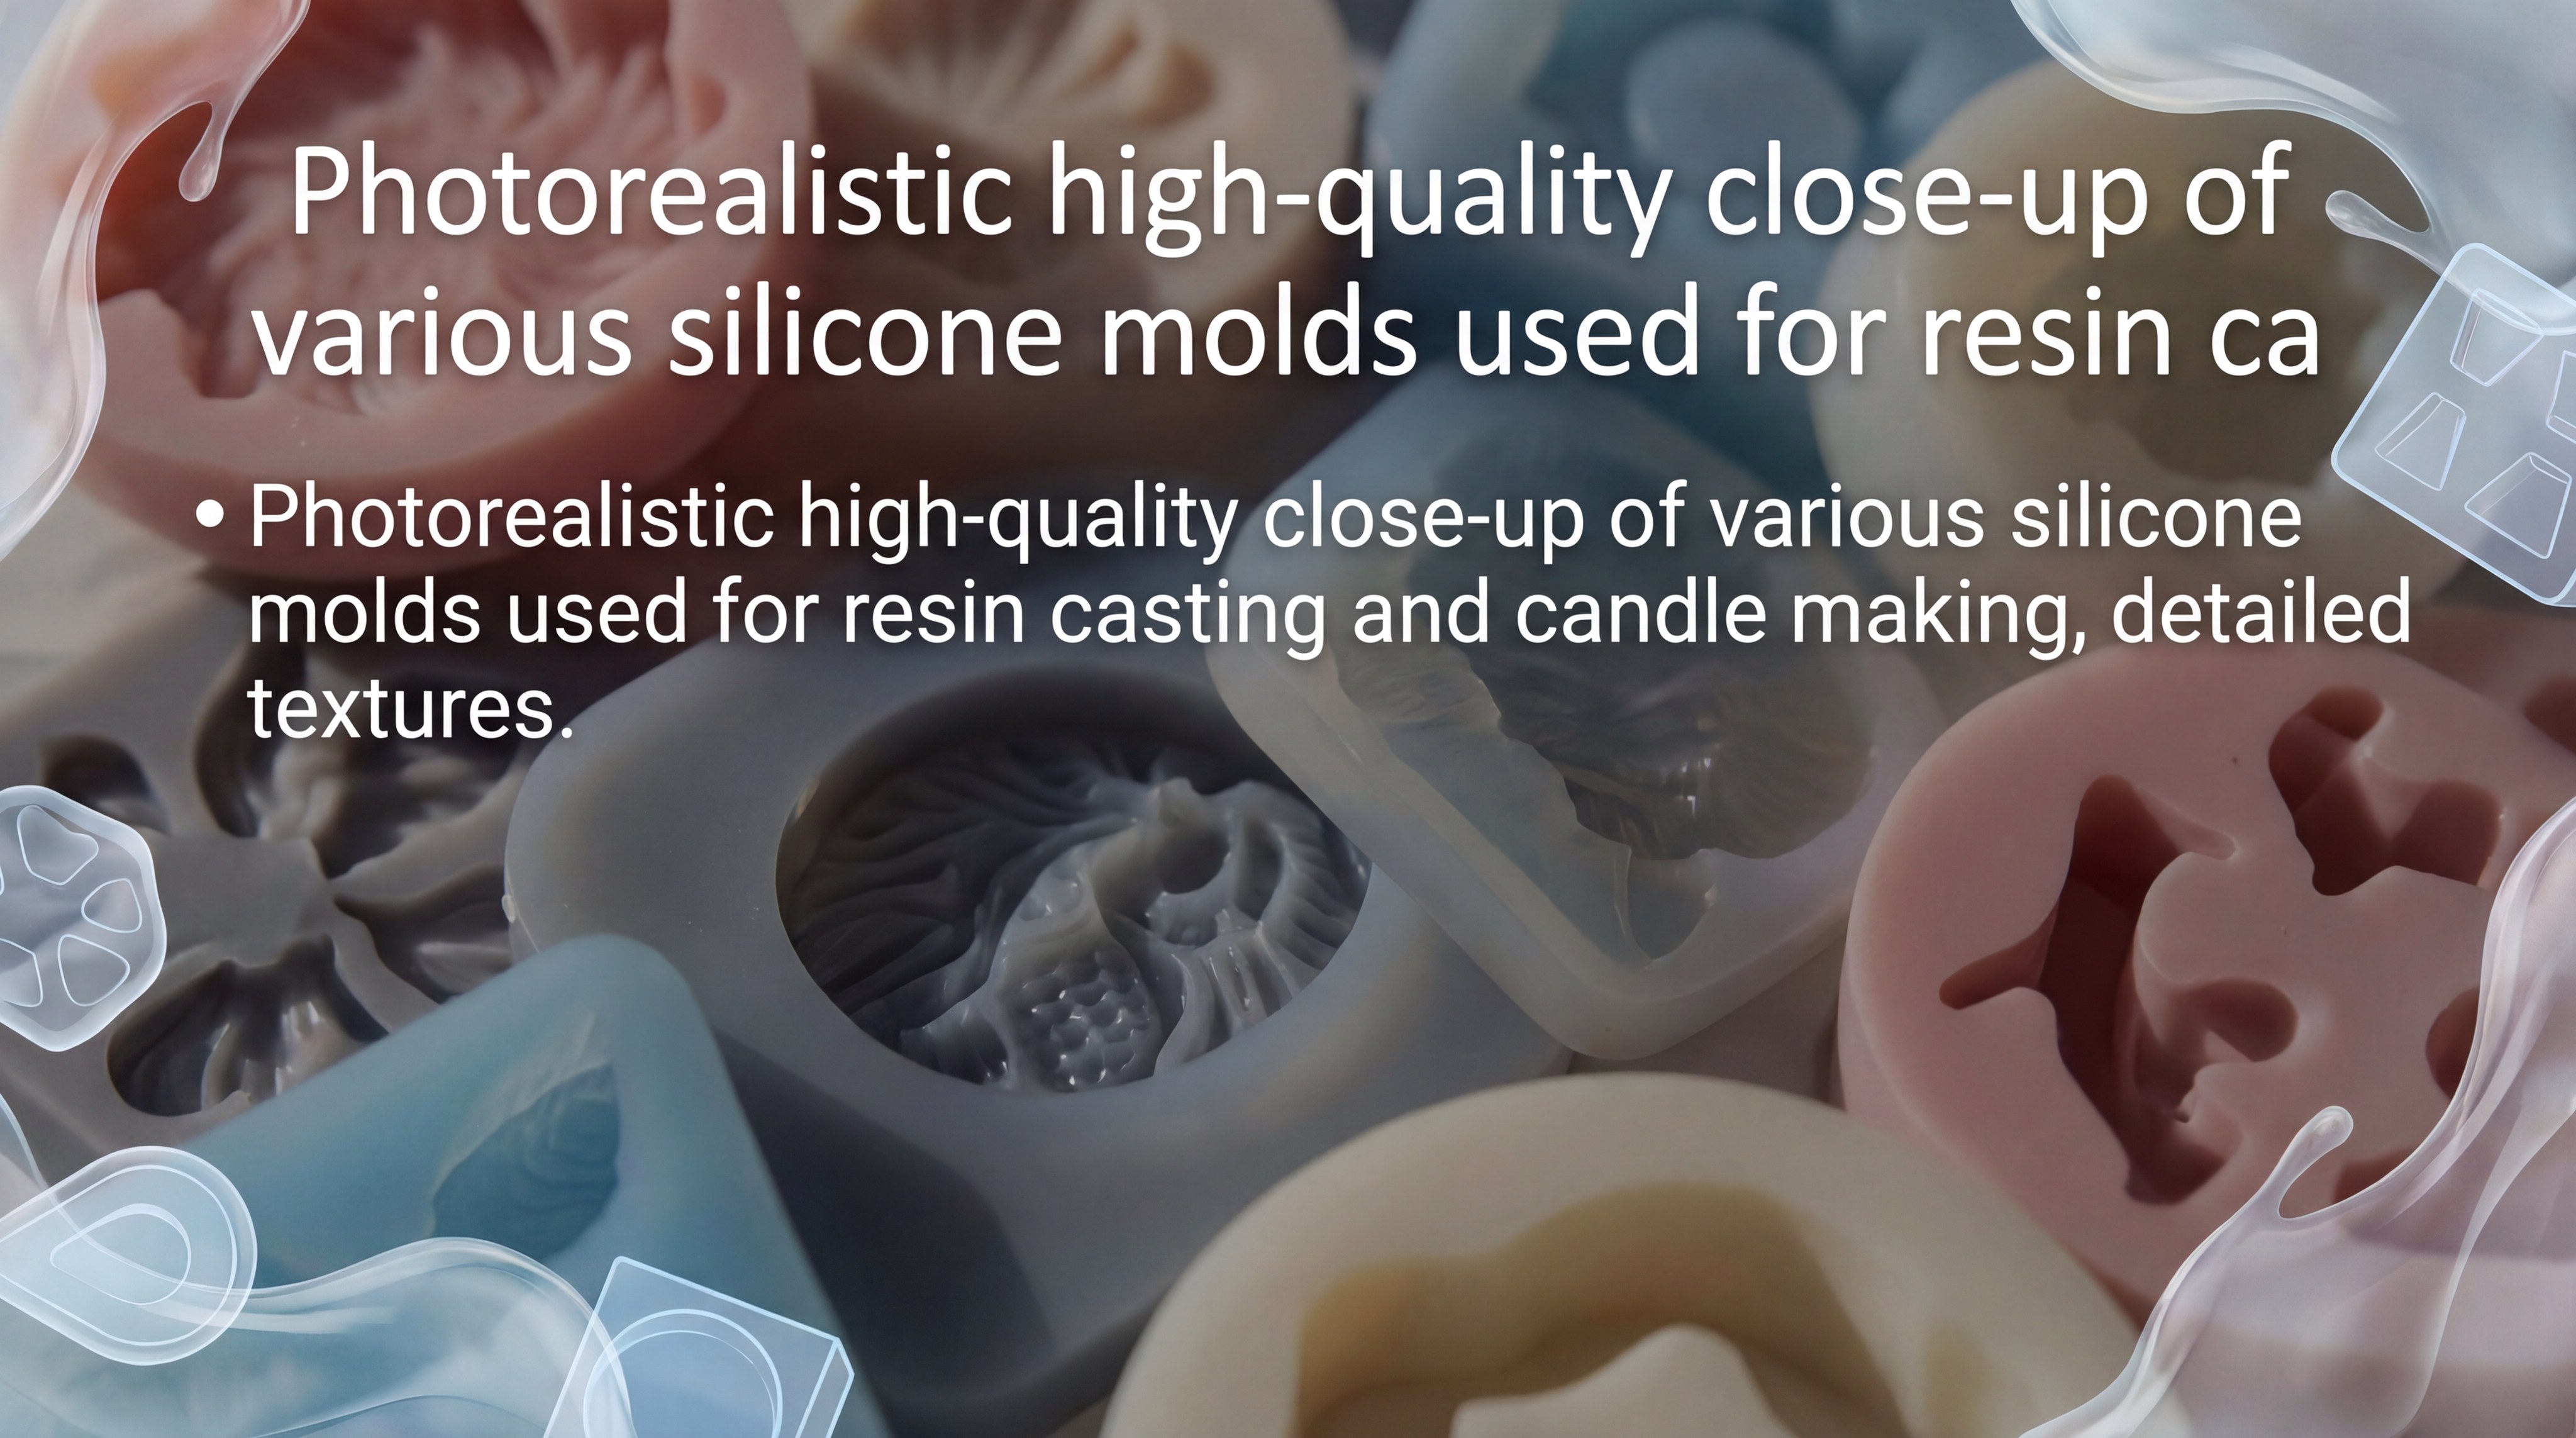
Silicone is the preferred choice because its natural non-stick properties and high flexibility allow for effortless demolding of cured resin without the need for heavy release agents. When you research how to make silicone molds, you quickly discover that this material handles the heat from exothermic resin reactions much better than rigid plastics. You can find more technical insights on material selection in our latest news updates.
Superior Flexibility and Detail
Silicone can stretch and return to its original shape, making it perfect for complex geometries with deep undercuts. Think about it:
- High tear strength prevents mold damage.
- Low surface energy ensures a glossy finish.
- Exceptional elasticity allows for easy part removal.
You will find that even the finest textures from your master model are preserved throughout the casting process.
Chemical Stability and Durability
The chemical inertness of silicone prevents it from bonding with epoxy or polyester resins during the curing cycle. Look at it this way:
- Resistances to high temperatures (up to 200°C).
- Zero reaction with most casting chemicals.
- Long-term dimensional stability for repeatable results.
You can trust that your mold will maintain its shape even after dozens of high-heat resin pours.
Key Takeaway: Silicone’s combination of flexibility and chemical resistance makes it the gold standard for resin casting professionals seeking longevity and detail.
| Feature | Silicone Advantage | Casting Benefit |
|---|---|---|
| Material Release | Naturally non-stick | Reduced labor and cleaner parts |
| Texture Capture | High Shore precision | Micro-detail preservation |
| Heat Tolerance | Thermally stable | No warping during resin curing |
Analysis: Silicone represents the most efficient ROI for creators because it reduces part failure rates and minimizes the need for post-processing cleaning.
What Materials Do You Need For DIY Silicone Molds?

Essential materials include 100% silicone caulk or professional RTV kits, cornstarch to act as a catalyst, and a master model for the desired shape. Understanding how to make silicone molds also involves having a reliable source for professional products and kits to ensure industrial-grade results. You will also need basic safety gear like gloves and a mixing vessel.
Household Staples for Rapid Prototyping
You can create a functional mold using common items found in a local hardware store or kitchen. But here is the best part:
- Silicone caulk provides the flexible base.
- Cornstarch accelerates the curing process.
- Water-based food coloring helps track the mix.
You will find this method is incredibly fast for creating simple one-part molds in under an hour.
Professional Grade RTV Silicone Kits
For high-precision work, liquid RTV (Room Temperature Vulcanizing) silicone kits offer superior flow and bubble-release properties. Wait, there’s more:
- Two-part systems ensure consistent curing.
- Lower viscosity captures intricate skin textures.
- Various Shore hardness options for specific needs.
You should opt for these kits when your project requires a glass-like surface finish or highly complex 3D parts.
Key Takeaway: While DIY caulk methods are excellent for learning, transitioning to professional RTV kits is necessary for commercial-quality results.
| Material Type | Pros | Best Use Case |
|---|---|---|
| Caulk & Starch | Low cost, fast cure | Simple shapes, rapid testing |
| Liquid RTV-2 | High detail, zero bubbles | Jewelry, figurines, mass production |
| Putty Silicone | No mess, fast set | Direct impressions of objects |
Analysis: The choice of material should be dictated by the complexity of the master model and the desired surface finish of the final cast.
How To Make Silicone Molds Step By Step?
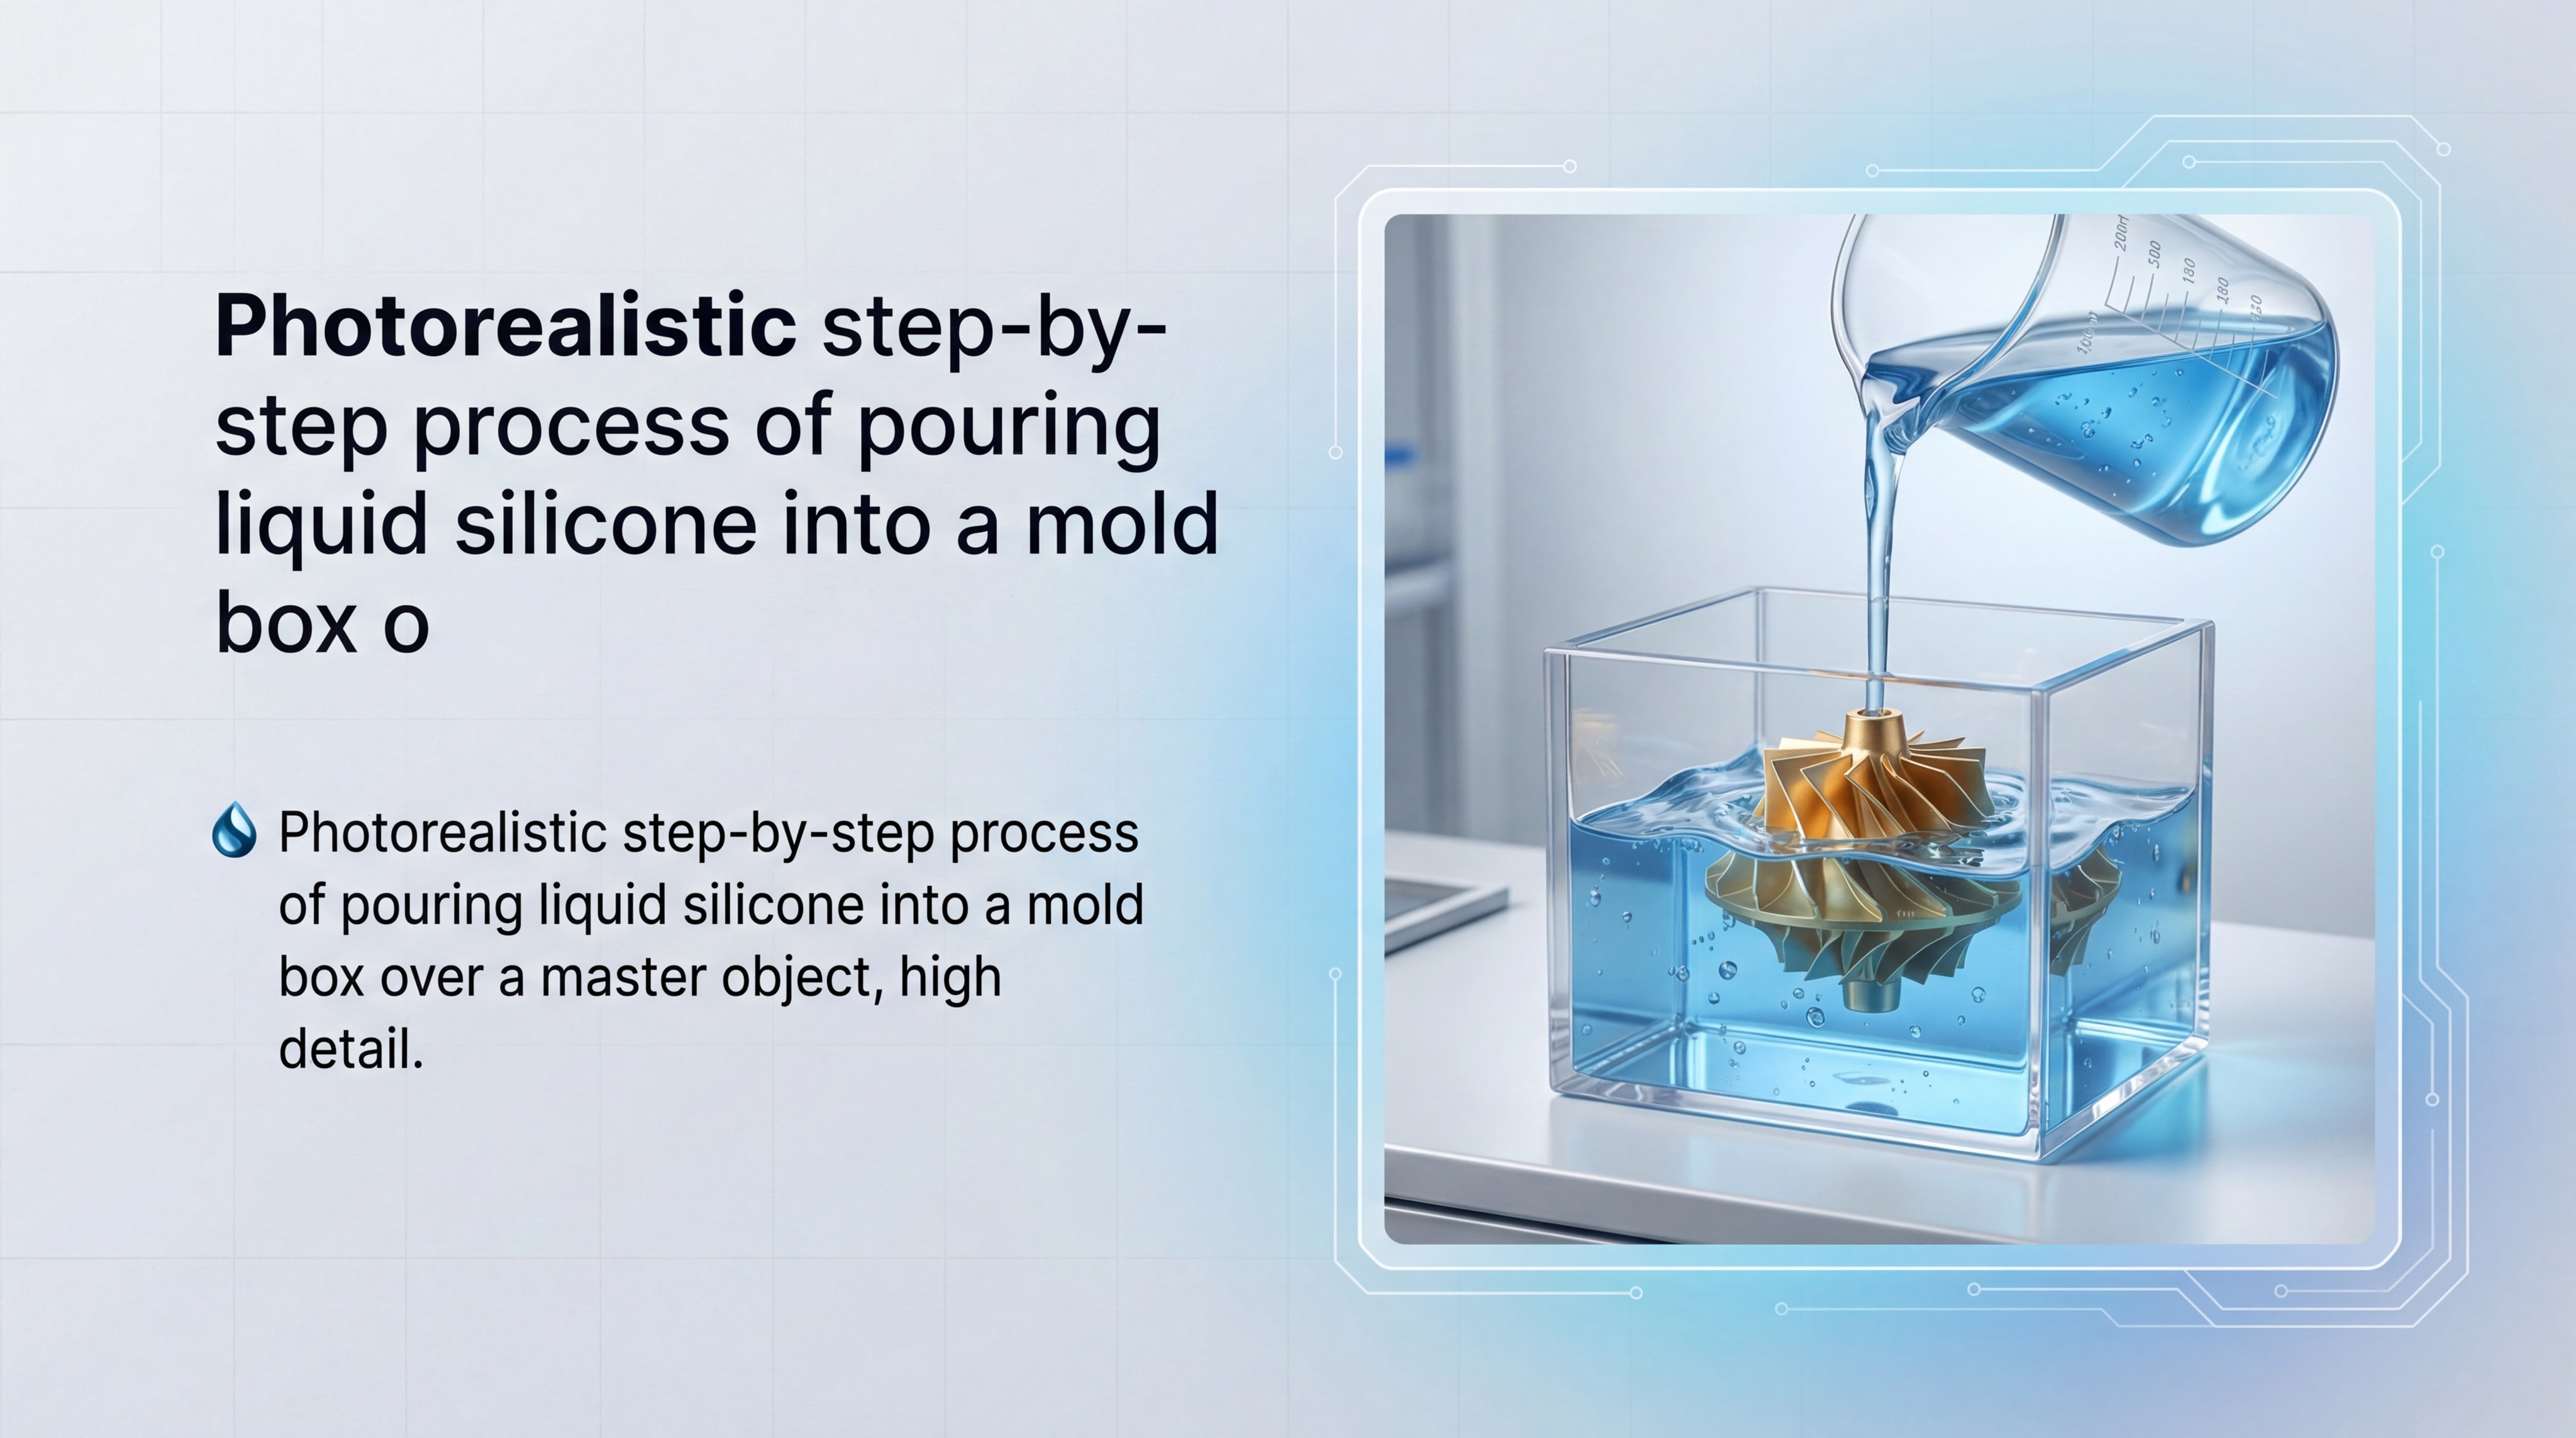
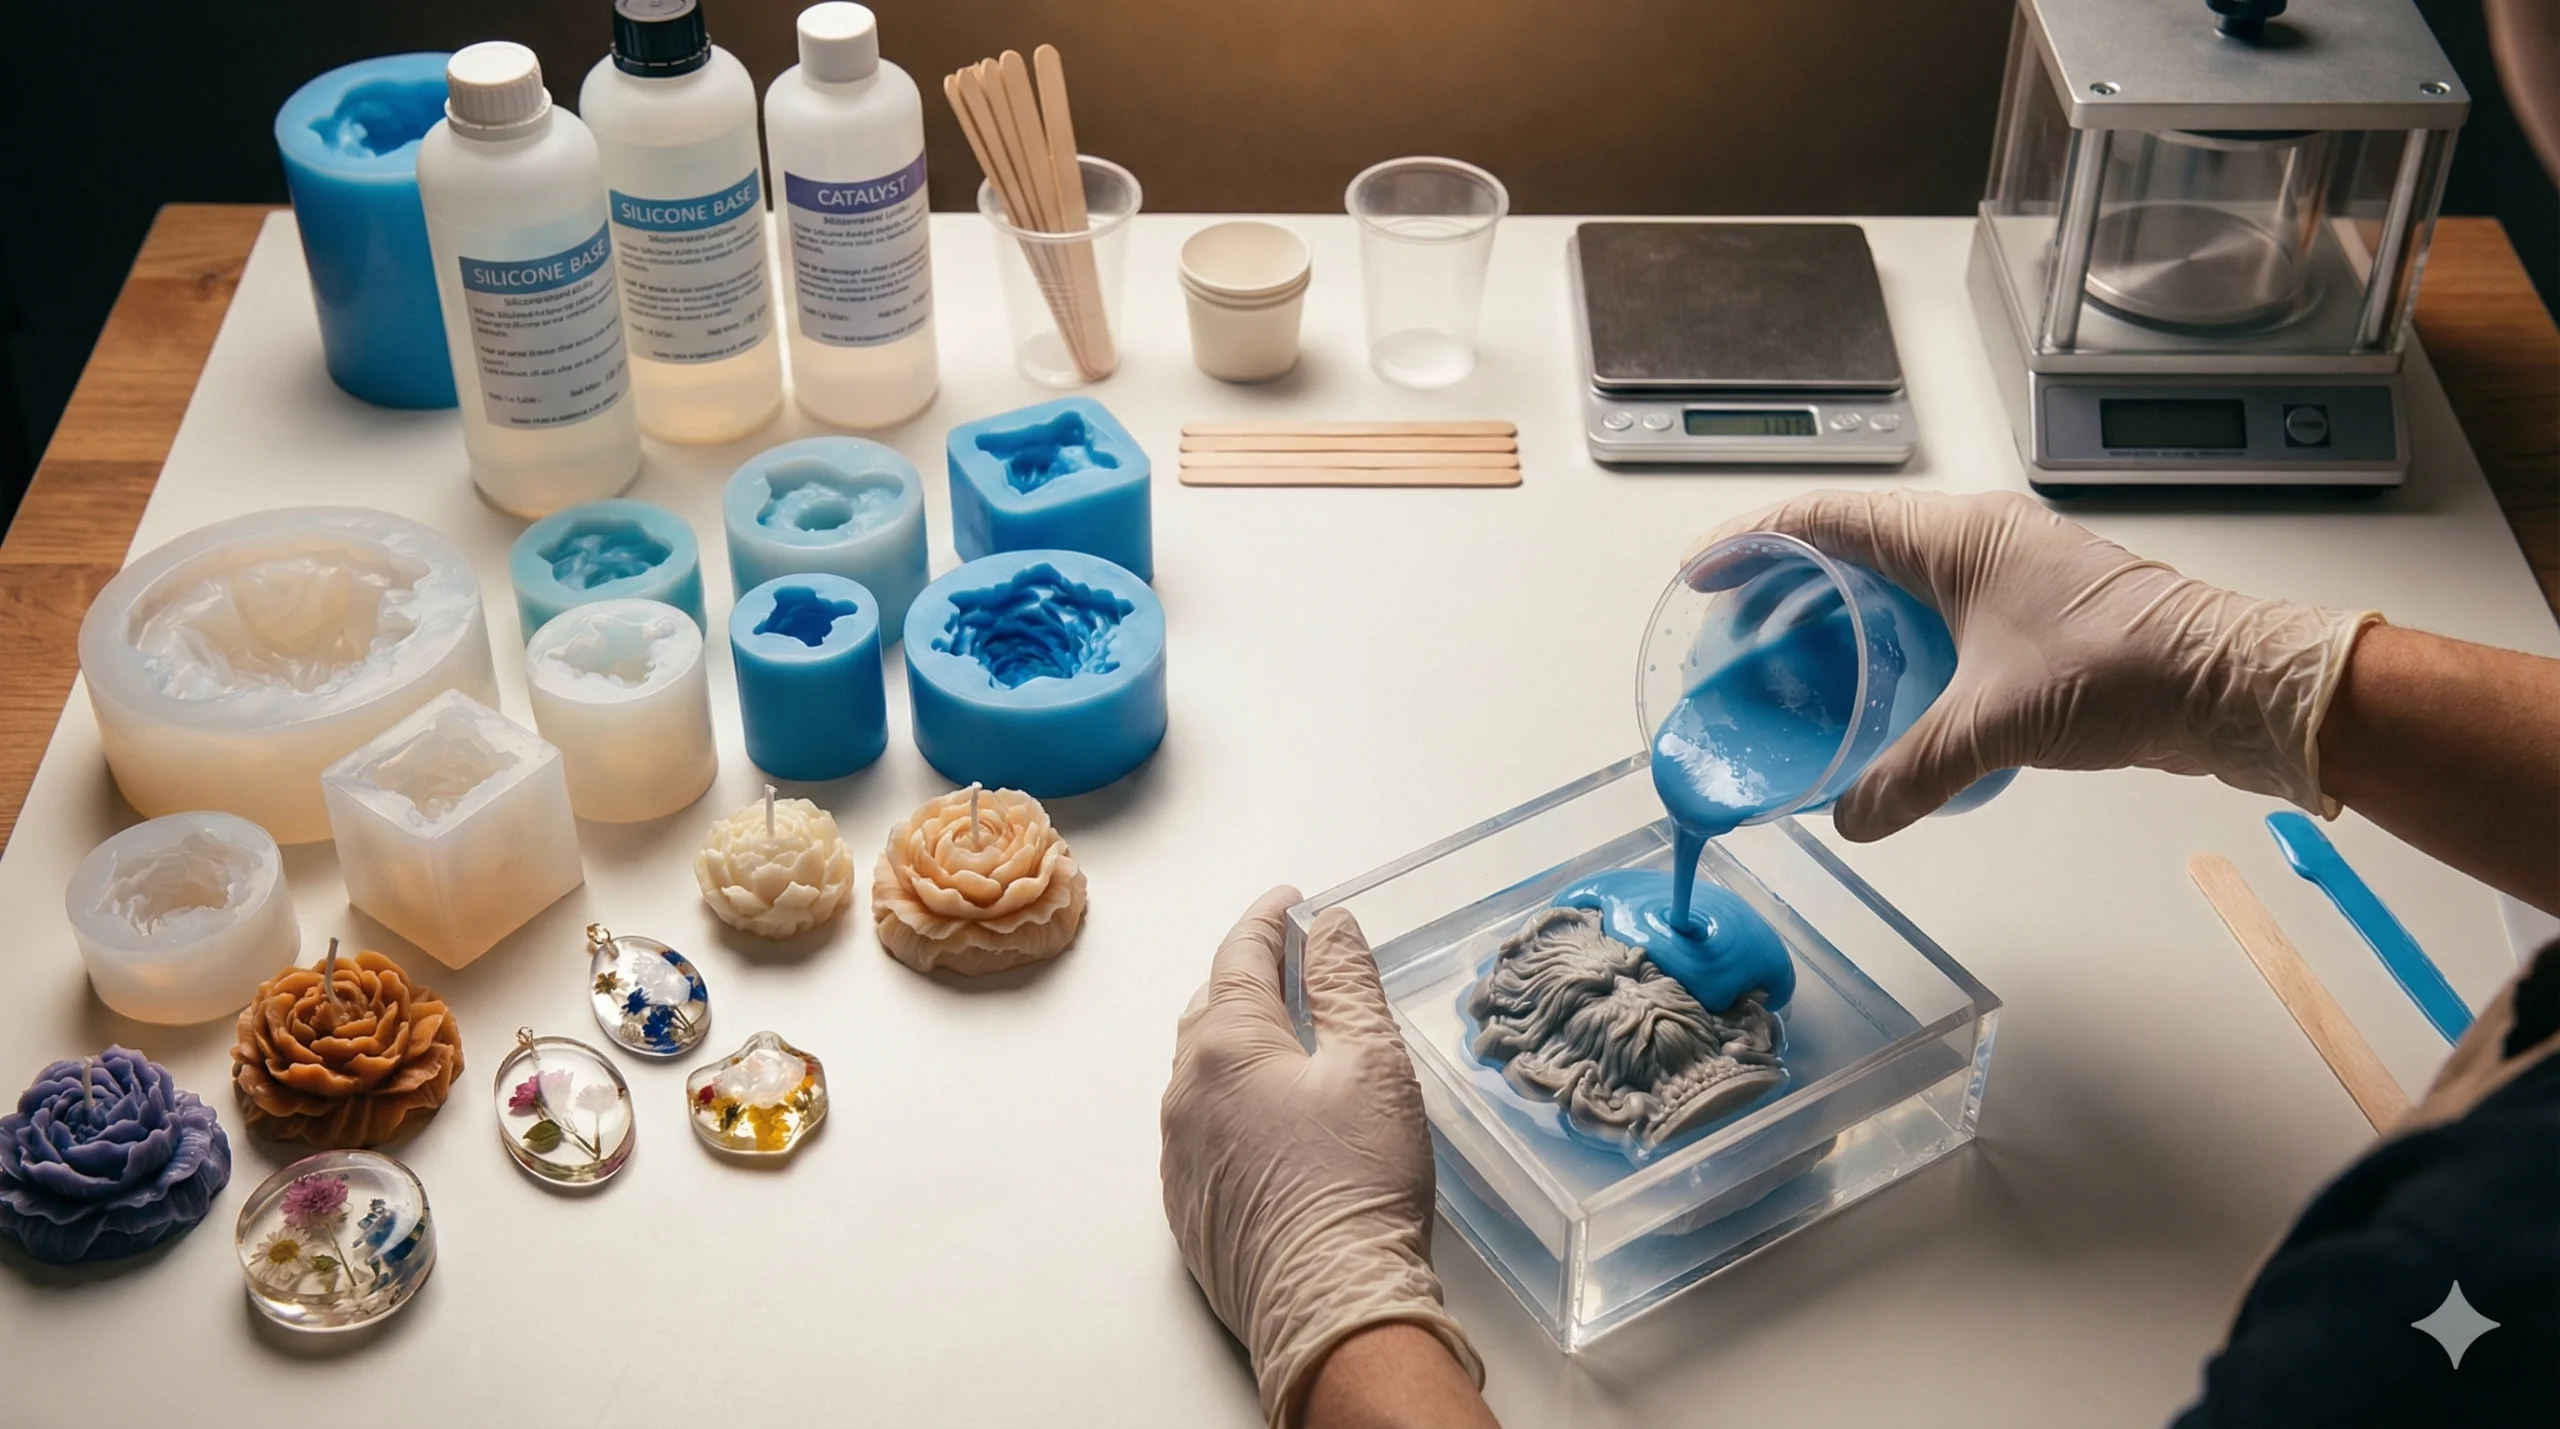
The process involves preparing a master object, mixing the silicone components, and submerging the object until the silicone cures into a flexible negative. Mastering how to make silicone molds requires a disciplined approach to mixing to ensure no air is trapped against the master surface. Check our industrial news for advanced techniques used in professional manufacturing environments.
Preparation of the Master Model
Your master must be clean, dry, and potentially sealed if it is made from porous materials like wood or clay. Here is the deal:
- Use a clear sealant on 3D prints.
- Fix the object to the base of a mold box.
- Apply a thin layer of mold release.
You must ensure the master is completely stationary so it doesn’t float when the silicone is poured.
Mixing and Pouring for Accuracy
Whether using the caulk method or liquid kits, thorough mixing is the most critical step for a successful cure. Specifically:
- Stir slowly to avoid introducing air.
- Pour in a thin stream from a height.
- Tap the mold box to bring bubbles up.
You will see that the “long pour” technique naturally breaks many surface bubbles before they reach your object.
Key Takeaway: Success is found in the preparation phase; a clean master and a patient, steady pour define the quality of the final mold.
| Step | Action | Goal |
|---|---|---|
| Fixing | Secure master to base | Prevent floating or shifting |
| Blending | Mix catalyst and base | Uniform curing throughout |
| Degassing | Tapping or vacuuming | Eliminate surface pitting |
Analysis: Most mold failures occur due to improper mixing ratios or trapped air at the interface of the master model.
Is Homemade Silicone Mold Making Cost-Effective?
Homemade molds are highly cost-effective for small-scale projects, often costing less than $10 to produce a custom shape that would cost $20-50 at retail. When analyzing how to make silicone molds, you must consider the trade-off between material cost and the labor time involved in DIY fabrication. For hobbyists, the savings are immediate and significant.
Low Initial Investment for Beginners
You can start making molds with a minimal budget because the primary ingredients are available in bulk. The best part?
- Caulk tubes cost only a few dollars.
- Cornstarch is a cheap household staple.
- Reusable tools reduce recurring costs.
You can experiment freely without the fear of wasting expensive industrial materials during the learning curve.
Reusability and Production Scalability
A single well-made silicone mold can produce dozens of resin or wax casts before it begins to degrade. In other words:
- Cost per cast drops with every use.
- DIY molds allow for custom branding.
- No shipping wait times for replacements.
You gain the ability to scale your small business production without a massive upfront investment in factory tooling.
Key Takeaway: DIY mold making provides an excellent ROI for creators, combining low entry costs with high-volume production potential.
| Cost Factor | DIY Approach | Retail Purchase |
|---|---|---|
| Material Cost | $5 – $15 | $20 – $60 |
| Customization | Unlimited | Fixed designs |
| Lead Time | 2 – 24 Hours | 3 – 7 Days |
Analysis: While DIY is cheaper, professional mold services become more economical when you need thousands of identical parts with 100% consistency.
Can You Use Food Coloring In Silicone Molds?

Yes, food coloring can be used to tint DIY silicone molds, but it must be added sparingly to avoid interfering with the chemical curing process. In the context of how to make silicone molds, coloring serves as a vital tool for organization and process identification. For deeper research into silicone pigments, visit our news section.
Aesthetic Customization and Branding
Adding color to your silicone mix allows you to create a professional look for your workshop tools. You might be wondering:
- Does color affect the final cast?
- How much should you add?
- Can you mix different colors?
The reality is that food coloring acts as a mild accelerator due to its water content, so work quickly after mixing.
Practical Benefits of Color Coding
Professionals use different colors to distinguish between various mold types or material compatibilities. But it gets better:
- Identify wax molds vs resin molds.
- Track different Shore hardness levels.
- Mark molds for food-safe applications.
You will find that a color-coded system prevents cross-contamination and speeds up your production workflow significantly.
Key Takeaway: Food coloring is a functional tool for organization, but use it in moderation to maintain the structural integrity of the silicone.
| Pigment Type | Impact on Silicone | Recommended Use |
|---|---|---|
| Food Coloring | Speeds up cure time | Quick DIY projects |
| Mica Powder | No chemical change | Shimmering, aesthetic molds |
| Silicone Ink | High compatibility | Professional grade coloring |
Analysis: Using water-based dyes in silicone is a “pro-tip” for the caulk method, as the moisture actually helps the acetic acid-based silicone set faster.
How To Prevent Bubbles In DIY Silicone Molds?
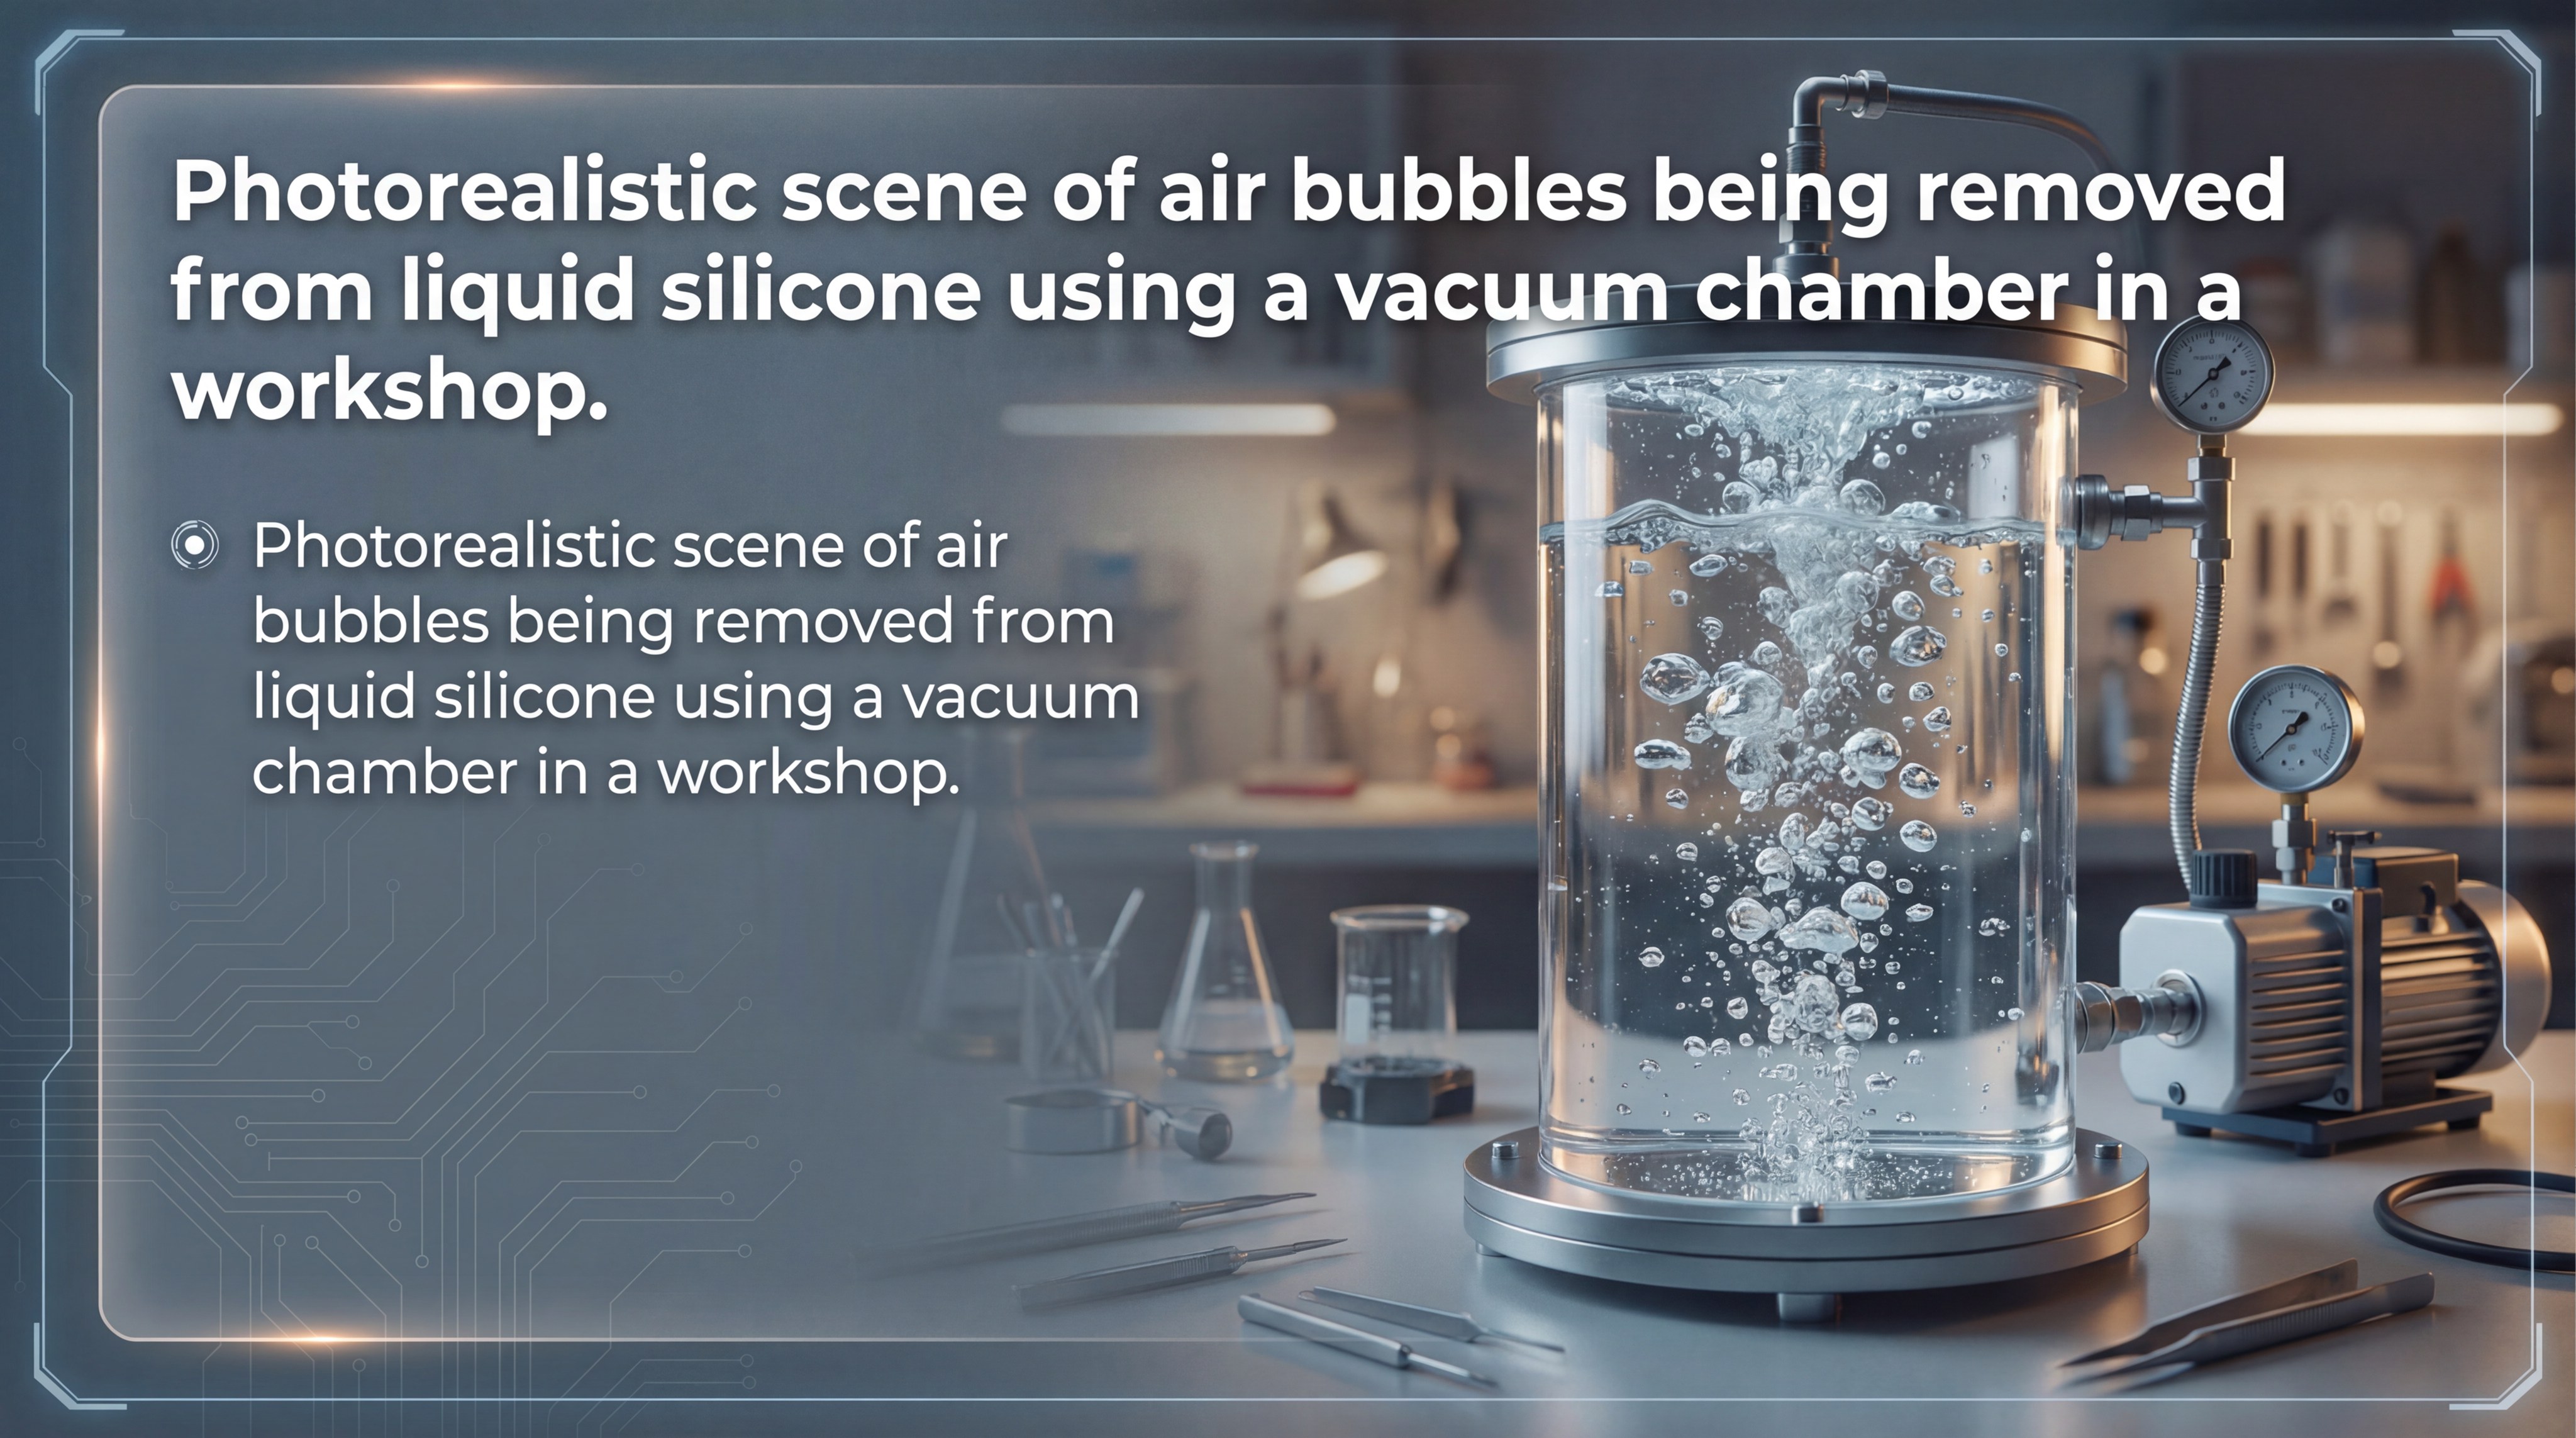
Preventing bubbles requires slow mixing, a high-altitude pour technique, and physical vibration to force air to the surface. When learning how to make silicone molds, air entrapment is the most common reason for surface defects in your final resin casts. Industrial methods often employ vacuum chambers to achieve a perfect, bubble-free finish.
Manual Vibration and Tapping
If you don’t have a vacuum chamber, you can use mechanical energy to dislodge air trapped against your master object. The best part?
- Tap the mold box on a table.
- Use a vibrating tool against the base.
- Poke bubbles with a fine needle.
You will notice air rising to the top as the vibration disrupts the surface tension of the liquid silicone.
The “Detail Coat” Application
A proven method for complex shapes is to brush a thin layer of silicone directly onto the master before pouring the bulk. Here’s the deal:
- Ensures coverage in every crevice.
- Breaks bubbles at the critical interface.
- Prevents air pockets in deep undercuts.
You can then pour the remaining silicone over this “detail coat” to provide the structural support needed for the mold.
Key Takeaway: Eliminating bubbles is a matter of technique; combine slow mixing with vibration and a detail coat for professional results.
| Technique | Difficulty | Effectiveness |
|---|---|---|
| High Pour | Low | Moderate |
| Vibration | Low | High for simple shapes |
| Vacuum Chamber | High | 100% Effective |
Analysis: While professional tools are ideal, manual techniques can achieve 95% bubble removal when performed with patience.
How Long Does A DIY Silicone Mold Last?
A well-maintained DIY silicone mold can last for 30 to 50 pours depending on the chemical aggressiveness of the resin used. Part of knowing how to make silicone molds is understanding the degradation factors that lead to mold failure over time. For more tips on extending mold life, check our latest industrial news.
Chemical Wear and Tear
Resins are chemically active and will eventually “dry out” the silicone, making it brittle and prone to tearing. Look at it this way:
- Epoxy resin is harsher than wax.
- High heat cycles accelerate aging.
- Pigments can cause surface staining.
You will see the mold surface lose its shine and become “chalky” when it is nearing the end of its useful life.
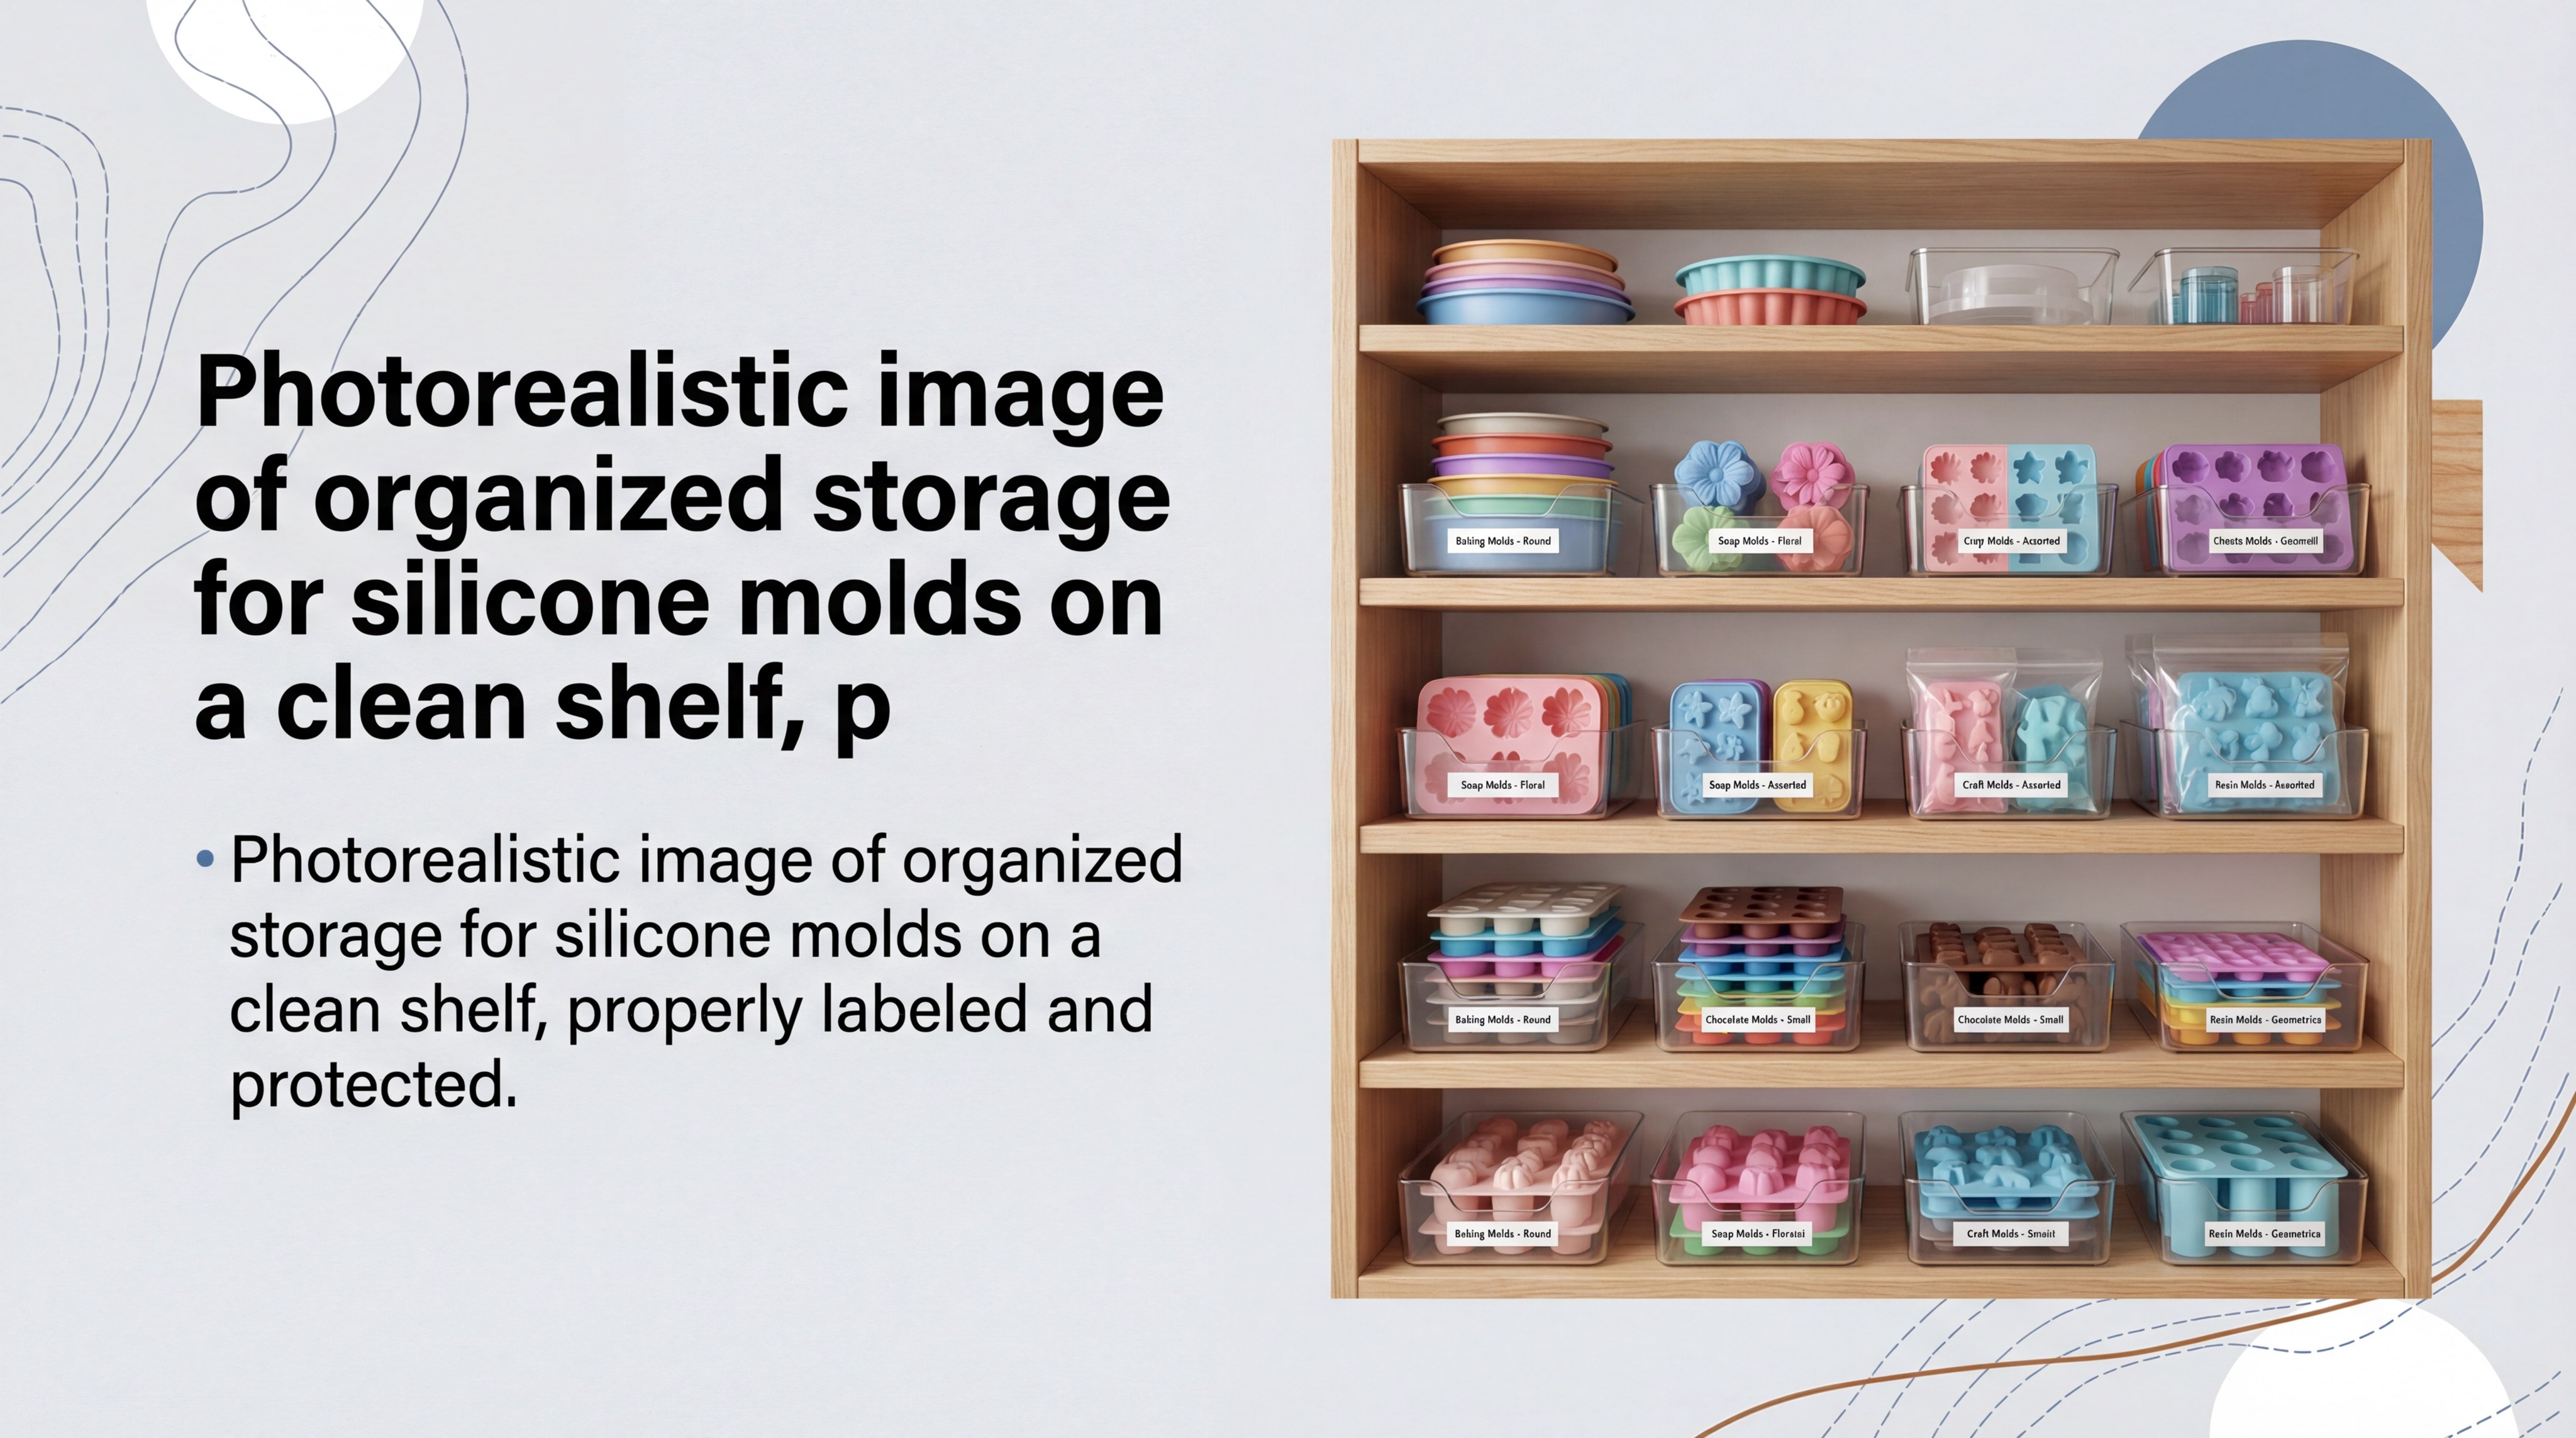
Maintenance and Storage Tips
Proper storage is the best way to ensure your custom molds remain functional for as long as possible. Wait, there’s more:
- Wash with mild soap after every use.
- Store flat in a cool, dark place.
- Use a mold release spray periodically.
You should keep your molds in airtight containers to prevent dust accumulation and keep the silicone from absorbing atmospheric moisture.
Key Takeaway: Longevity depends on material care; using mold release and proper storage can double the lifespan of your custom tools.
| Factor | Effect on Lifespan | Mitigation |
|---|---|---|
| Resin Type | High chemical stress | Use mold release spray |
| Storage | UV and dust damage | Store in dark containers |
| Cleaning | Residue buildup | Gentle soap and water |
Analysis: The “failure point” of a mold is usually at the edges or fine details where the silicone is thinnest and most stressed during demolding.
Which Silicone Type Is Best For Resin Molds?
Platinum-cure silicone is the best choice for resin molds because of its superior dimensional stability and resistance to chemical shrinkage. When deciding how to make silicone molds, choosing between Tin-cure and Platinum-cure is the most important technical decision you will make. Both have specific advantages depending on your project’s precision requirements.
Platinum-Cure for High Precision
Platinum-cure systems are used for jewelry and medical-grade parts where even a millimeter of shrinkage is unacceptable. Think about it:
- Virtually zero shrinkage over time.
- Long shelf life (years of use).
- Best resistance to aggressive resins.
You must be careful with “cure inhibition,” as materials like latex or certain 3D printing resins can prevent Platinum silicone from hardening.
Tin-Cure for Economy and Ease
Tin-cure silicone is more forgiving and significantly cheaper, making it ideal for large decorative items or simple candles. The best part?
- Resistant to most inhibitors.
- Easier for beginners to mix.
- Lower initial material cost.
You will find that Tin-cure is excellent for one-off projects, but the mold will slowly shrink and become brittle over several months.
Key Takeaway: Use Platinum-cure for commercial resin products and Tin-cure for budget-friendly art or candle making.
| Silicone Type | Shrinkage | Durability |
|---|---|---|
| Platinum-Cure | < 0.1% | Extremely High |
| Tin-Cure | 1% – 3% | Moderate |
| DIY Caulk | Variable | Low |
Analysis: Professional creators typically start with Tin-cure for prototyping and switch to Platinum-cure for the final production mold.
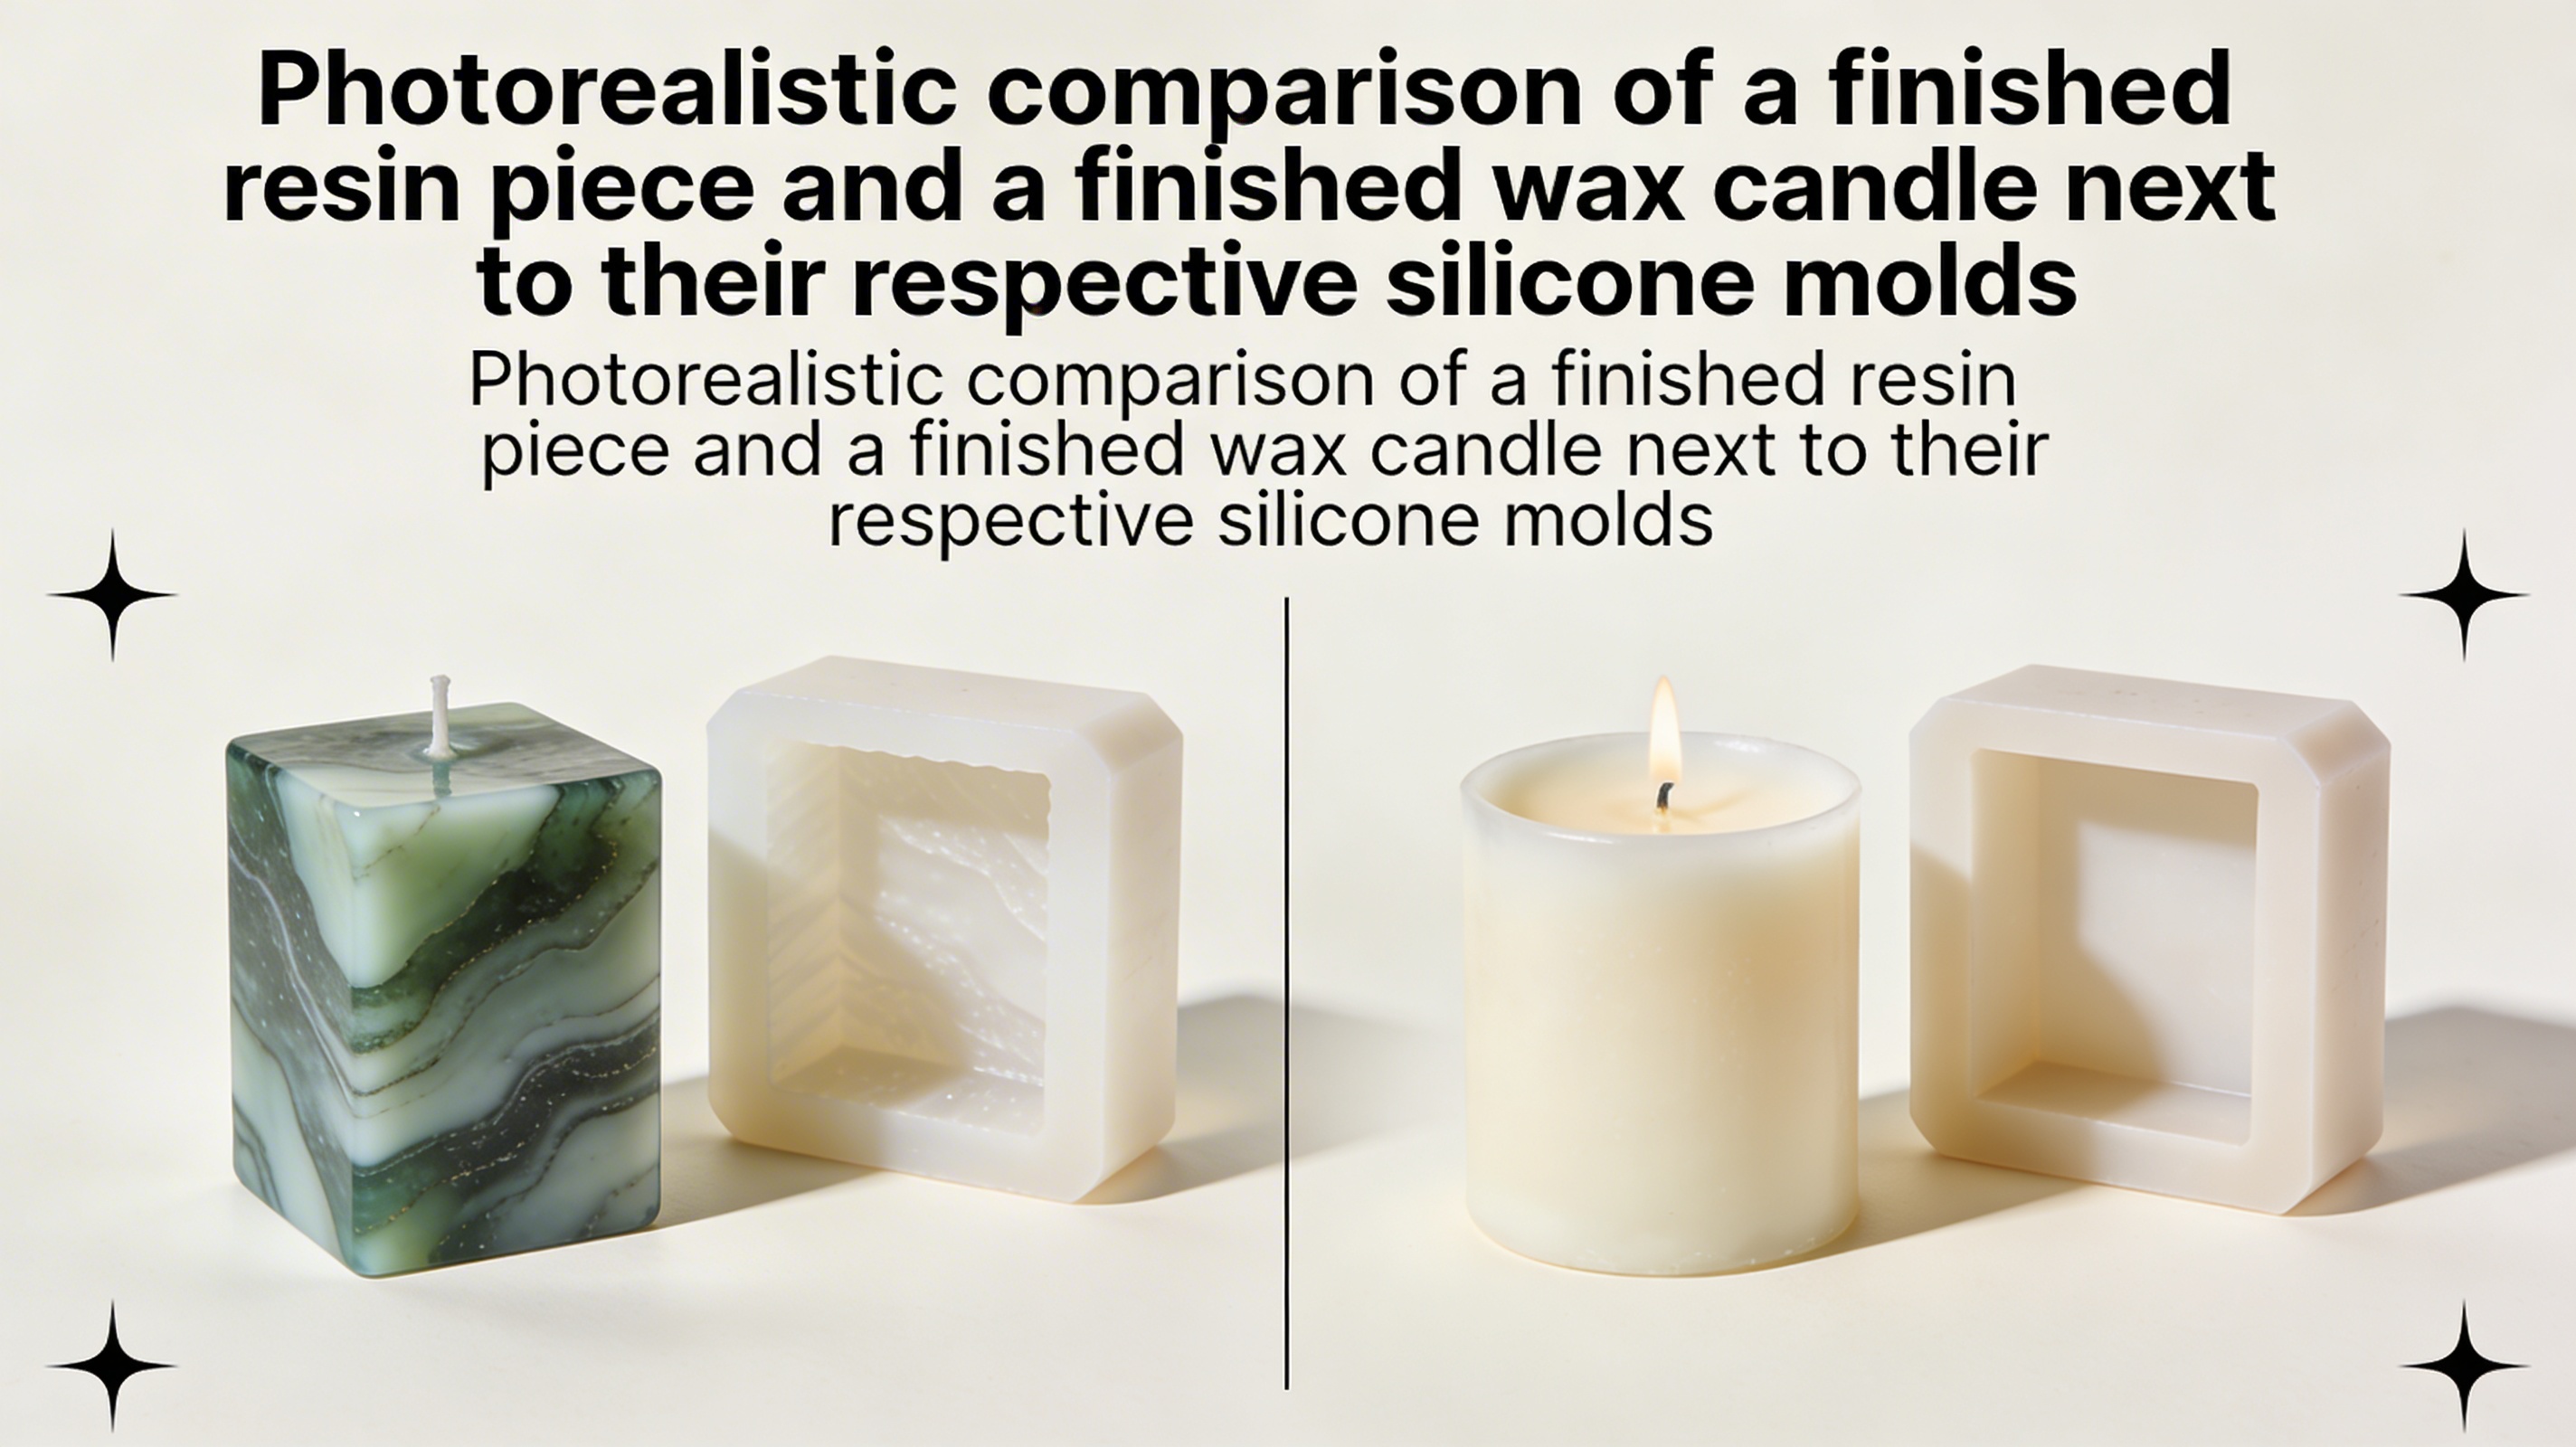
Can You Make Molds For Intricate Wax Designs?
Yes, silicone is the ideal medium for intricate wax designs because its flexibility prevents the fragile wax from snapping during removal. When exploring how to make silicone molds for candles, you must consider the “Shore hardness” of the silicone to ensure it is soft enough to peel away from delicate features. Visit our news for specific guides on candle mold engineering.
Shore Hardness and Wax Fragility
Wax is much more brittle than resin, so your mold needs a lower Shore hardness (softer feel) to be effective. Specifically:
- Shore 10A-15A is perfect for candles.
- Allows for “peeling” the mold back.
- Reduces pressure on small wax details.
You will find that a soft mold acts like a second skin, rolling off the wax without applying any snapping force to the design.
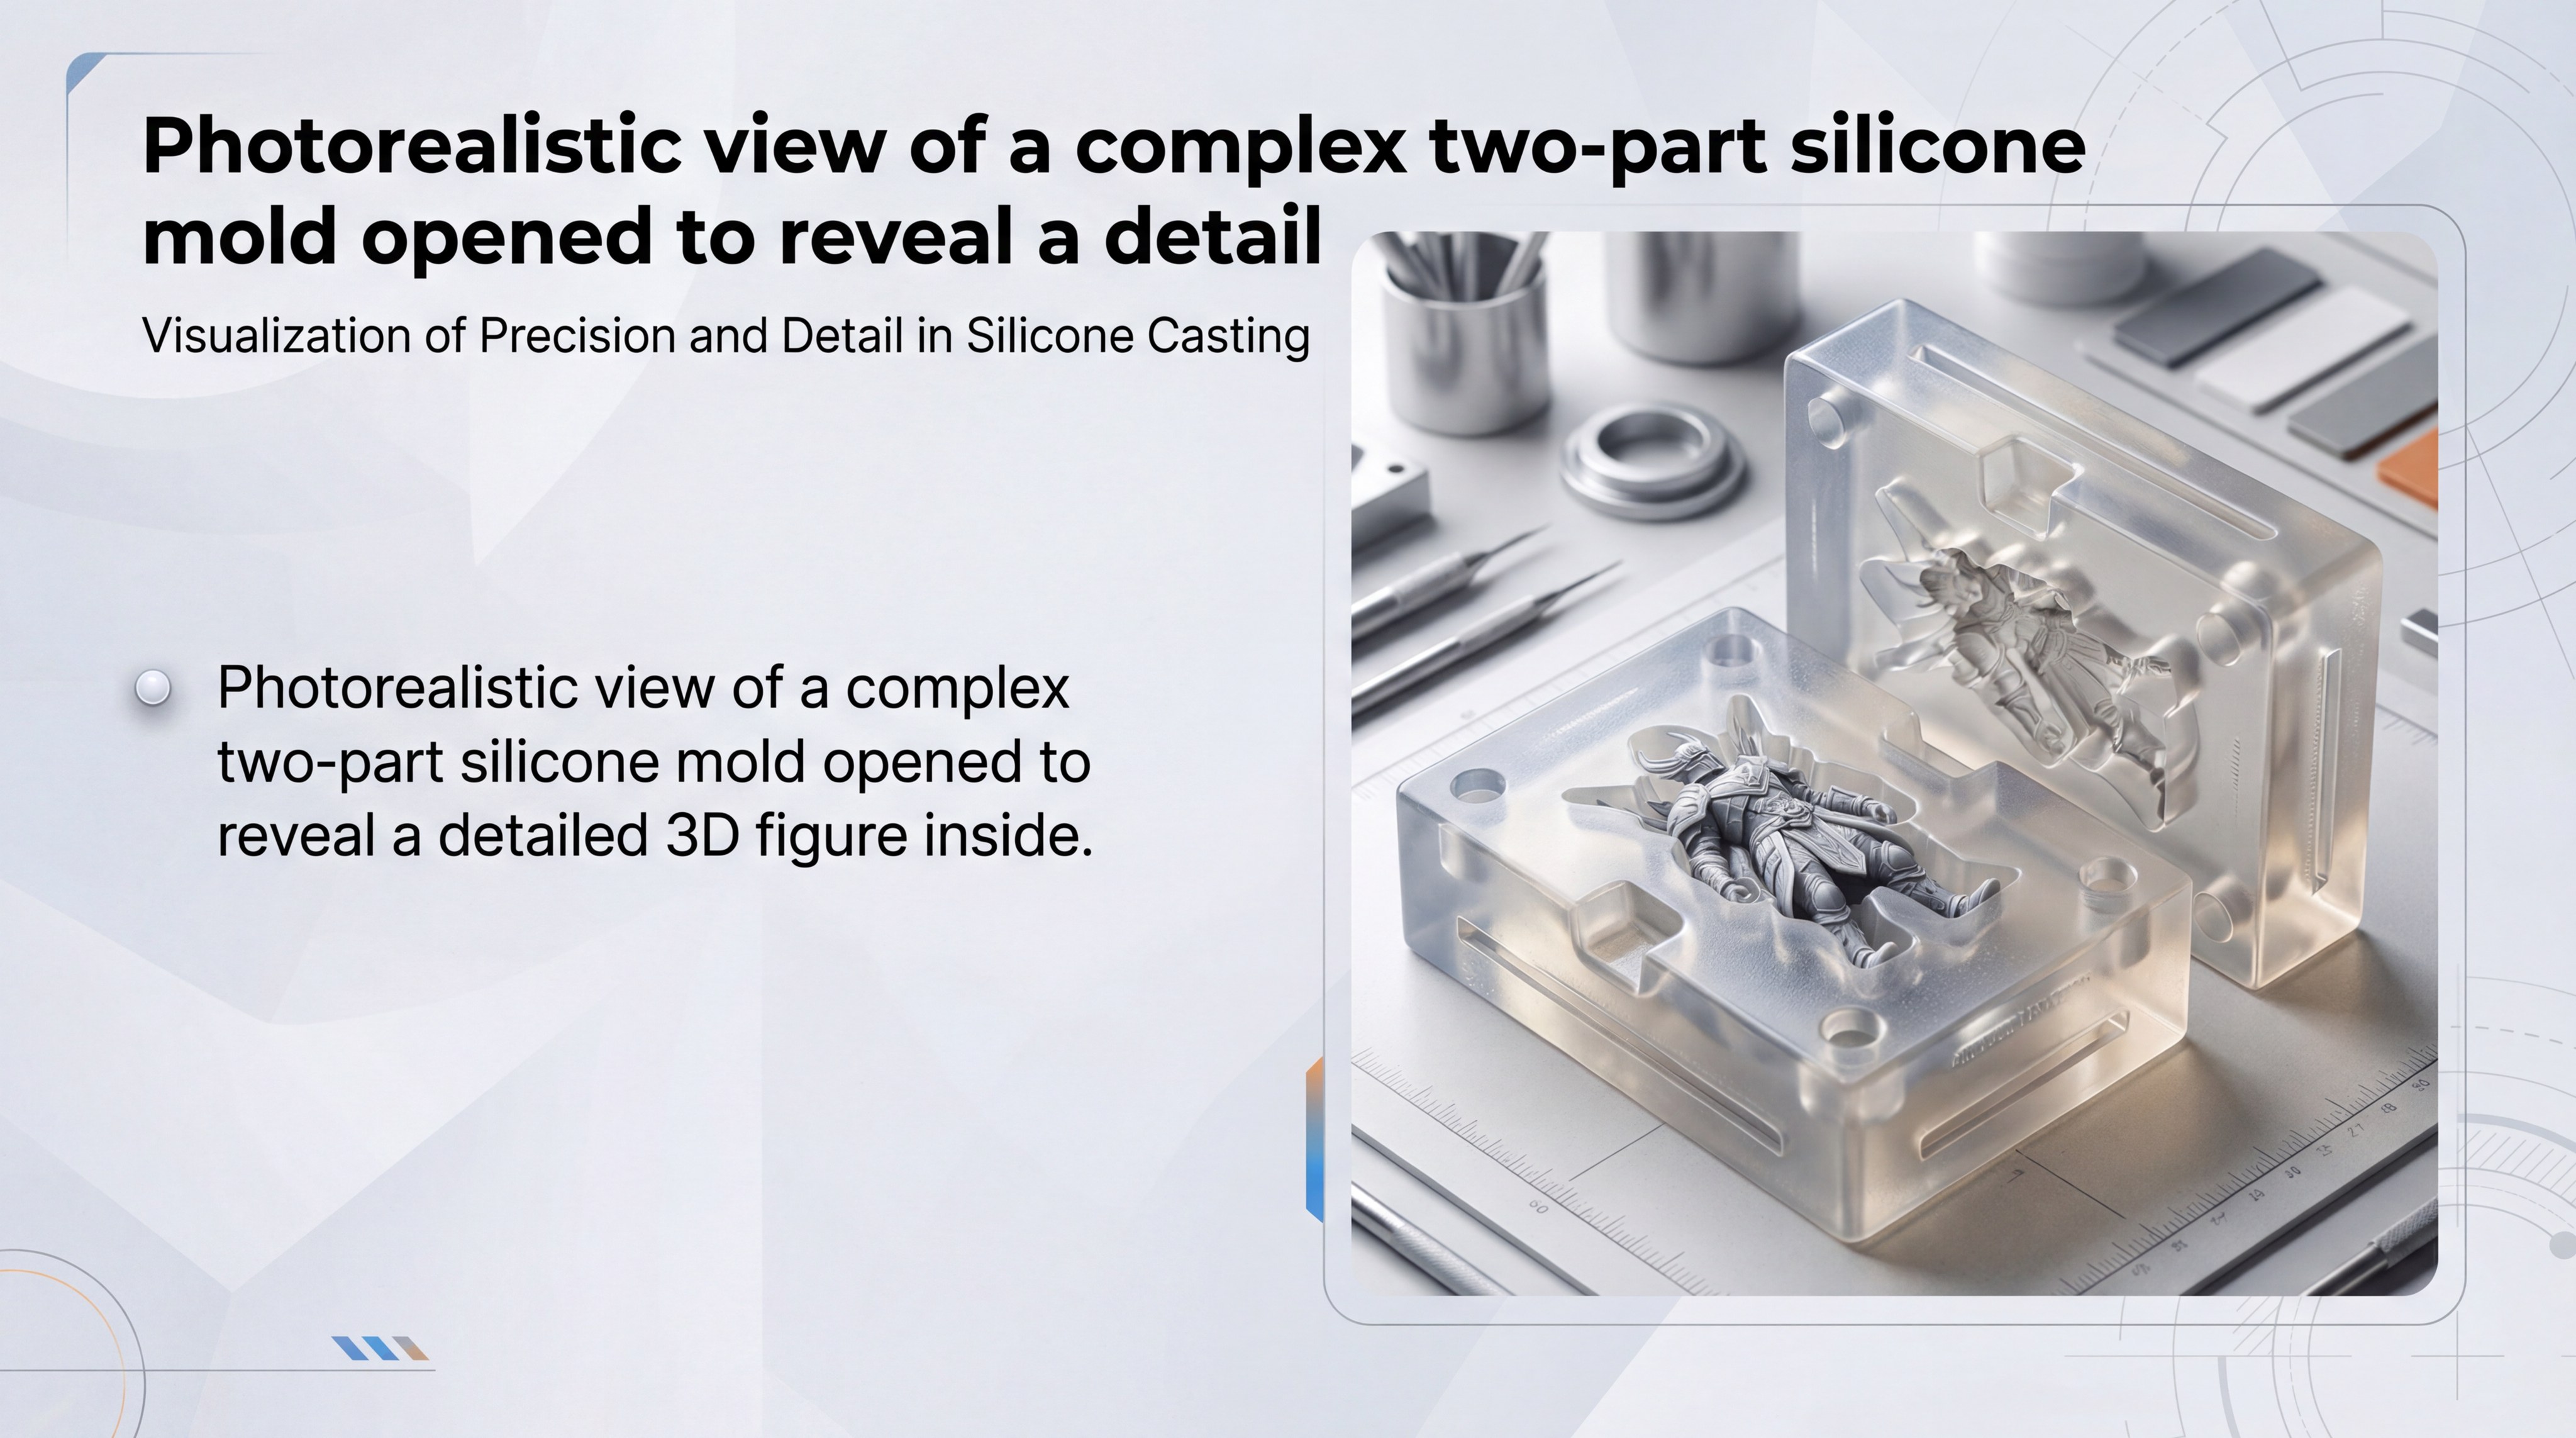
Split Molds and Two-Part Systems
For complex 3D figures, a single-pour mold may not be sufficient to release the wax safely. Wait, there’s more:
- Use a “split mold” with a side cut.
- Create registration marks for alignment.
- Use rubber bands to hold the split closed.
You can achieve incredible detail in figurines or floral candles by using a two-part mold system that opens completely to reveal the cast.
Key Takeaway: For wax, soft silicone is your best friend; it provides the delicate touch needed to preserve fragile, high-detail designs.
| Design Feature | Mold Solution | Benefit |
|---|---|---|
| Undercuts | Split-cut mold | Easy release without snapping |
| Fine Textures | Low-viscosity silicone | Perfect detail replication |
| 3D Figures | Two-part mold | No mold-line distortion |
Analysis: The “split-mold” technique is the secret to high-end artisanal candles, allowing for shapes that appear impossible to demold.
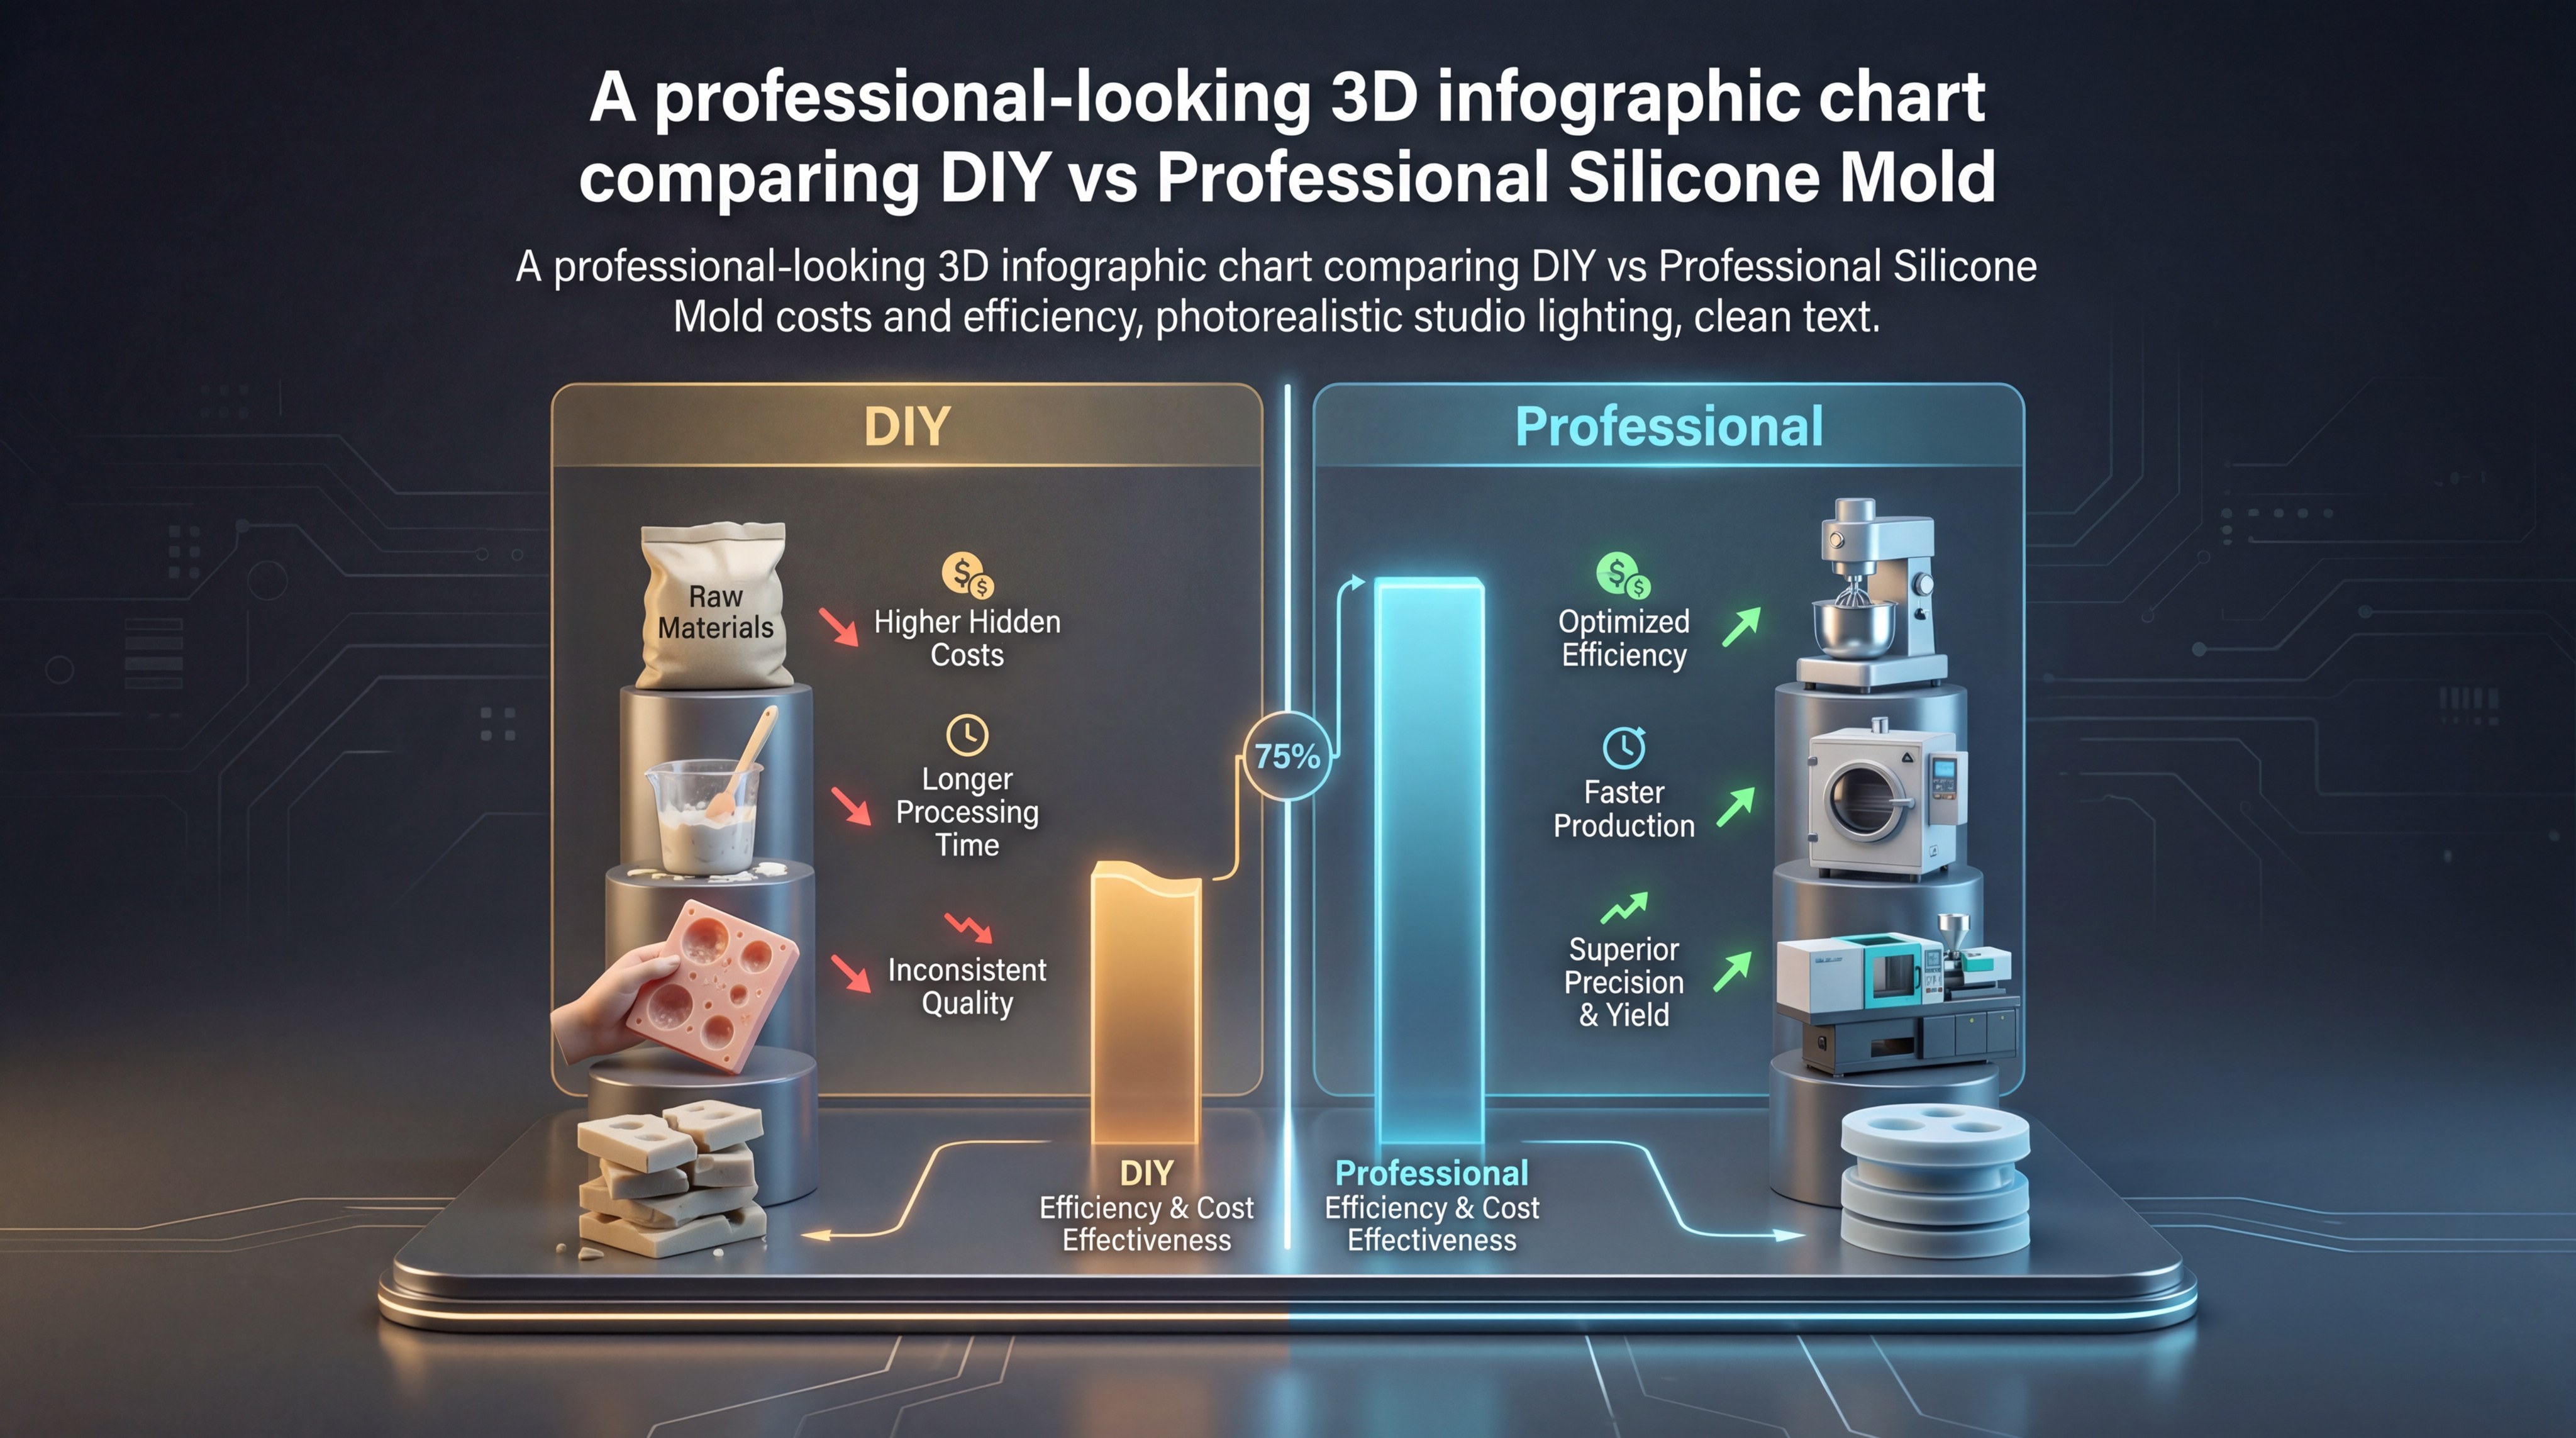
When Should You Choose Professional Silicone Molds?
You should choose professional molds when your project scales beyond a few dozen units or requires industrial certifications for medical or automotive use. While learning how to make silicone molds is a great skill, transitioning to silicone injection molding provides the consistency and speed required for a growing business. Learn more about us to see how we handle high-volume production.
Scalability and Unit Consistency
Manual DIY methods are time-consuming and prone to slight variations between every mold you pour. But here is the best part:
- Multi-cavity molds increase output.
- Automated degassing ensures 0% bubbles.
- Precision tooling lasts for thousands of cycles.
You will find that the cost per unit drops dramatically when you move from manual pouring to industrial injection processes.
Industry Compliance and Material Quality
If you are selling products for medical use, food contact, or automotive safety, DIY molds simply cannot meet the required standards. Look at it this way:
- ISO 9001 certified manufacturing.
- Medical-grade LSR (Liquid Silicone Rubber).
- Traceable material supply chains.
You gain the legal and safety protections of a professional factory, ensuring your brand is built on a foundation of reliability and quality.
Key Takeaway: DIY is for creation and validation; professional manufacturing is for scaling and market competition.
| Feature | DIY Mold | Professional Injection |
|---|---|---|
| Daily Capacity | 1 – 5 units | 1,000+ units |
| Precision | Hand-poured | CNC Machined accuracy |
| Cost at Scale | Increasing labor | Decreasing unit cost |
Analysis: The transition point usually occurs when you are spending more than 20% of your time making molds rather than selling finished products.
FAQ: Common Questions About Mold Making
Can I use these molds for baking?
No, unless you use certified food-grade silicone and a dedicated clean-room environment. DIY caulk often contains toxic additives like fungicides that are dangerous if ingested.
What’s the best way to clean my molds?
The best way is using warm water and mild dish soap. Reasoning: Silicone is naturally non-stick, so gentle agitation is usually enough to remove wax or resin dust without scratching the surface.
Can I fix a torn silicone mold?
You can attempt a repair using fresh silicone caulk, but it will always be a weak point. Reasoning: Silicone only bonds well to itself, but the repair joint will lack the uniform strength of the original cured structure.
How do I know if my silicone is fully cured?
It should feel firm and non-tacky to the touch with no “vinegar” smell remaining. Reasoning: The smell of acetic acid is a byproduct of the curing process; once it dissipates, the chemical reaction is complete.
Can I speed up the curing time?
Yes, by adding a tiny drop of water or increasing the humidity in the room. Reasoning: Moisture acts as the catalyst for the RTV process in most consumer-grade silicone caulks.
Conclusion
Mastering how to make silicone molds is a transformative skill that bridges the gap between a generic hobby and a unique, professional brand. Whether you are crafting intricate wax candles or high-detail resin jewelry, the ability to create your own production tools offers unparalleled creative freedom. As your designs gain traction in the market, remember that scaling your vision requires the precision and reliability that only professional industrial processes can provide.
Ready to transform your custom designs into high-volume reality? Contact us today for expert guidance on your next silicone manufacturing project.