
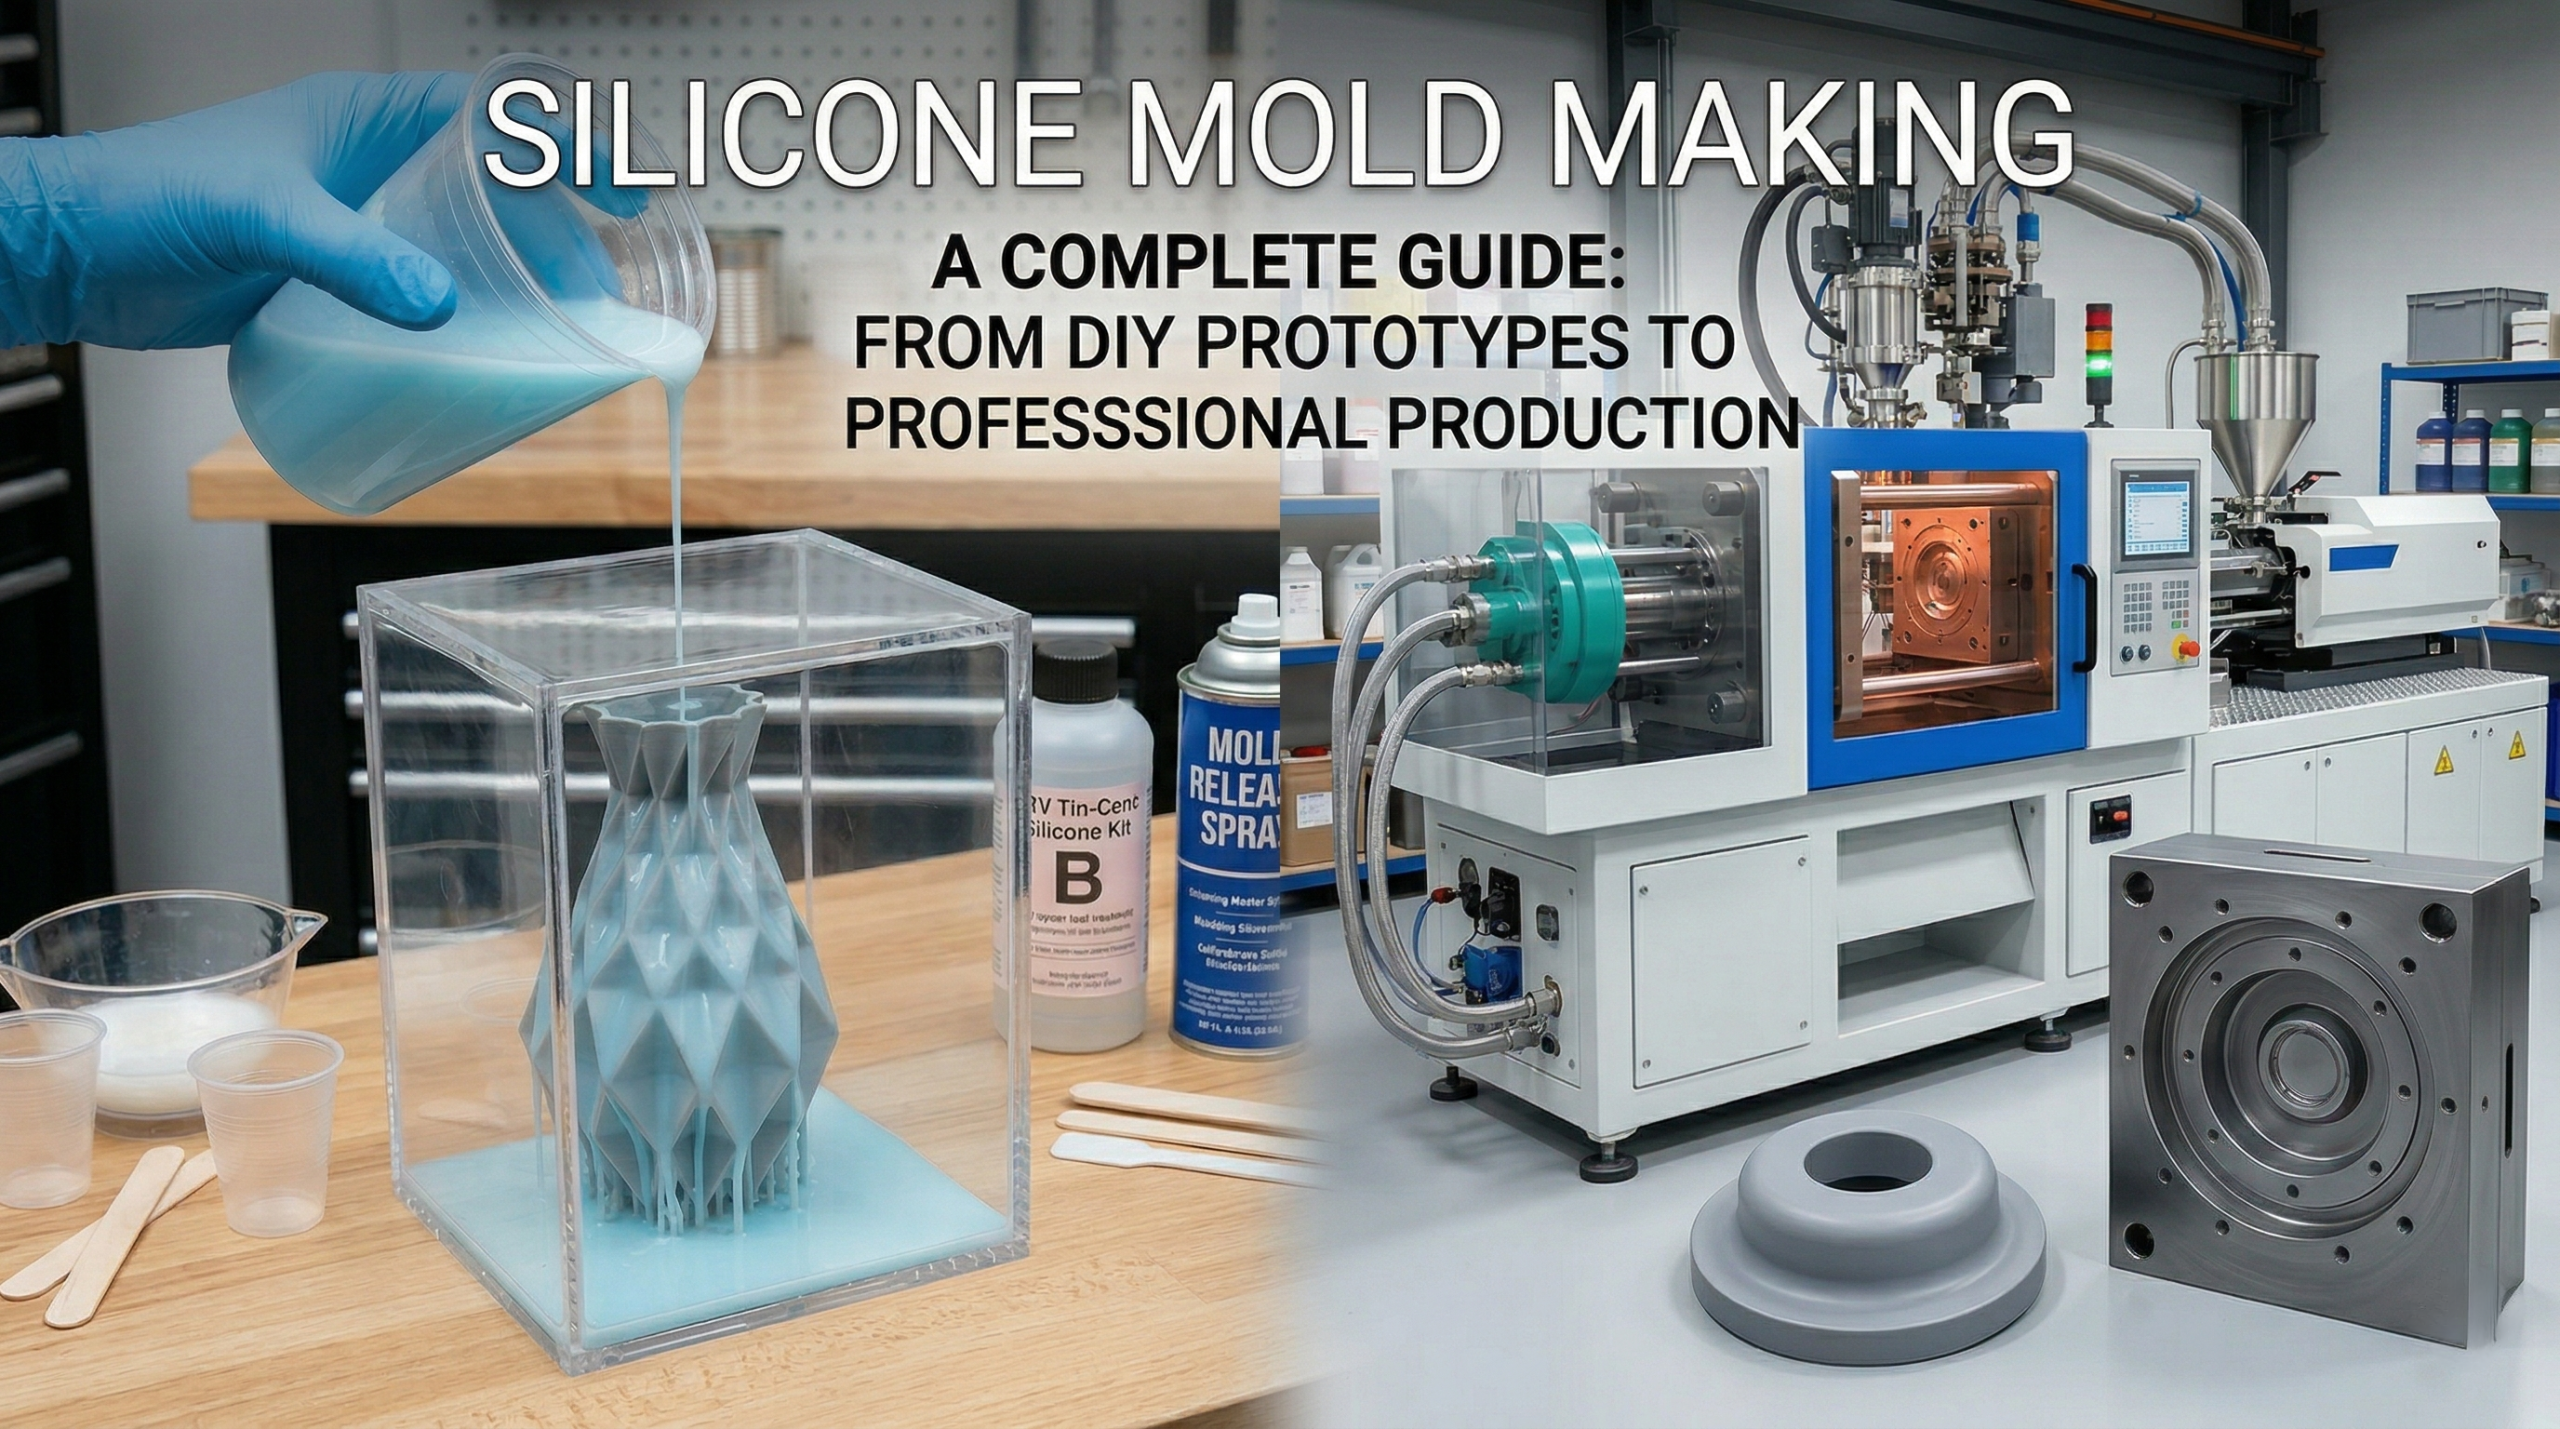
To make silicone molds, you must properly prepare a master model, secure it within a sealed mold box, and carefully pour mixed liquid silicone over it to cure. You might be struggling with a complex prototype, feeling frustrated as your DIY attempts result in bubbly, unusable shapes that waste expensive materials. The good news is that mastering the art of crafting Silicone Molds is entirely achievable. By following proven techniques, you can transition from messy kitchen experiments to flawless, professional-grade replicas.
1. What Are Silicone Molds and Why Are They Used?
Silicone Molds are flexible, durable cavities used to cast various materials into precise shapes by pouring liquid into a pre-formed matrix. They are used because their non-stick nature and flexibility allow for the easy release of complex parts without damaging the mold or the cast itself. Whether you are crafting specialized industrial parts or manufacturing medical devices, these tools are fundamentally essential for consistent replication. Let’s explore the core concepts behind this vital manufacturing process.
Understanding the Basics?
At its core, the molding process involves creating a negative impression of a positive master object. The resulting cavity captures every intricate microscopic detail of your original design.
- They capture micro-details accurately.
- They withstand high curing temperatures.
- They are highly reusable for multiple casts.
But here’s the kicker… not all materials are created equal, and choosing the right type of formulation makes all the difference in your production success.
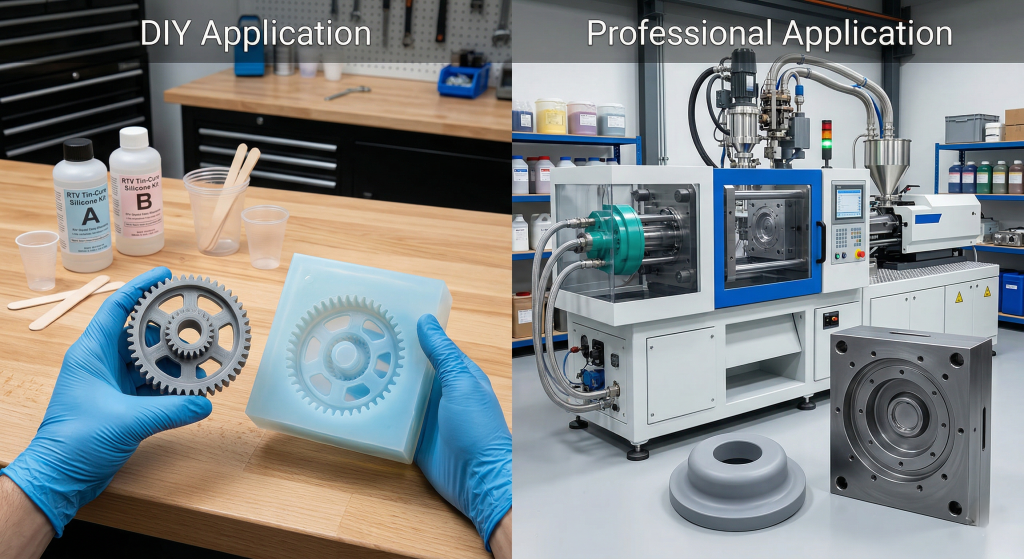
DIY vs. Professional Applications?
In a DIY setting, hobbyists typically use pourable tin-cure kits to make small crafts or one-off art pieces. Professionals, on the other hand, utilize heavy-duty injection molding machines and industrial-grade compounds to produce thousands of identical parts daily.
Key Takeaway: Understanding your specific application determines the complexity and financial cost of the molding process you need to adopt for your business.
Table 1: Application Comparison
| Feature | DIY Application | Professional Application |
|---|---|---|
| Setup Cost | Low | Very High |
| Production Volume | Low (1-50 parts) | High (1000+ parts) |
| Curing Method | Room Temperature | Heat/Injection Vulcanization |
This table highlights how your target production volume significantly dictates the required tooling investment.
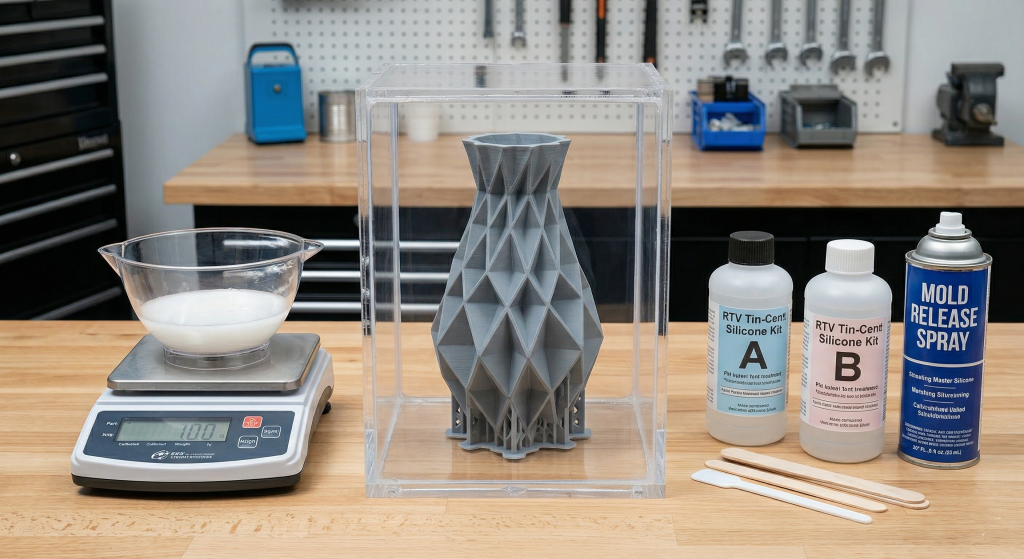
2. What Materials Do You Need to Make Silicone Molds?
To make Silicone Molds, you need liquid silicone parts A and B, a master model, mixing containers, stirring sticks, and mold release spray. Gathering the right supplies before you begin ensures a smooth and uninterrupted workflow during the time-sensitive pouring phase. You will also need rigid materials to construct the containment box around your master object to prevent the heavy liquid from escaping.
Essential DIY Supplies?
When starting out, you do not need expensive industrial equipment to get great, functional results. Simple hardware store items often suffice for building the containment walls and mixing the thick liquids manually.
- Plastic cups and wooden stir sticks for mixing.
- Foam core board or acrylic sheets for the box.
- Hot glue or modeling clay to seal the edges.
You might be wondering… can I use standard cardboard for the box walls? It is generally too porous and can cause leaks or transfer unwanted textures onto your final piece.
Professional Grade Materials?
Industrial setups require far more robust and precise materials to ensure longevity and tight manufacturing tolerances. Platinum-cure formulations are typically favored for their absolute dimensional stability and total lack of shrinkage over time.
Key Takeaway: Investing in high-quality platinum formulations yields superior longevity and exact dimensional accuracy for rigorous, high-volume engineering projects.
Table 2: Material Requirements
| Material Type | Primary Purpose | Recommended For |
|---|---|---|
| Tin-Cure | Basic replication | Prototypes, art pieces |
| Platinum-Cure | High precision | Medical, food-grade |
| Foam Board | Containment box | Quick DIY setups |
Selecting platinum-cure materials is absolutely essential when dimensional stability and long-term durability are strict project requirements.
3. How Do You Prepare the Master Model for Molding?
You prepare the master model by cleaning its surface thoroughly, filling any unwanted gaps, and securing it firmly to the baseplate of your mold box. Proper preparation of the model for your Silicone Molds prevents the liquid rubber from flowing underneath and causing the master to float to the top. This critical step guarantees that the final cavity is a flawless, accurate replica of your original engineering design.
Cleaning and Sealing?
Any dust, oil, or debris left on the master will be permanently transferred to the cavity surface, ruining the finish. Porous items, like wood or unpainted 3D prints, must be sealed tightly before pouring the liquid rubber.
- Wash the model with mild soap and water.
- Apply an acrylic spray to seal porous surfaces.
- Ensure the item is completely dry before proceeding.
Here is the deal… skipping the sealing phase often results in the curing rubber permanently bonding to your expensive original part.
Applying Mold Release?
Mold release is a critical chemical barrier that prevents the rubber from sticking aggressively to the master model or the containment box walls. You should spray a light, even coat over all exposed surfaces before pouring. It is highly important to brush out any pooled liquid in the crevices to preserve fine surface details.
Key Takeaway: A properly cleaned and chemically coated master model guarantees an effortless demolding process and a pristine final cavity.
Table 3: Preparation Checklist
| Task | Purpose | Consequence of Skipping |
|---|---|---|
| Cleaning | Removes surface oils | Surface defects in mold |
| Sealing | Closes porous materials | Rubber sticking to master |
| Release Agent | Creates non-stick barrier | Difficult object removal |
Properly sealing and lubricating the master prevents material fusion and ensures crisp, accurate detail retention.
4. What Are the Steps to Build a Proper Mold Box?
To build a proper mold box, you must cut walls to fit around your master with a half-inch clearance, glue them to a flat base, and seal all seams tightly. Constructing a secure box is vital to contain the heavy liquid mixture while it cures into your Silicone Molds. A leaky container will cause expensive material to spill everywhere and completely ruin your production timeline.
Choosing Box Materials?
The walls of your container should be non-porous and sturdy enough to withstand the immense outward pressure of the liquid rubber. Many professional makers prefer clear materials so they can visually see the rubber rising and actively check for trapped air bubbles.
- Acrylic sheets provide excellent visibility and reusability.
- Lego bricks are highly modular for complex shapes.
- Melamine boards offer a sturdy, non-stick surface.
What is the real story? While you can technically use almost anything, smooth and non-porous walls will save you hours of post-production cleanup time.
Sealing the Edges?
Once the walls are erected around the master, every internal and external seam must be sealed flawlessly. Hot glue is the industry standard for this task because it sets rapidly and peels off easily later. You should also press a thin bead of modeling clay around the base of the master object.
Key Takeaway: A completely watertight seal is your only reliable defense against catastrophic material leaks during the critical curing phase.
Table 4: Box Construction Options
| Material | Advantages | Disadvantages |
|---|---|---|
| Acrylic | Transparent, highly reusable | Requires cutting tools |
| Lego Bricks | Adjustable, easy setup | Seams can leak slightly |
| Melamine | Cheap, naturally non-stick | Opaque, hard to cut |
Building the enclosure with transparent acrylic allows for real-time monitoring of the liquid flow and air bubble release.
5. How Do You Mix and Pour Silicone for Best Results?
You mix and pour the material by carefully measuring the components by weight or volume, stirring thoroughly while scraping the sides, and pouring the liquid from a height in a thin stream. The precise way you handle the liquid directly impacts the final structural quality of your Silicone Molds. Formulations require meticulous attention to the mixing ratios to ensure they cure completely and evenly across the entire block.
Measuring Ratios?
Precision is absolutely non-negotiable when combining the chemical base and the reactive catalyst. Some formulations require a simple 1:1 ratio by volume, while others demand a precise 10:1 ratio by weight utilizing a calibrated digital scale.
- Always read the manufacturer instructions before measuring.
- Use separate clean cups to avoid cross-contamination.
- Double-check your digital scale calibration constantly.
Ready for the good part? Once you master the exact chemical ratios, you will never have to deal with a sticky, uncured mess ruining your workbench again.
Pouring Techniques?
You should never pour the thick liquid directly onto the top of your delicate master model. Instead, aim for the lowest point in the box and let the fluid rise naturally around the object like a rising tide. This deliberate technique pushes the atmospheric air up and away from the intricate details of your machined part.
Key Takeaway: Utilizing the high, thin pouring method drastically reduces the amount of trapped air and ensures a flawless, professional surface finish.
Table 5: Mixing and Pouring Parameters
| Step | Action Required | Expected Outcome |
|---|---|---|
| Measurement | Weigh exact ratios | Proper chemical reaction |
| Stirring | Scrape sides and bottom | Homogenous mixture |
| Pouring | High, thin stream | Minimized trapped air |
Adhering strictly to measured ratios and pouring techniques guarantees an even, reliable cure without weak soft spots.
6. How Can You Remove Air Bubbles Effectively?
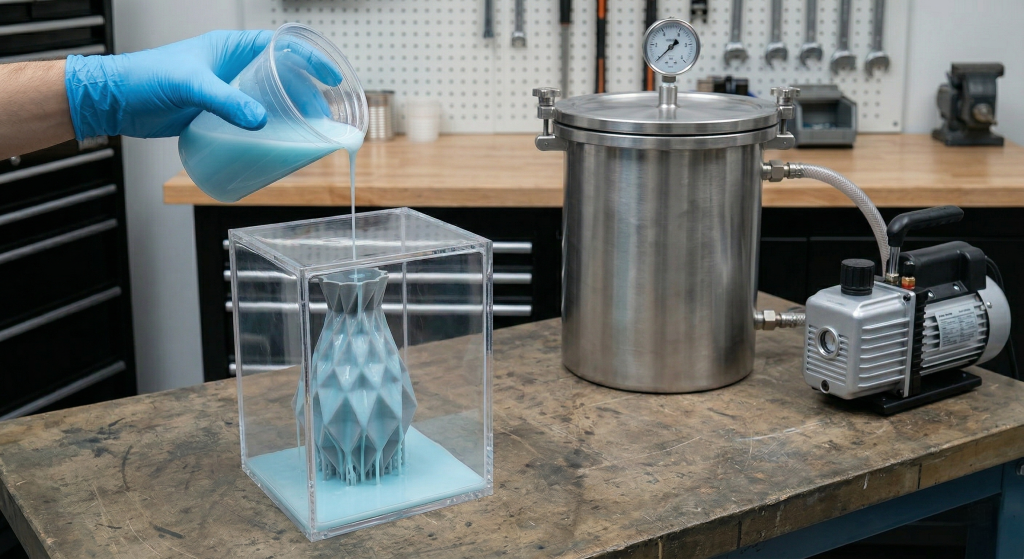
You can remove air bubbles effectively by degassing the mixed liquid in a vacuum chamber or by utilizing vibration and strategic pouring techniques if a chamber is unavailable. Trapped air is the absolute worst enemy of high-quality Silicone Molds because bubbles cause voids and structural imperfections. Eliminating these microscopic bubbles ensures your molds possess a pristine, glass-like finish on the interior cavity.
Using a Vacuum Chamber?
For true professional results, placing your mixing cup into a commercial vacuum chamber is the ultimate solution. The machine aggressively pulls the air out of the liquid, causing it to expand rapidly and then collapse back down completely bubble-free.
- Ensure your mixing cup is three times larger than the liquid volume.
- Degas the mixture for at least three to five minutes.
- Watch carefully to prevent the rising mixture from overflowing.
This is where it gets interesting… degassing not only improves the cosmetic appearance but also significantly increases the physical tear strength of the cured rubber.
The No-Vacuum Method?
If you do not have expensive degassing equipment, you can still achieve excellent results through careful manual techniques. Tapping the sides of the mold box gently with a rubber mallet helps dislodge stubborn trapped air bubbles. Brushing a thin layer of the liquid directly onto the master before pouring the rest also helps capture fine details flawlessly.
Key Takeaway: Combining strategic vibration with a high-pour technique allows DIY makers to achieve virtually bubble-free results without costly vacuum systems.
Table 6: Bubble Removal Techniques
| Method | Equipment Needed | Effectiveness Level |
|---|---|---|
| Vacuum Degassing | Vacuum chamber & pump | Excellent (100% removal) |
| High Thin Pour | None | Good (Removes large bubbles) |
| Vibration Tapping | Rubber mallet | Moderate (Moves surface air) |
Employing a commercial vacuum chamber remains the absolute gold standard for producing industrial-grade, defect-free tooling.
7. What Is the Safest Way to Demold Your Creation?
The safest way to demold your creation is to wait for the full recommended cure time, dismantle the box walls carefully, and gently flex the rubber away from the master object. Rushing the demolding process can easily tear your freshly cured Silicone Molds or break fragile parts of your original engineering model. Extreme patience is heavily rewarded during this final, highly satisfying step of the crafting journey.
Curing Times Explained?
Every chemical formulation has a specific pot life and cure time that is heavily influenced by ambient room temperature and relative humidity. Platinum-cure materials generally take longer to set completely but offer superior tear strength and extreme heat resistance.
- Pot life is your active working time before it thickens.
- Cure time is the total mandatory wait before demolding.
- Higher room temperatures will safely accelerate the curing process.
But here’s the kicker… attempting to demold your part even one hour too early can cause permanent, unfixable distortion in the cavity walls.
Demolding Steps?
Begin by peeling away the hot glue and removing the acrylic or foam walls one by one to expose the block. Slowly pry the baseboard away, revealing the flat bottom of the cured rubber block. Carefully flex the edges of the block backward to break the internal vacuum seal around the master before pulling it out completely.
Key Takeaway: Taking your time to dismantle the enclosure and carefully break the vacuum seal prevents catastrophic tearing of your newly created tooling.
Table 7: Demolding Phases
| Phase | Action Required | Primary Purpose |
|---|---|---|
| Verification | Check surface tackiness | Ensure full cross-linking cure |
| Wall Removal | Dismantle containment | Safely expose the rubber block |
| Vacuum Break | Flex edges gently | Safely release the master part |
Carefully breaking the tight vacuum seal before extraction is critically important to maintaining the structural integrity of the delicate cavity.
8. How Do Professionals Scale Up Silicone Mold Production?
Professionals scale up production by transitioning from manual pouring into high-volume Liquid Silicone Rubber (LSR) injection molding machines housed in climate-controlled clean rooms. When global businesses need millions of parts, manual creation of Silicone Molds is simply too slow and highly inconsistent. Industrial scaling relies entirely on automated machinery, metal tooling, and strict quality control protocols to meet demanding global supply chains.
Advanced Liquid Silicone Injection?
LSR injection systems aggressively pump a two-part platinum compound directly into a heated metal cavity under immense hydraulic pressure. This vulcanizes the material in mere seconds rather than hours, allowing for massive daily manufacturing outputs.
- It utilizes heavily automated hydraulic machinery.
- The curing process is accelerated via intense heat.
- It produces zero material waste through precision runners.
What’s the real story? This extreme level of automation is exactly why major electronics and medical brands can launch products with millions of flawless components simultaneously.
Large Scale Vulcanization?
For solid rubber parts, factories employ heavy-duty vacuum vulcanization presses that compress the raw material into shape forcefully. Facilities often utilize advanced CNC machining centers to carve the initial metal tooling with microscopic, exacting precision. These highly engineered industrial setups guarantee that every single production batch matches the client’s exact geometric specifications perfectly.
Key Takeaway: Transitioning directly to injection and vulcanization machinery is mandatory for brands seeking high-volume, defect-free global manufacturing capabilities.
Table 8: Scaling Technologies
| Technology | Primary Material | Production Speed |
|---|---|---|
| Manual Pouring | RTV Liquid Rubber | Slow (Hours/Days) |
| LSR Injection | Liquid Silicone | Very Fast (Seconds) |
| Compression | Solid Rubber | Fast (Minutes) |
Investing in advanced LSR injection technology exponentially increases daily production capacity while simultaneously reducing long-term manual labor costs.
9. What Are Common Mold Defects and How to Fix Them?
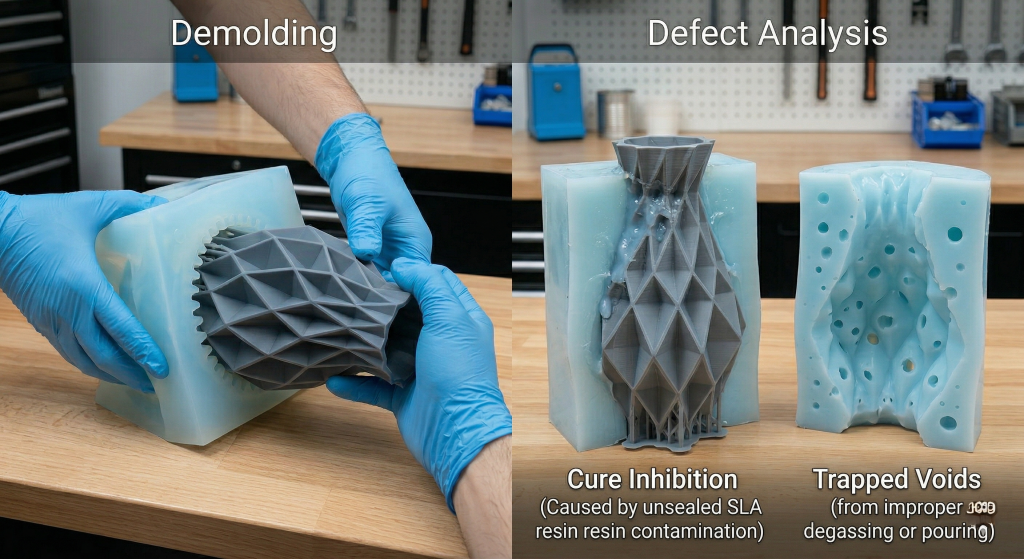
Common defects include cure inhibition, excessive bubbles, and tearing, which can be fixed by sealing masters, degassing properly, and using higher-strength materials. Troubleshooting these frustrating issues quickly saves you from wasting expensive batches of Silicone Molds. Understanding the scientific root causes of these failures is the absolute fastest way to improve your technical proficiency and overall production yields.
Dealing with Incomplete Cures?
Cure inhibition happens when a chemical contaminant on the master model prevents the rubber from cross-linking and solidifying properly. This disastrous chemical reaction leaves a sticky, gooey mess directly on the surface of your otherwise perfectly solid block.
- SLA 3D prints contain resins that cause severe inhibition.
- Latex gloves contain sulfur which destroys platinum cures.
- Always use nitrile gloves and seal SLA prints with acrylic.
You might be wondering… can I save a sticky, inhibited mold? Unfortunately, chemically inhibited rubber cannot be reversed and the entire block must be discarded immediately.
Fixing Surface Blemishes?
Surface blemishes like pinholes are caused by trapped air, while dull, cloudy spots often result from improper mold release application. If your final cavity has a microscopic tear or bubble, you can sometimes patch it using a tiny amount of fresh liquid. However, for high-precision engineering parts, remaking the entire block from scratch is usually the safest corrective action.
Key Takeaway: Identifying and aggressively eliminating chemical contaminants before pouring is significantly cheaper and easier than trying to repair a defective cavity.
Table 9: Troubleshooting Guide
| Defect | Root Cause | Solution / Prevention |
|---|---|---|
| Cure Inhibition | Sulfur or resin contamination | Seal master, use nitrile gloves |
| Large Voids | Trapped air during pouring | Pour high and thin, use vacuum |
| Tearing | Demolding too early | Wait for full recommended cure time |
Proactively sealing resin masters and strictly avoiding sulfur-based products are the most effective ways to prevent chemical cure inhibition.
10. How Do You Maintain and Store Your Molds Properly?
You maintain and store them properly by washing them with mild soap, drying them completely, and keeping them in a cool, dark place away from UV light. Proper storage drastically extends the operational lifespan of your Silicone Molds, allowing you to cast hundreds of parts over several years. Neglecting this crucial step leads rapidly to brittle walls, dimensional shrinkage, and a massive loss of surface detail.
Cleaning After Use?
After successfully extracting your cast part, you must clean the cavity thoroughly to remove any residual casting resins, dyes, or release agents. Leaving harsh, reactive chemicals inside the cavity will slowly degrade the rubber structure over time.
- Wash the interior with warm water and dish soap.
- Avoid using harsh chemical solvents or abrasive scrub pads.
- Let the block air dry completely before putting it away.
Ready for the good part? A meticulously well-maintained platinum-cure block can easily last for decades without losing its original flexibility or microscopic detail.
Optimal Storage Conditions?
The block should always be stored flat in its natural geometric shape to prevent permanent, irreversible warping. If you have a complex two-part setup, store them assembled with a rubber band holding them together lightly. Keep them securely in a temperature-controlled environment away from direct sunlight, as harsh UV rays aggressively break down the chemical bonds.
Key Takeaway: Implementing a strict cleaning protocol and climate-controlled storage routine ensures your tooling remains dimensionally accurate for future production runs.
Table 10: Storage Best Practices
| Condition | Ideal Status | Consequence of Neglect |
|---|---|---|
| Temperature | Cool and stable (65-75°F) | Accelerated material degradation |
| Light Exposure | Dark, no direct UV rays | Rubber becomes brittle and powdery |
| Physical Posture | Flat, fully assembled | Permanent warping and misalignment |
Storing the components fully assembled and flat in a dark, climate-controlled space prevents warping and extends operational lifespan significantly.
Mastering this craft solves the frustrating problem of inconsistent prototyping, allowing you to create flawless replicas every time. We specialize in transitioning your innovative designs into mass-produced realities through world-class LSR injection technologies. As an industry leader dedicated to precision manufacturing, we strive to elevate your product quality. Please contact us today to elevate your production line!
Frequently Asked Questions
Q1: What’s the best type of silicone for beginners?
Tin-cure is absolutely the best option for beginners. It is generally more forgiving with mixing ratios and is significantly cheaper, making it perfect for learning the basics without heavy financial risk.
Q2: Can I use 3D printed parts as my master model?
Yes, you can use them safely and effectively. However, SLA resin prints must be coated with a clear acrylic spray beforehand to prevent the sulfur in the resin from causing chemical cure inhibition.
Q3: How do I know if my mixture is fully cured?
You know it is fully cured when the surface is entirely firm and non-tacky to the touch. If pressing a gloved finger leaves an indent or feels sticky, it definitely needs more time to cross-link.
Q4: What’s the best way to color my final molds?
Using specialized liquid silicone pigments is the best and safest method. Adding a few drops during the part B mixing phase ensures a vibrant, uniform color without disrupting the delicate chemical curing process.
Q5: Can I bake my molds in the oven to cure faster?
Yes, applying gentle, controlled heat safely accelerates the process. However, you must ensure your master model and containment box materials can withstand the elevated temperatures without melting or permanently warping.