
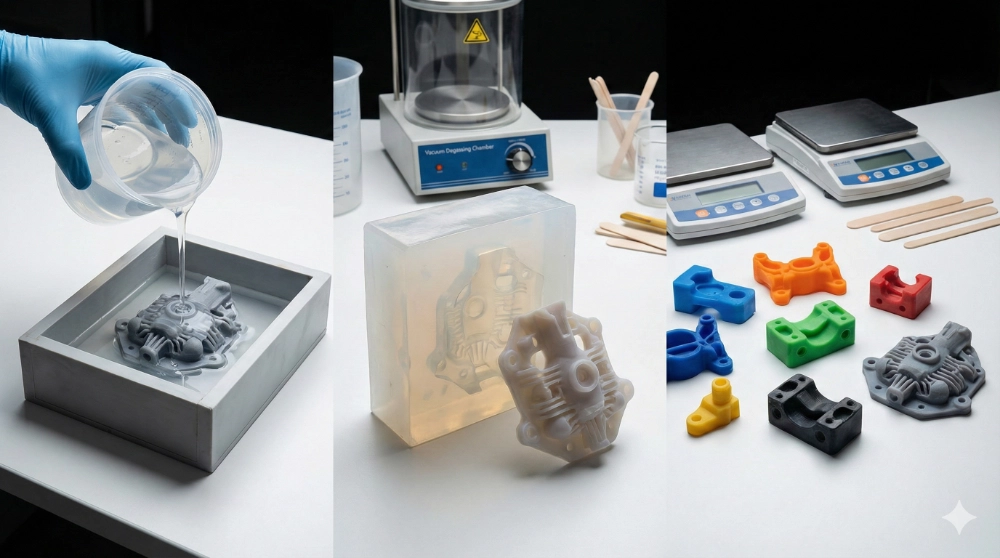
To make silicone molds, you must create a master pattern, construct a containment housing, mix a two-part elastomer with a catalyst, and pour the liquid over the master to cure into a flexible negative. Imagine you are in the middle of a high-stakes hardware development cycle where iterative prototypes are needed immediately. Traditional metal tooling requires thousands of dollars and weeks of lead time, often stalling your project before it even begins. By utilizing Custom Silicone Manufacturing, you can bridge the gap between digital CAD models and functional physical parts with speed and precision.
What are silicone molds and how do they work?
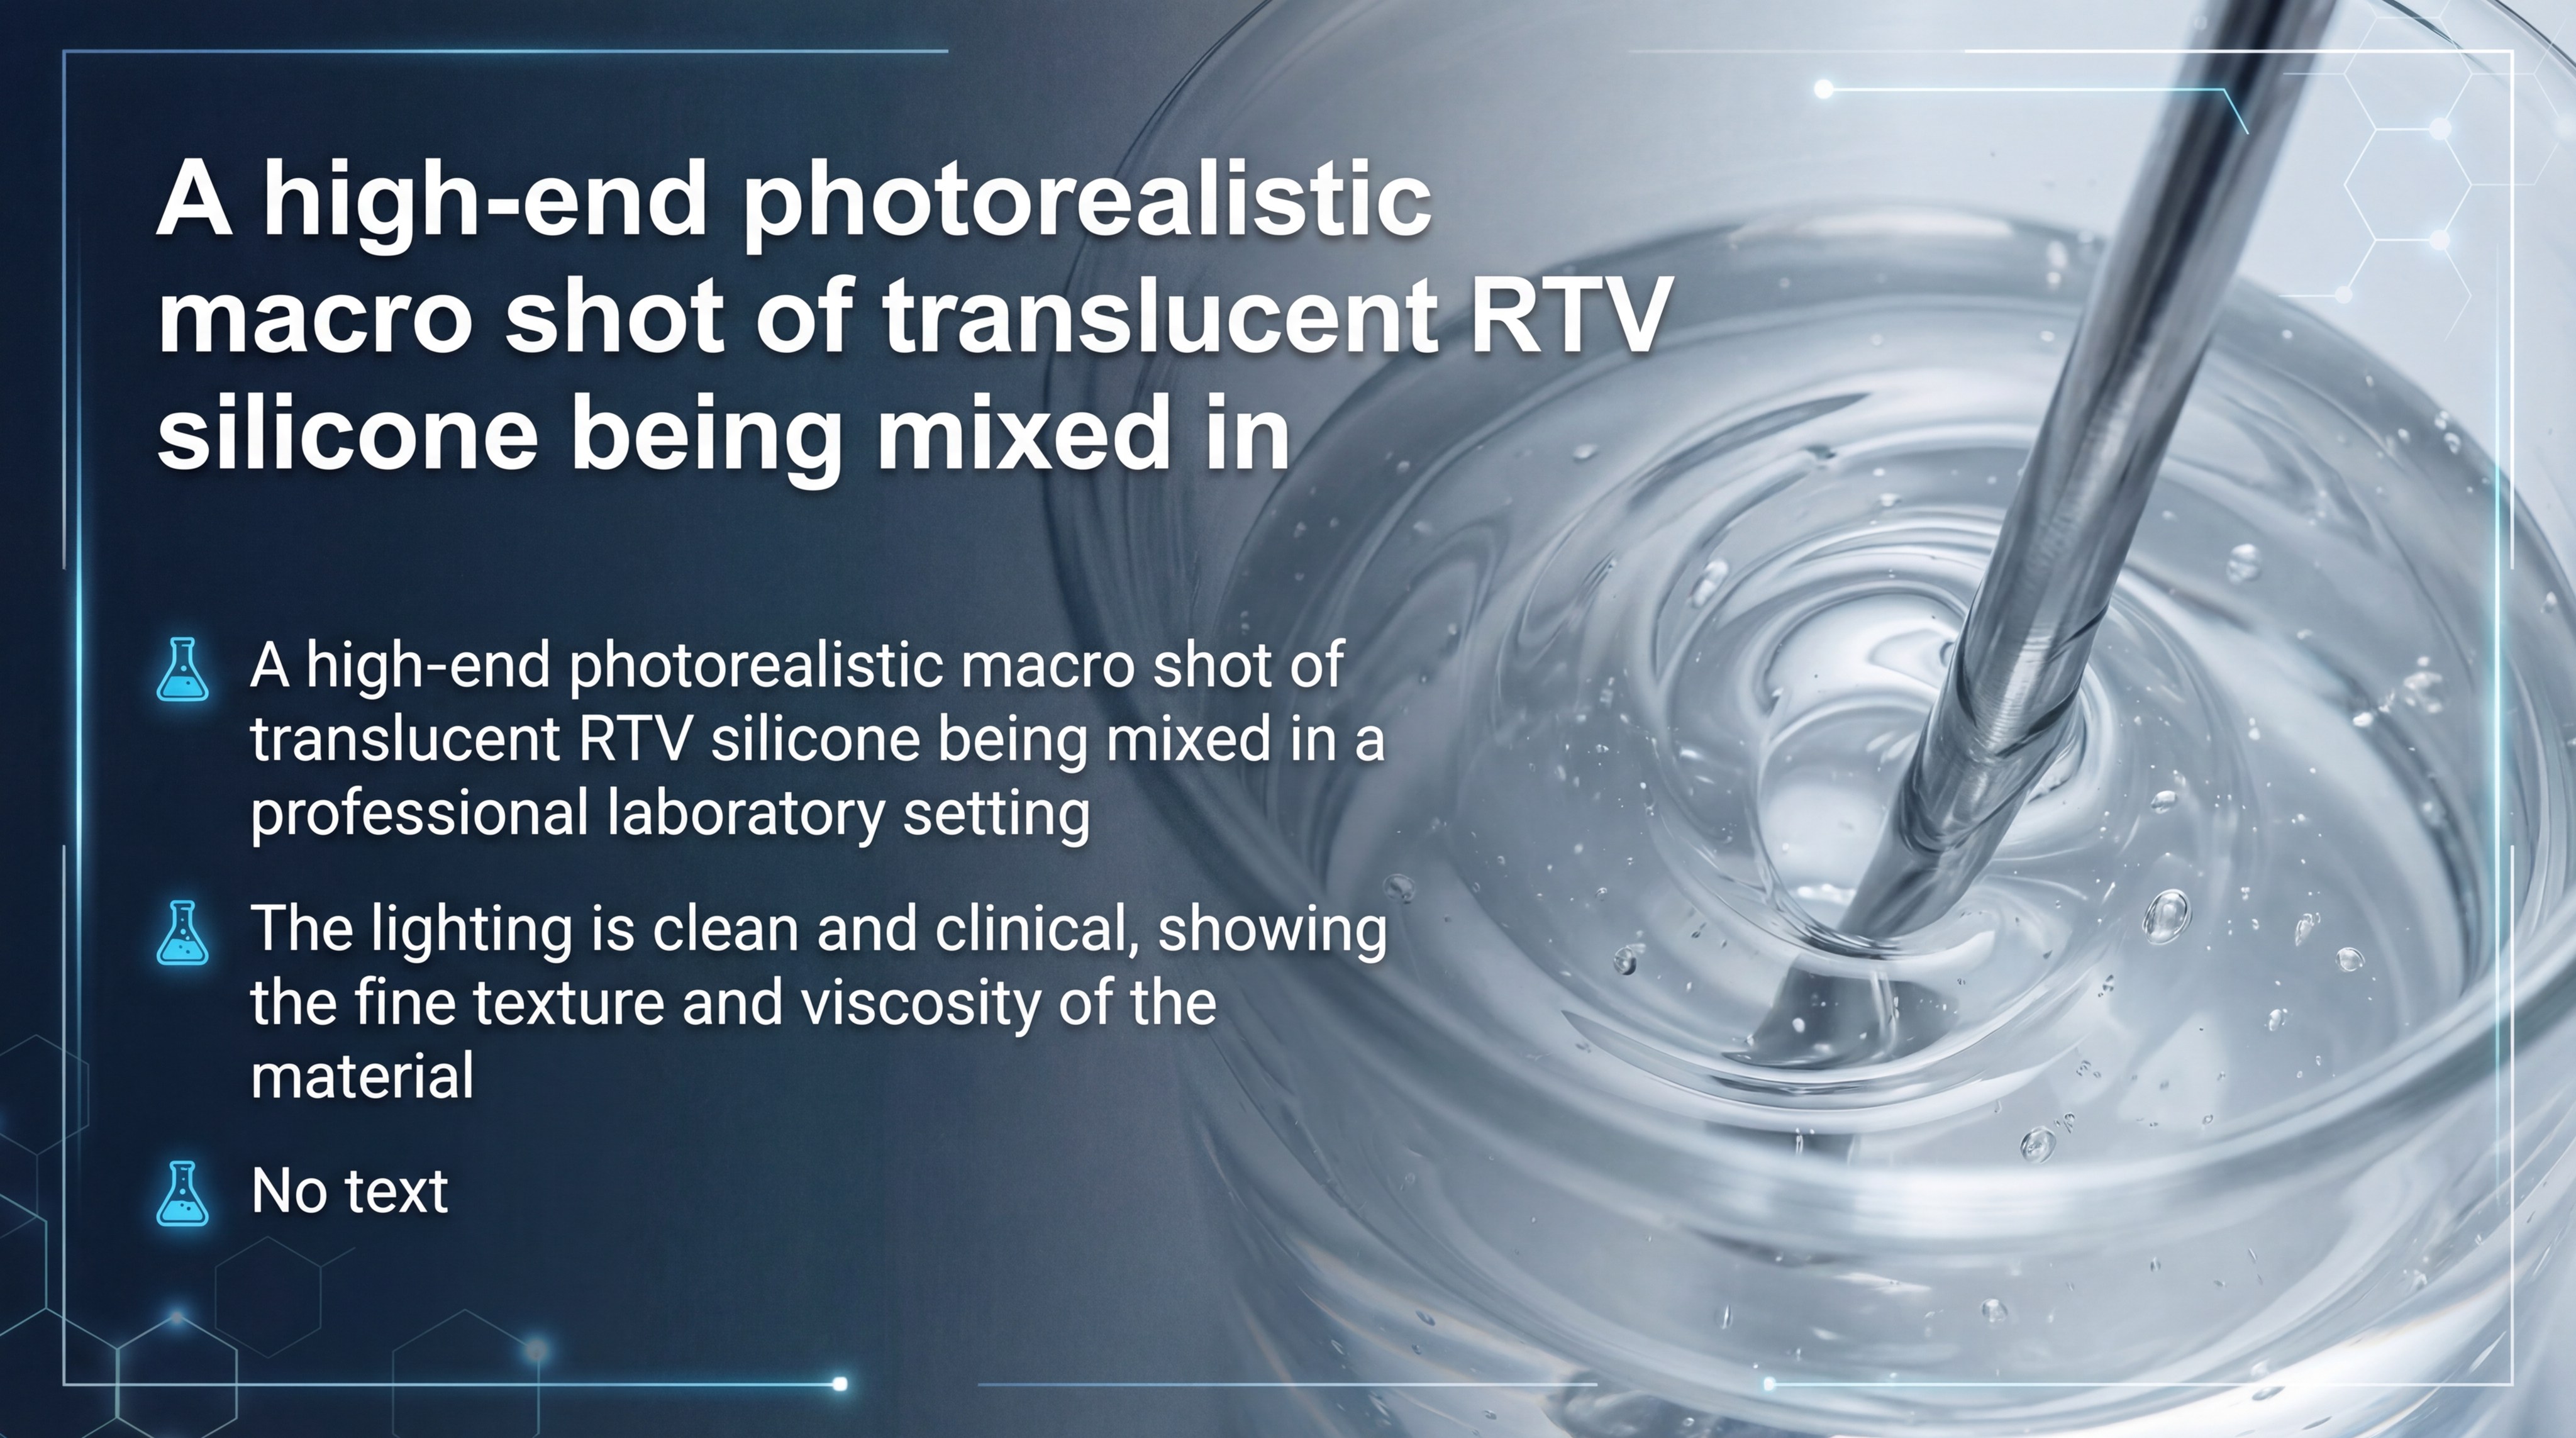
Silicone molds are flexible tools created by curing liquid Room Temperature Vulcanizing (RTV) rubber around a master pattern to capture high-fidelity surface details. When you engage in Custom Silicone Manufacturing, the process involves a chemical reaction between a base polymer and a catalyst. This transition allows the material to flow into every microscopic crevice before solidifying into a durable, elastic solid.
The science of RTV silicone rubber
RTV silicones transform from a liquid state to a stable solid without the need for high-heat industrial ovens. This characteristic is essential for maintaining the dimensional accuracy of the master pattern during the molding process.
The best part?
- Captures details as fine as embossed text.
- Resists bonding to most casting materials.
- Maintains flexibility across hundreds of uses.
Understanding durometer and Shore scales
Durometer refers to the hardness of the cured silicone, which determines how easily you can remove complex parts. Most professional molds fall within the Shore 10A to 40A range for maximum flexibility and tear resistance.
| Shore Scale | Hardness Level | Common Application |
|---|---|---|
| 10A – 20A | Very Soft | Intricate figurines, delicate textures |
| 30A – 50A | Medium | Gaskets, industrial seals, protective sleeves |
| 60A – 80A | Firm | Structural components, hard mounts |
Selecting the correct Shore hardness is the most critical decision for ensuring the tool can withstand the stresses of repeated demolding.
Key Takeaway: Understanding the chemical transition and hardness ratings of RTV silicone allows you to create tools that balance precision with functional durability.
Why should you choose silicone for your molds?
You should choose silicone for your molds because of its exceptional thermal stability, chemical resistance, and inherent flexibility that allows for complex geometries. In the world of Custom Silicone Manufacturing, these properties enable you to produce high-performance parts without the constraints of rigid metal tooling. The material remains stable across extreme temperatures, making it a versatile choice for engineering environments.
Exceptional thermal and chemical stability
Silicone rubber can typically withstand temperatures ranging from -65°C to 400°C depending on the specific formula. This resilience allows you to cast a variety of materials including resins, waxes, and even low-melt alloys.
Here is why:
- It does not degrade when exposed to exothermic resins.
- It remains stable in freezing or high-heat storage conditions.
- It resists chemical erosion from casting agents.
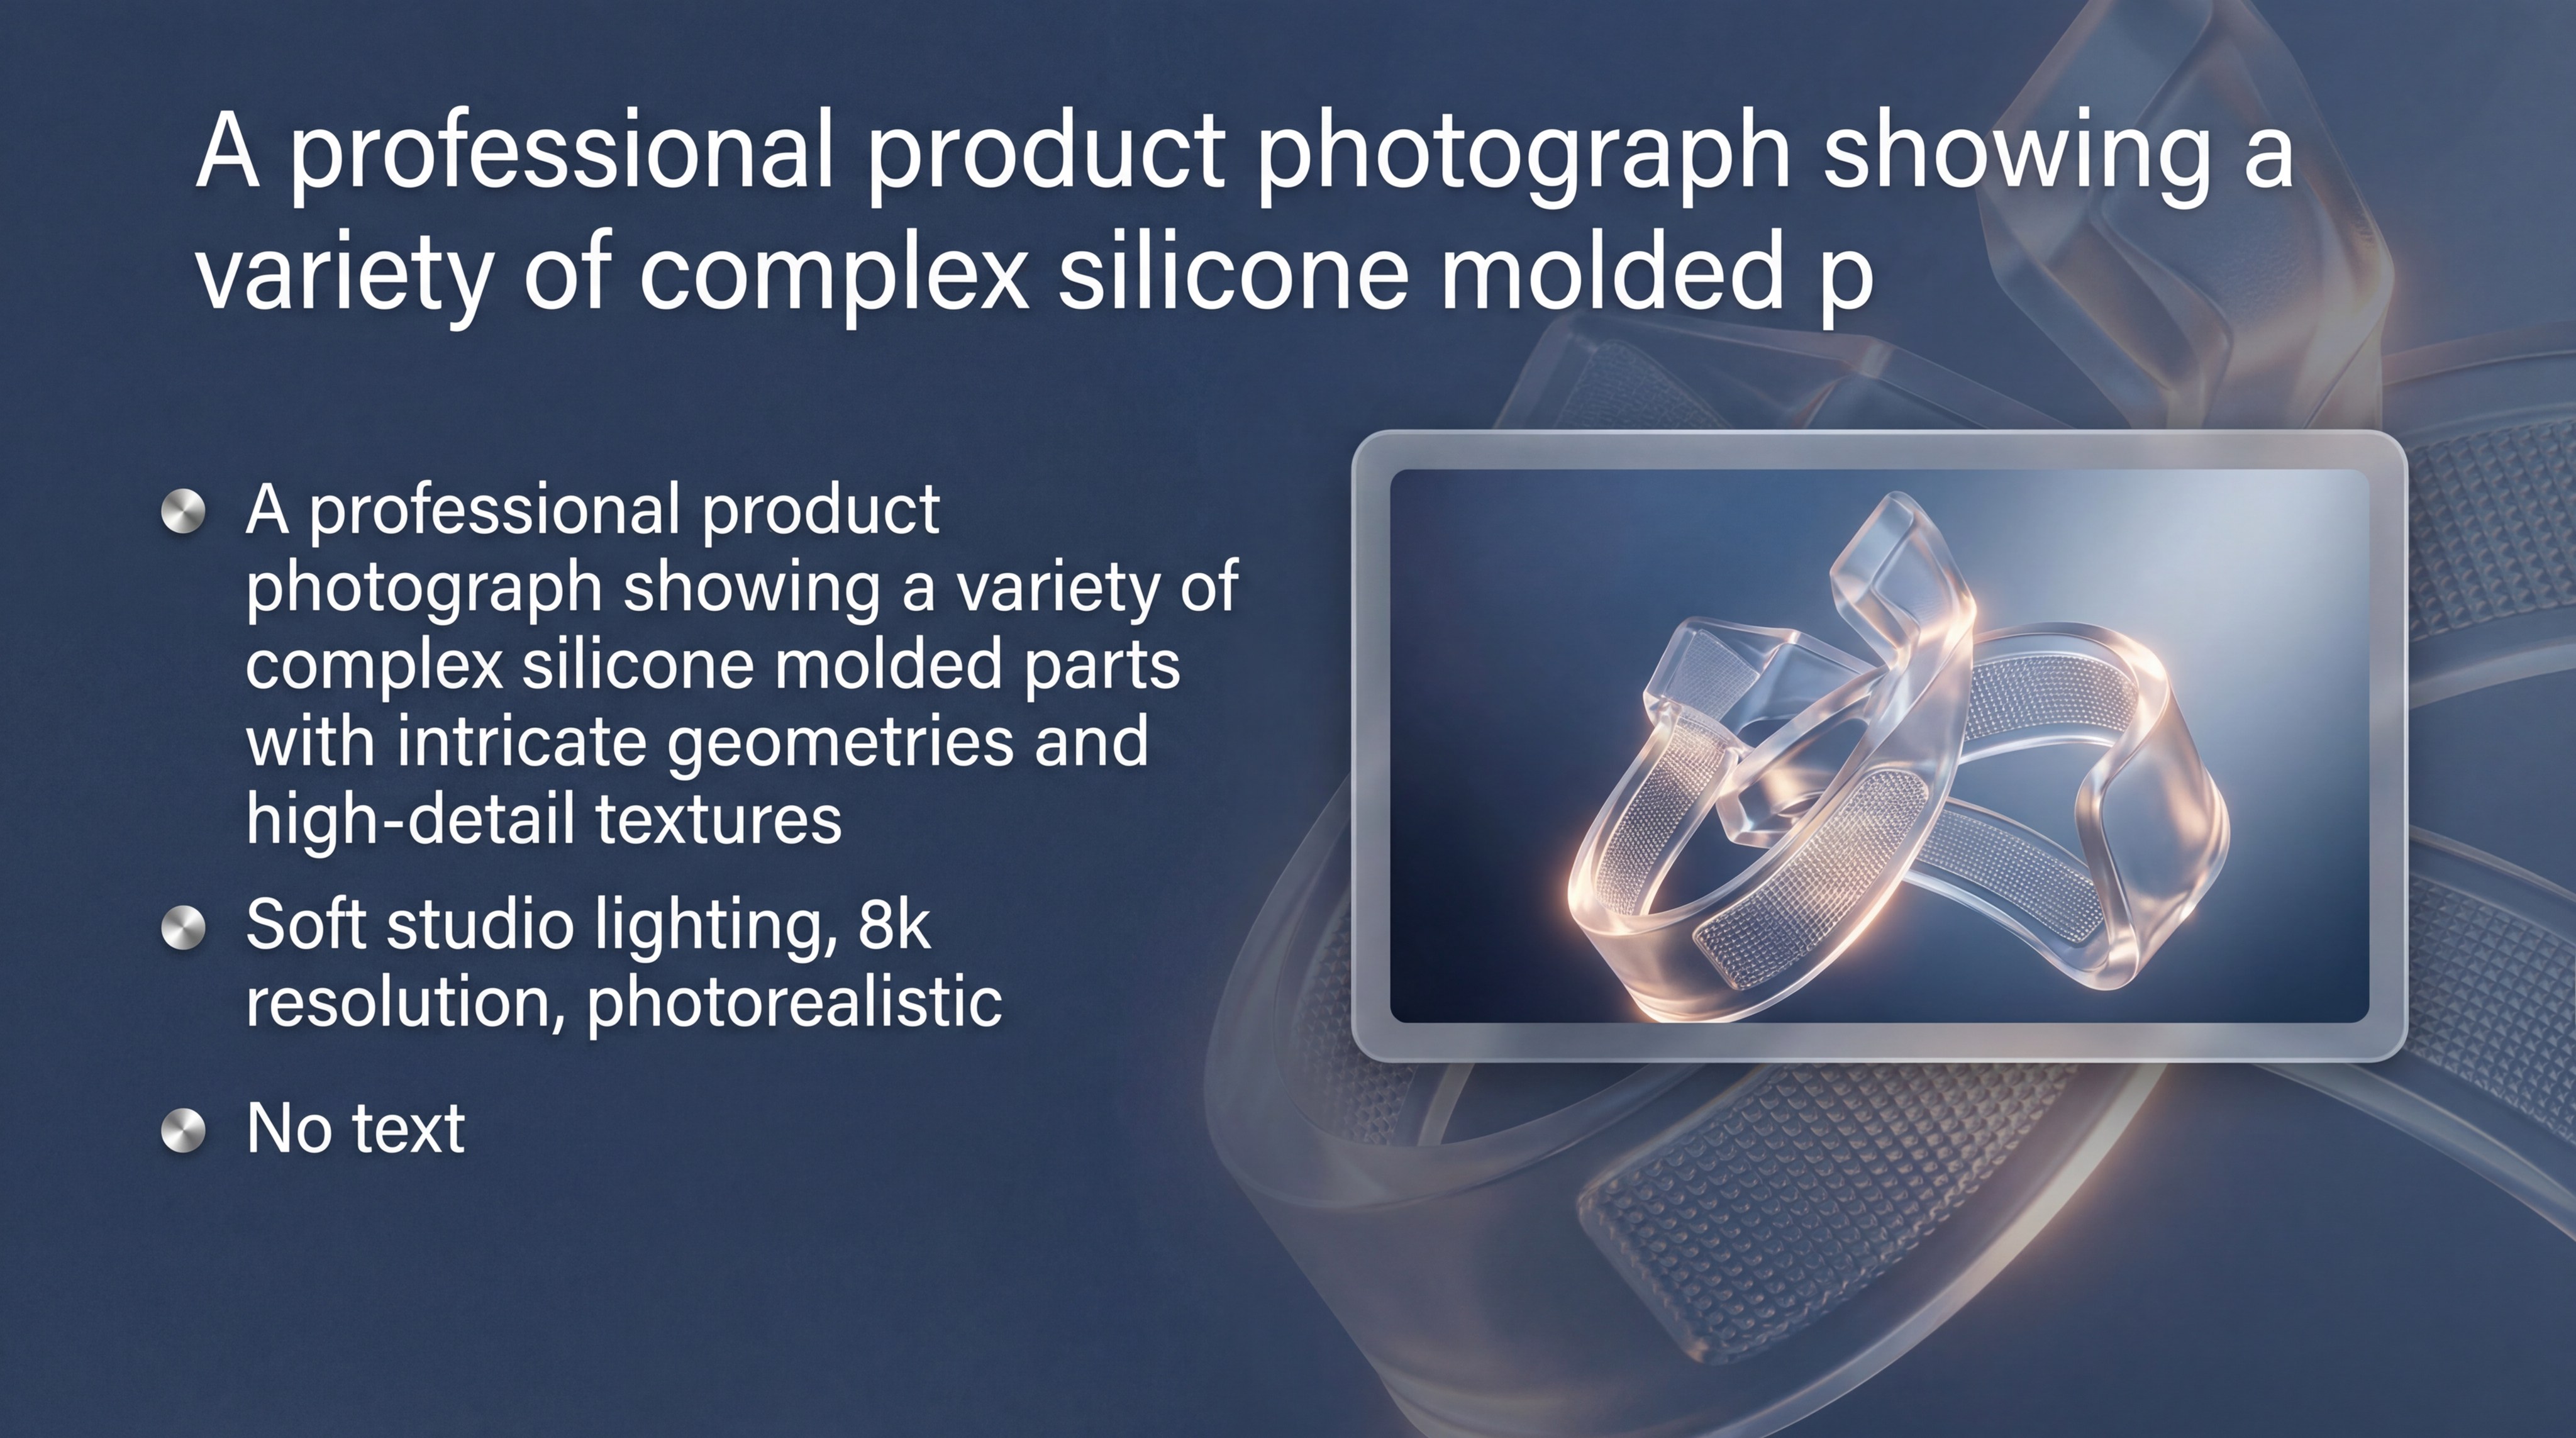
High flexibility for complex geometries
The elastic nature of silicone allows you to design parts with deep undercuts or negative draft angles that would be impossible with steel. You can simply stretch the mold to release the part without causing damage to the finished product.
| Benefit | Impact on Production |
|---|---|
| High Elongation | Allows for removal of complex geometries |
| Non-Stick Surface | Minimizes the need for aggressive release agents |
| Detail Fidelity | Replicates microscopic textures and sharp edges |
Flexible tooling significantly reduces the complexity of your mold designs by eliminating the need for expensive multi-part mechanical slides.
Key Takeaway: Silicone’s unique blend of physical resilience and elasticity makes it the premier choice for low-volume production and complex prototyping.
What tools are required for professional mold making?
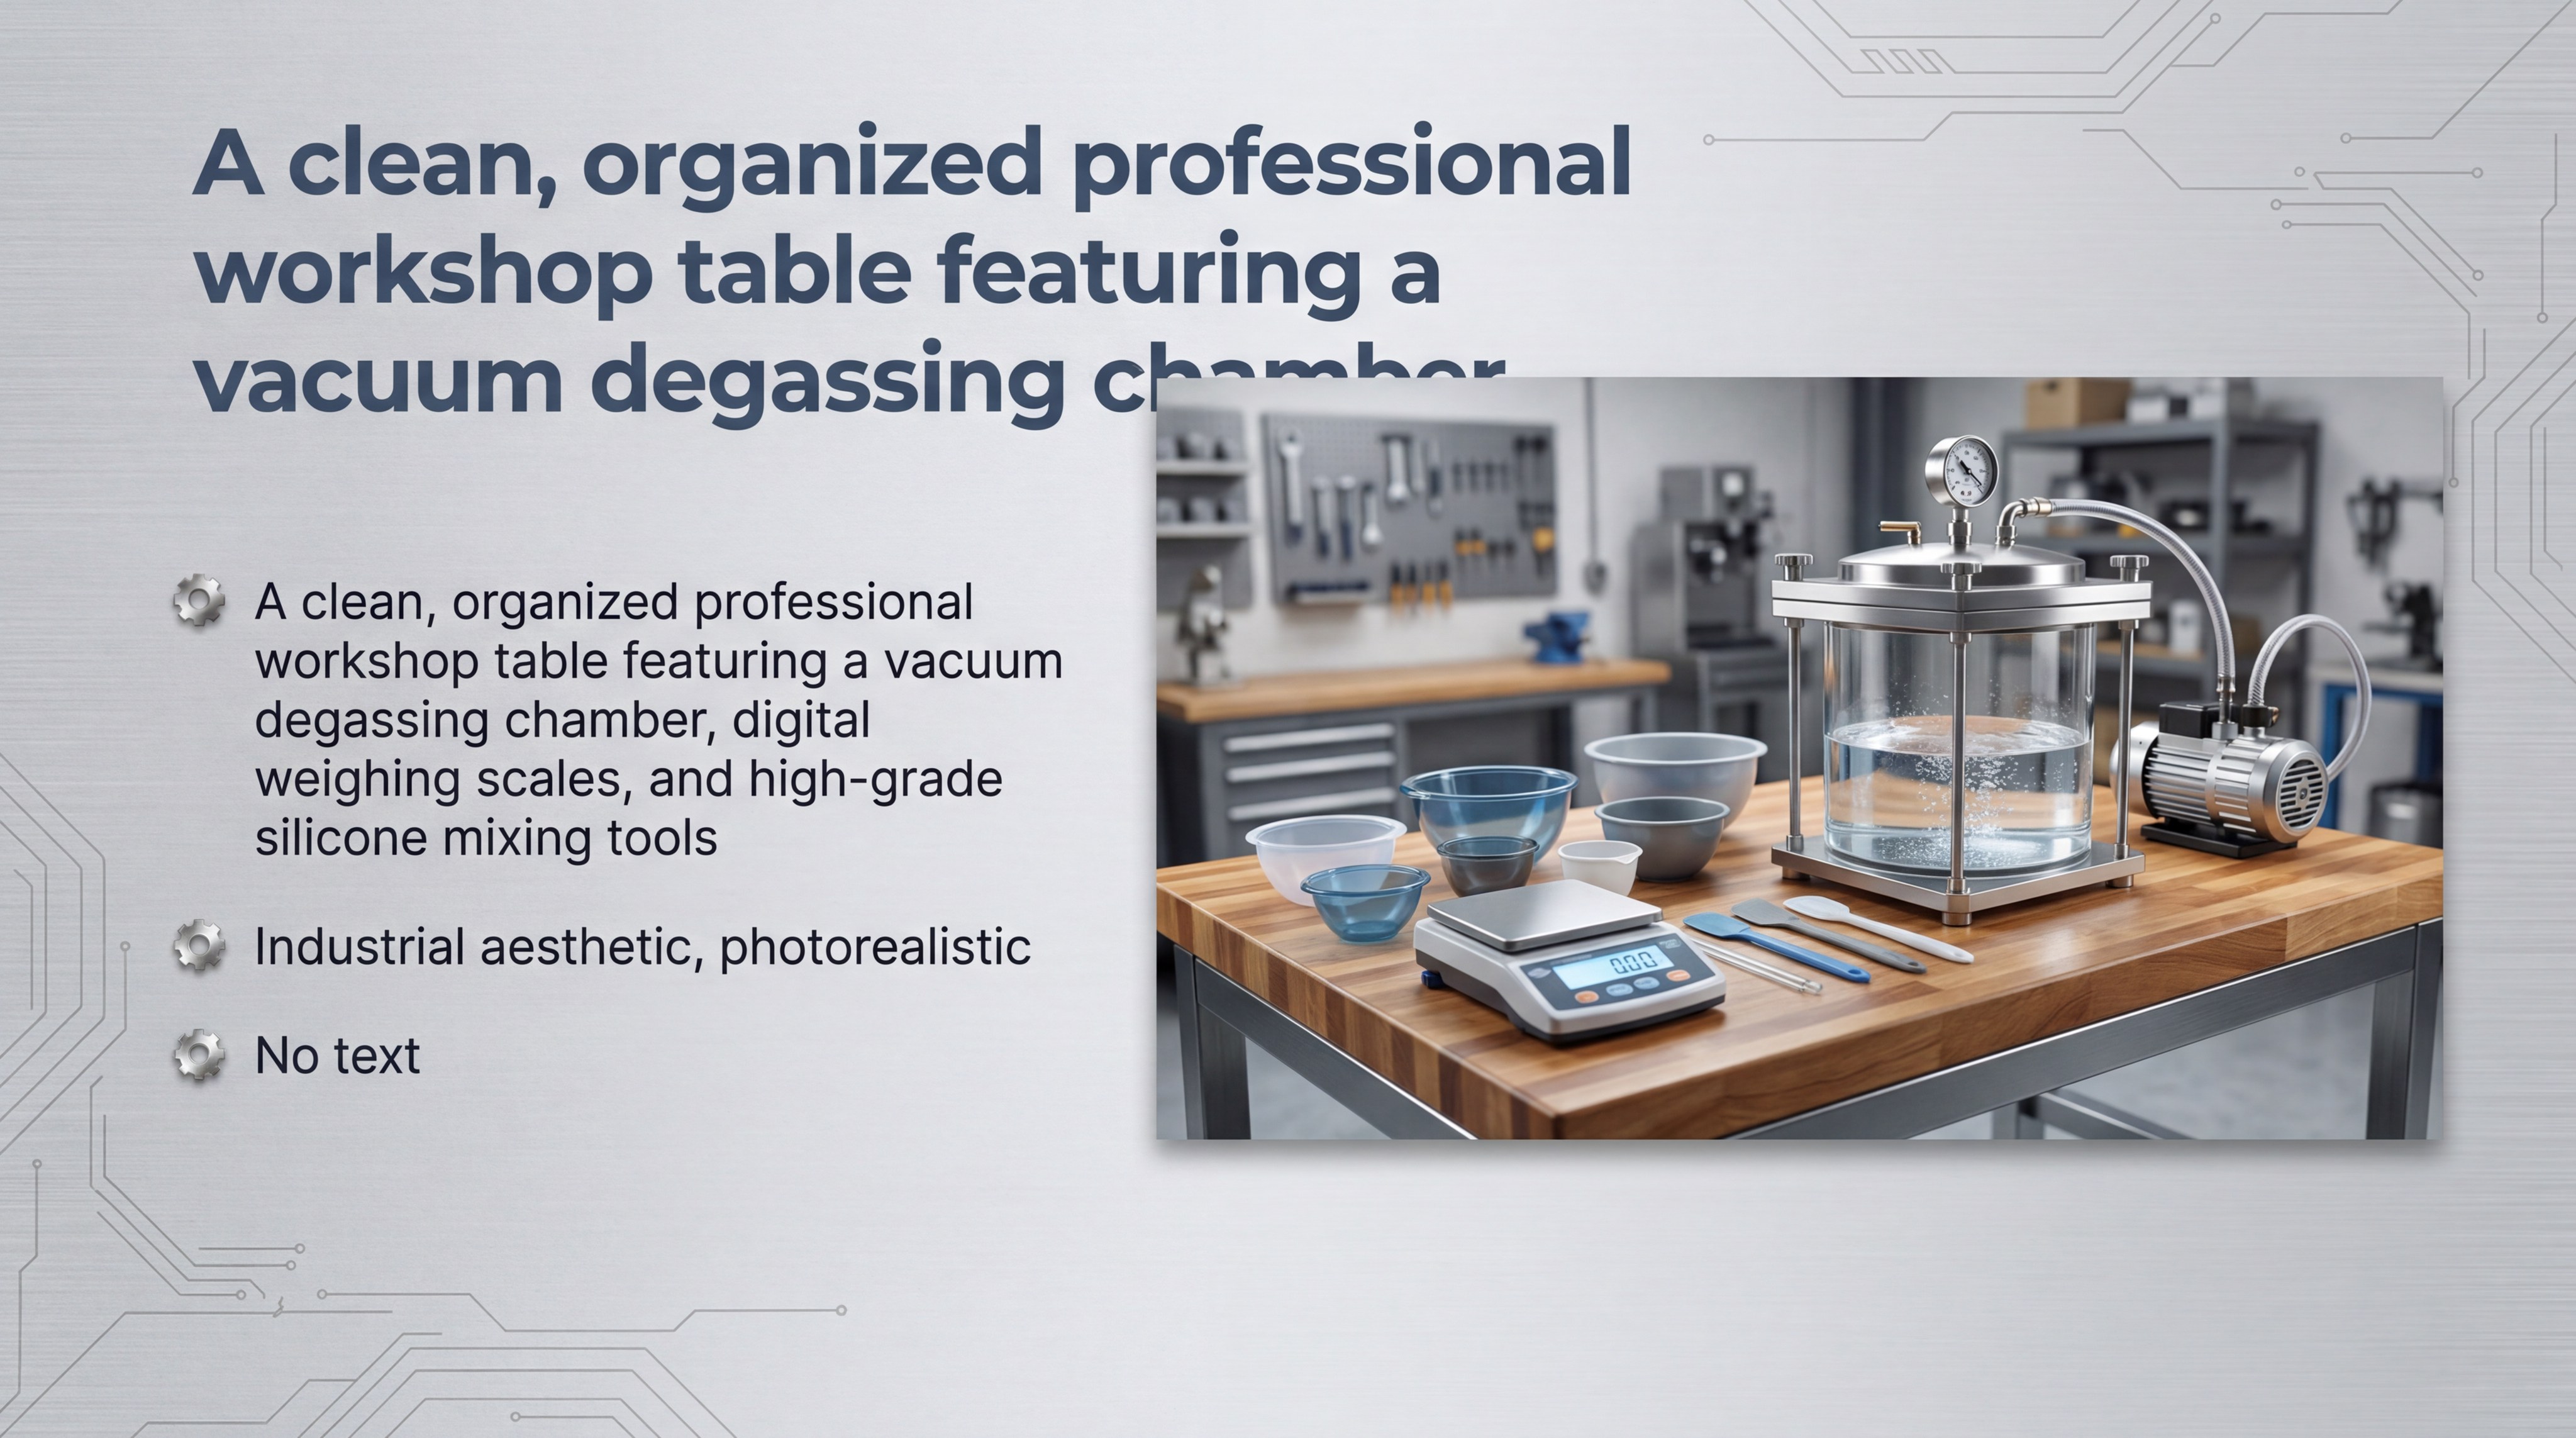
Professional mold making requires a vacuum degassing chamber, digital weighing scales, mixing containers, and high-quality RTV elastomers. Investing in these tools through Custom Silicone Manufacturing expertise ensures that your molds are free of air entrapment and structural flaws. Proper equipment is the foundation of a repeatable manufacturing process that yields industrial-grade results.
Essential materials and safety equipment
Accuracy is paramount when mixing two-part systems, so you must use digital scales to ensure the correct mix ratio. You also need safety gear, including gloves and eye protection, to handle the unreacted chemicals safely.
The secret to success?
- Vacuum chambers remove microscopic air bubbles.
- Clean mixing sticks prevent contamination.
- Graduated containers ensure precise volume measurements.
Selecting the right mold housing
The mold box acts as a containment vessel for the liquid silicone as it cures around your master pattern. You can use anything from custom-built MDF boxes to 3D printed housings designed specifically for your part’s geometry.
| Tool | Purpose | Requirement |
|---|---|---|
| Digital Scale | Precision measurement | Gram accuracy |
| Vacuum Chamber | Bubble removal | -29 inHg capability |
| Mold Box | Containment | Non-porous and leak-proof |
Using a professional equipment setup transforms mold making from a manual craft into a reliable engineering process.
Key Takeaway: High-quality tools, particularly vacuum degassing systems, are essential for producing dense, bubble-free molds that last through production cycles.
How do you design and 3D print master patterns?

You design and print master patterns by utilizing high-resolution stereolithography (SLA) technology to create a smooth, dimensionally accurate surface for the silicone to replicate. In Custom Silicone Manufacturing, the quality of your finished part is entirely dependent on the surface finish of the master. SLA printing provides the necessary resolution to eliminate visible layer lines that could otherwise become trapped in the mold.
Optimizing CAD for mold extraction
Successful molding starts at the design stage where you must integrate slight draft angles to facilitate easier part removal. Even though silicone is flexible, avoiding sharp interior corners will prolong the life of your tool by reducing stress points.
Think about this:
- Draft angles reduce friction during demolding.
- Filleted edges prevent silicone tearing.
- Clearances must account for material shrinkage.
Resin selection for surface detail
Choosing the right resin ensures that your master can withstand the chemical reaction of the curing silicone. High-temperature resins are often preferred because they maintain their shape even if the silicone curing process generates heat.
| Resin Feature | Professional Advantage |
|---|---|
| High Resolution | Eliminates sanding and post-processing |
| Chemical Stability | Prevents cure inhibition in the silicone |
| Rigidity | Ensures the master does not warp under pressure |
A perfectly printed master pattern serves as the high-precision template for every subsequent part produced in the mold.
Key Takeaway: High-resolution 3D printing is the most efficient way to create complex master patterns that meet the rigorous standards of industrial molding.
How do you select the right silicone chemistry?
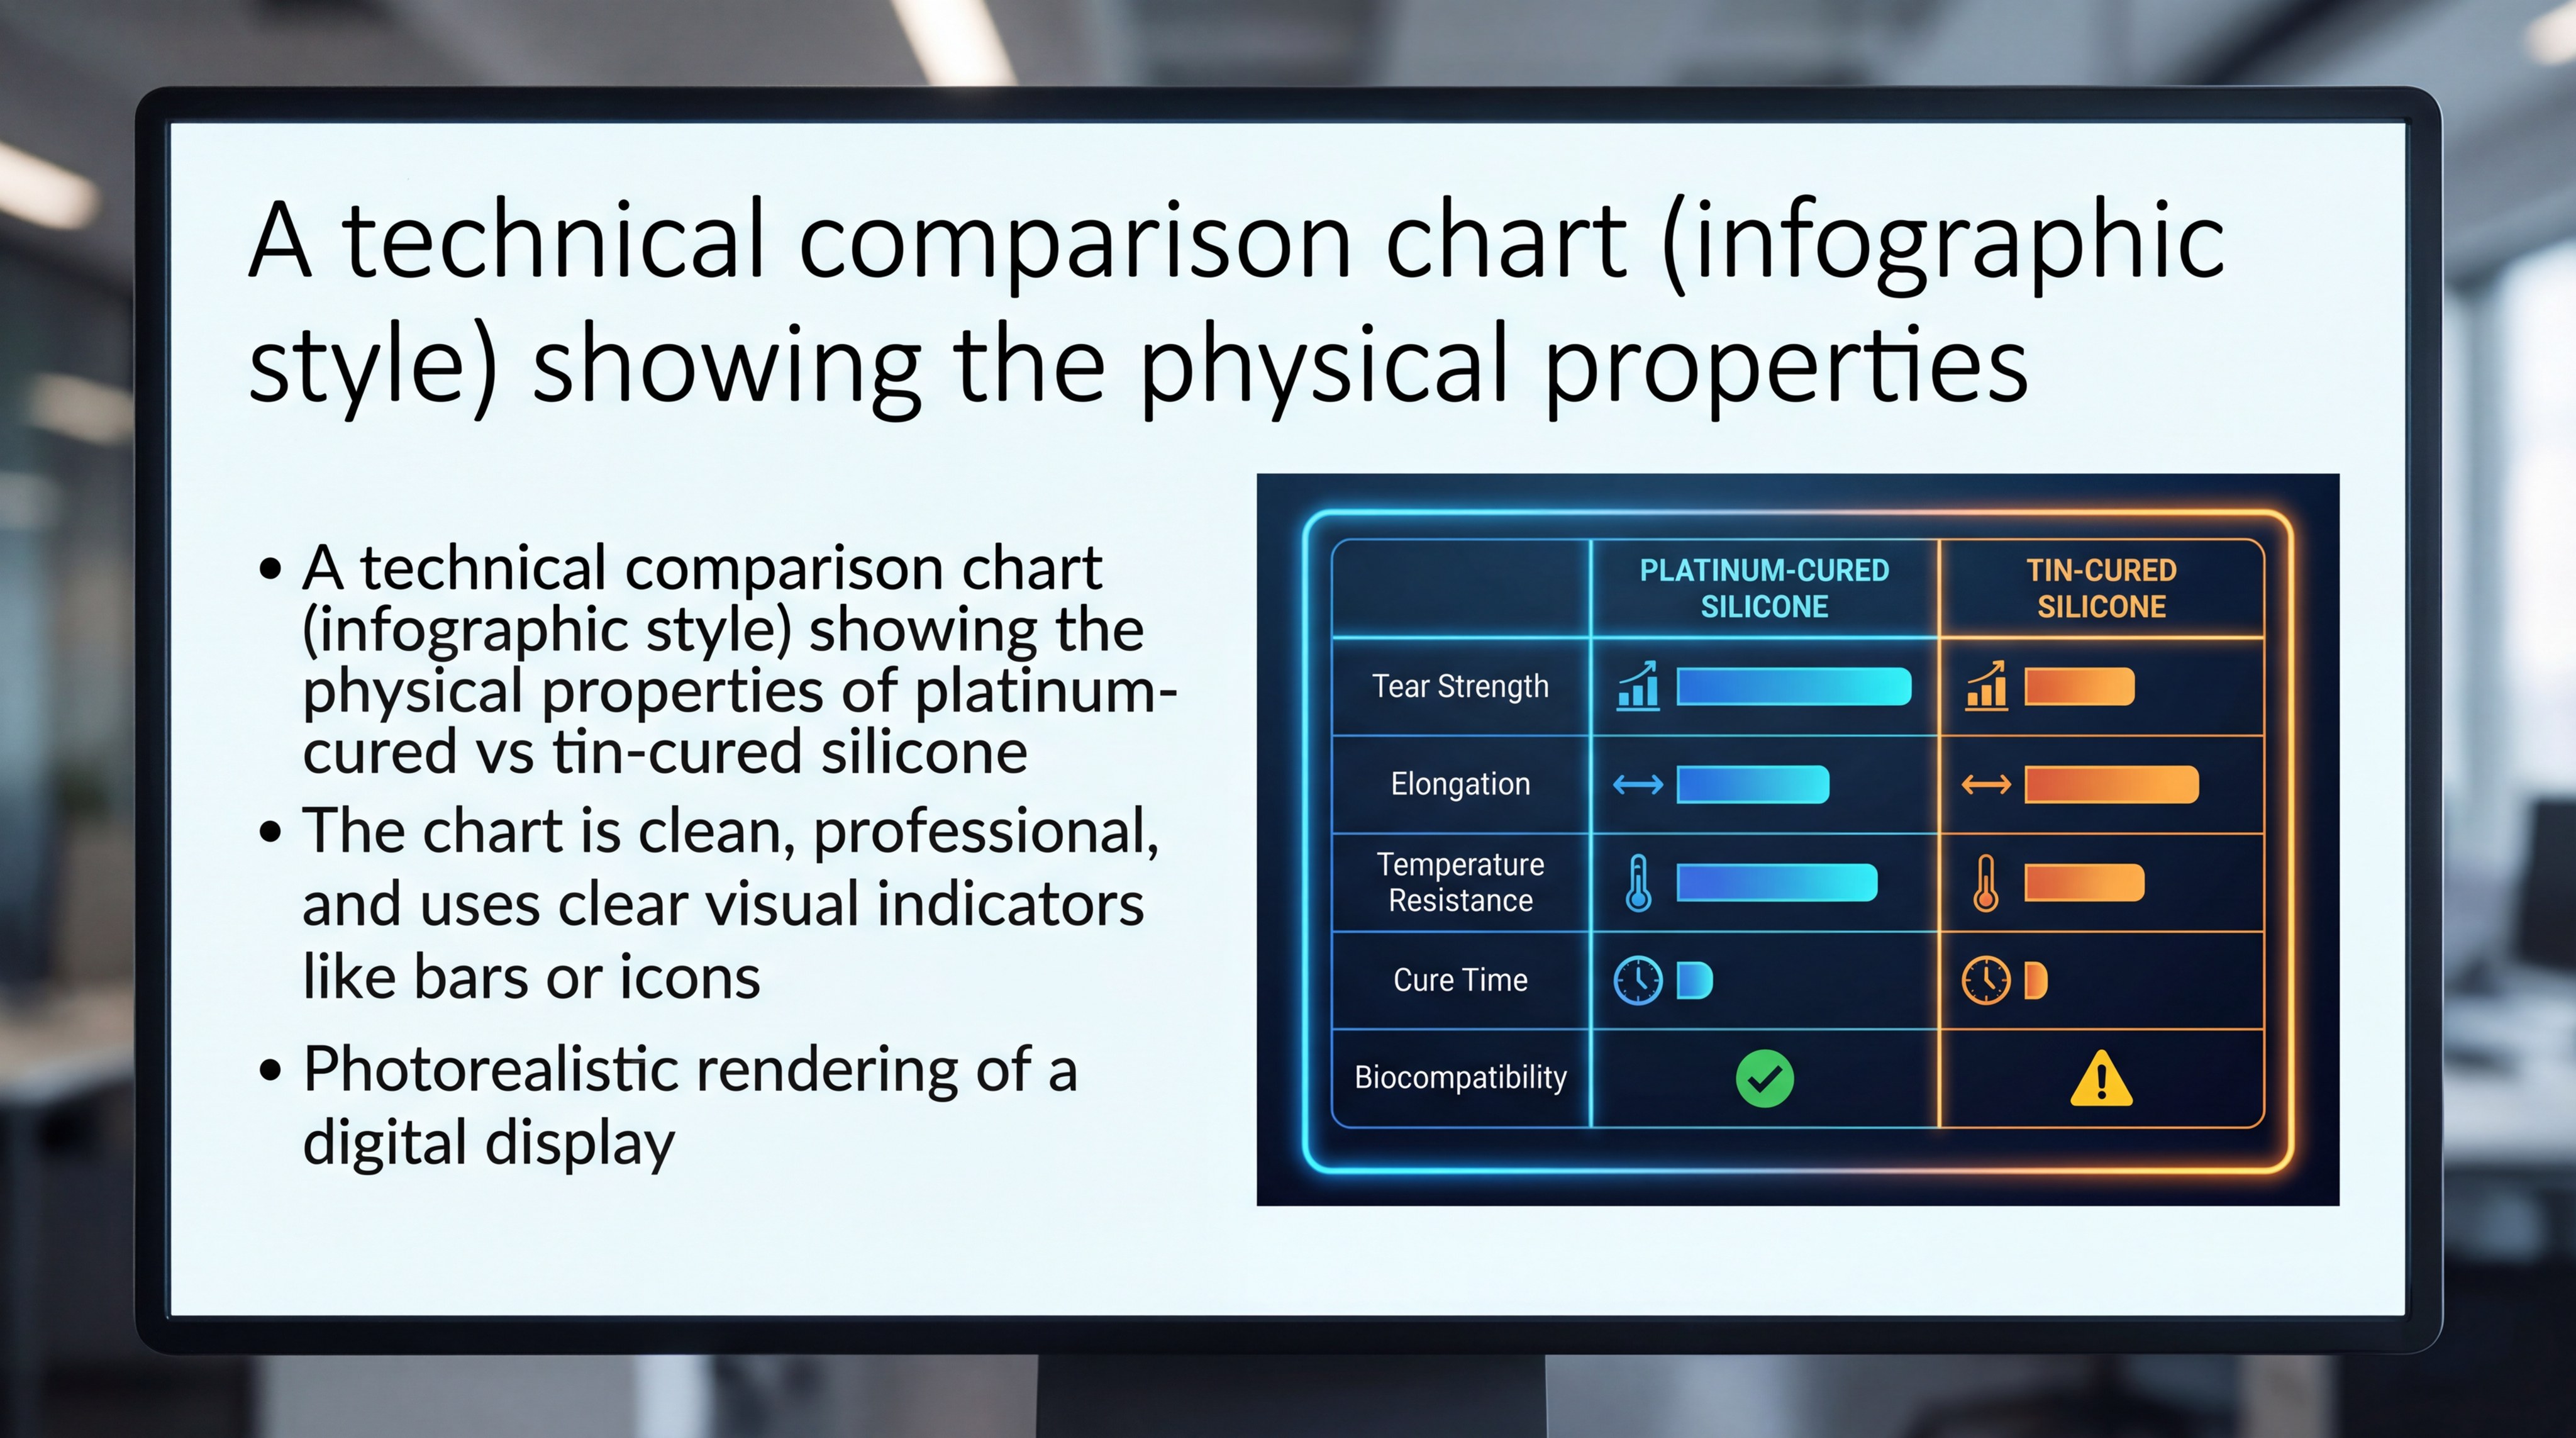
You select the right silicone chemistry by choosing between platinum-cured and tin-cured systems based on your requirements for dimensional stability and cost. For precision engineering and Custom Silicone Manufacturing, platinum-catalyzed silicones are the standard due to their near-zero shrinkage. Understanding these chemical differences ensures that your final parts meet the required tolerances for your specific application.
Platinum vs. tin-catalyzed systems
Platinum-cured silicones offer superior longevity and are often certified for medical or food-grade applications. Tin-cured systems are more budget-friendly but tend to shrink over time, making them less ideal for parts requiring a tight mechanical fit.
What’s the catch?
- Platinum systems are sensitive to sulfur contamination.
- Tin systems have a shorter shelf life for the tool.
- Both require precise 1:1 or 10:1 mix ratios.
Compliance and material safety
When manufacturing for regulated industries, you must select silicones that comply with FDA or ISO standards. Always review the technical data sheets to ensure the material meets the environmental and safety demands of your end-use case.
| Chemistry | Shrinkage Rate | Expected Lifespan |
|---|---|---|
| Platinum-Cured | < 0.1% | High (200+ cycles) |
| Tin-Cured | 0.5% – 1.0% | Moderate (50-75 cycles) |
Selecting the appropriate chemical catalyst is a strategic decision that impacts both the cost-efficiency and the precision of your production run.
Key Takeaway: Platinum-cured silicones are the preferred choice for professional applications where dimensional accuracy and material compliance are non-negotiable.
How do you construct a precise mold box?
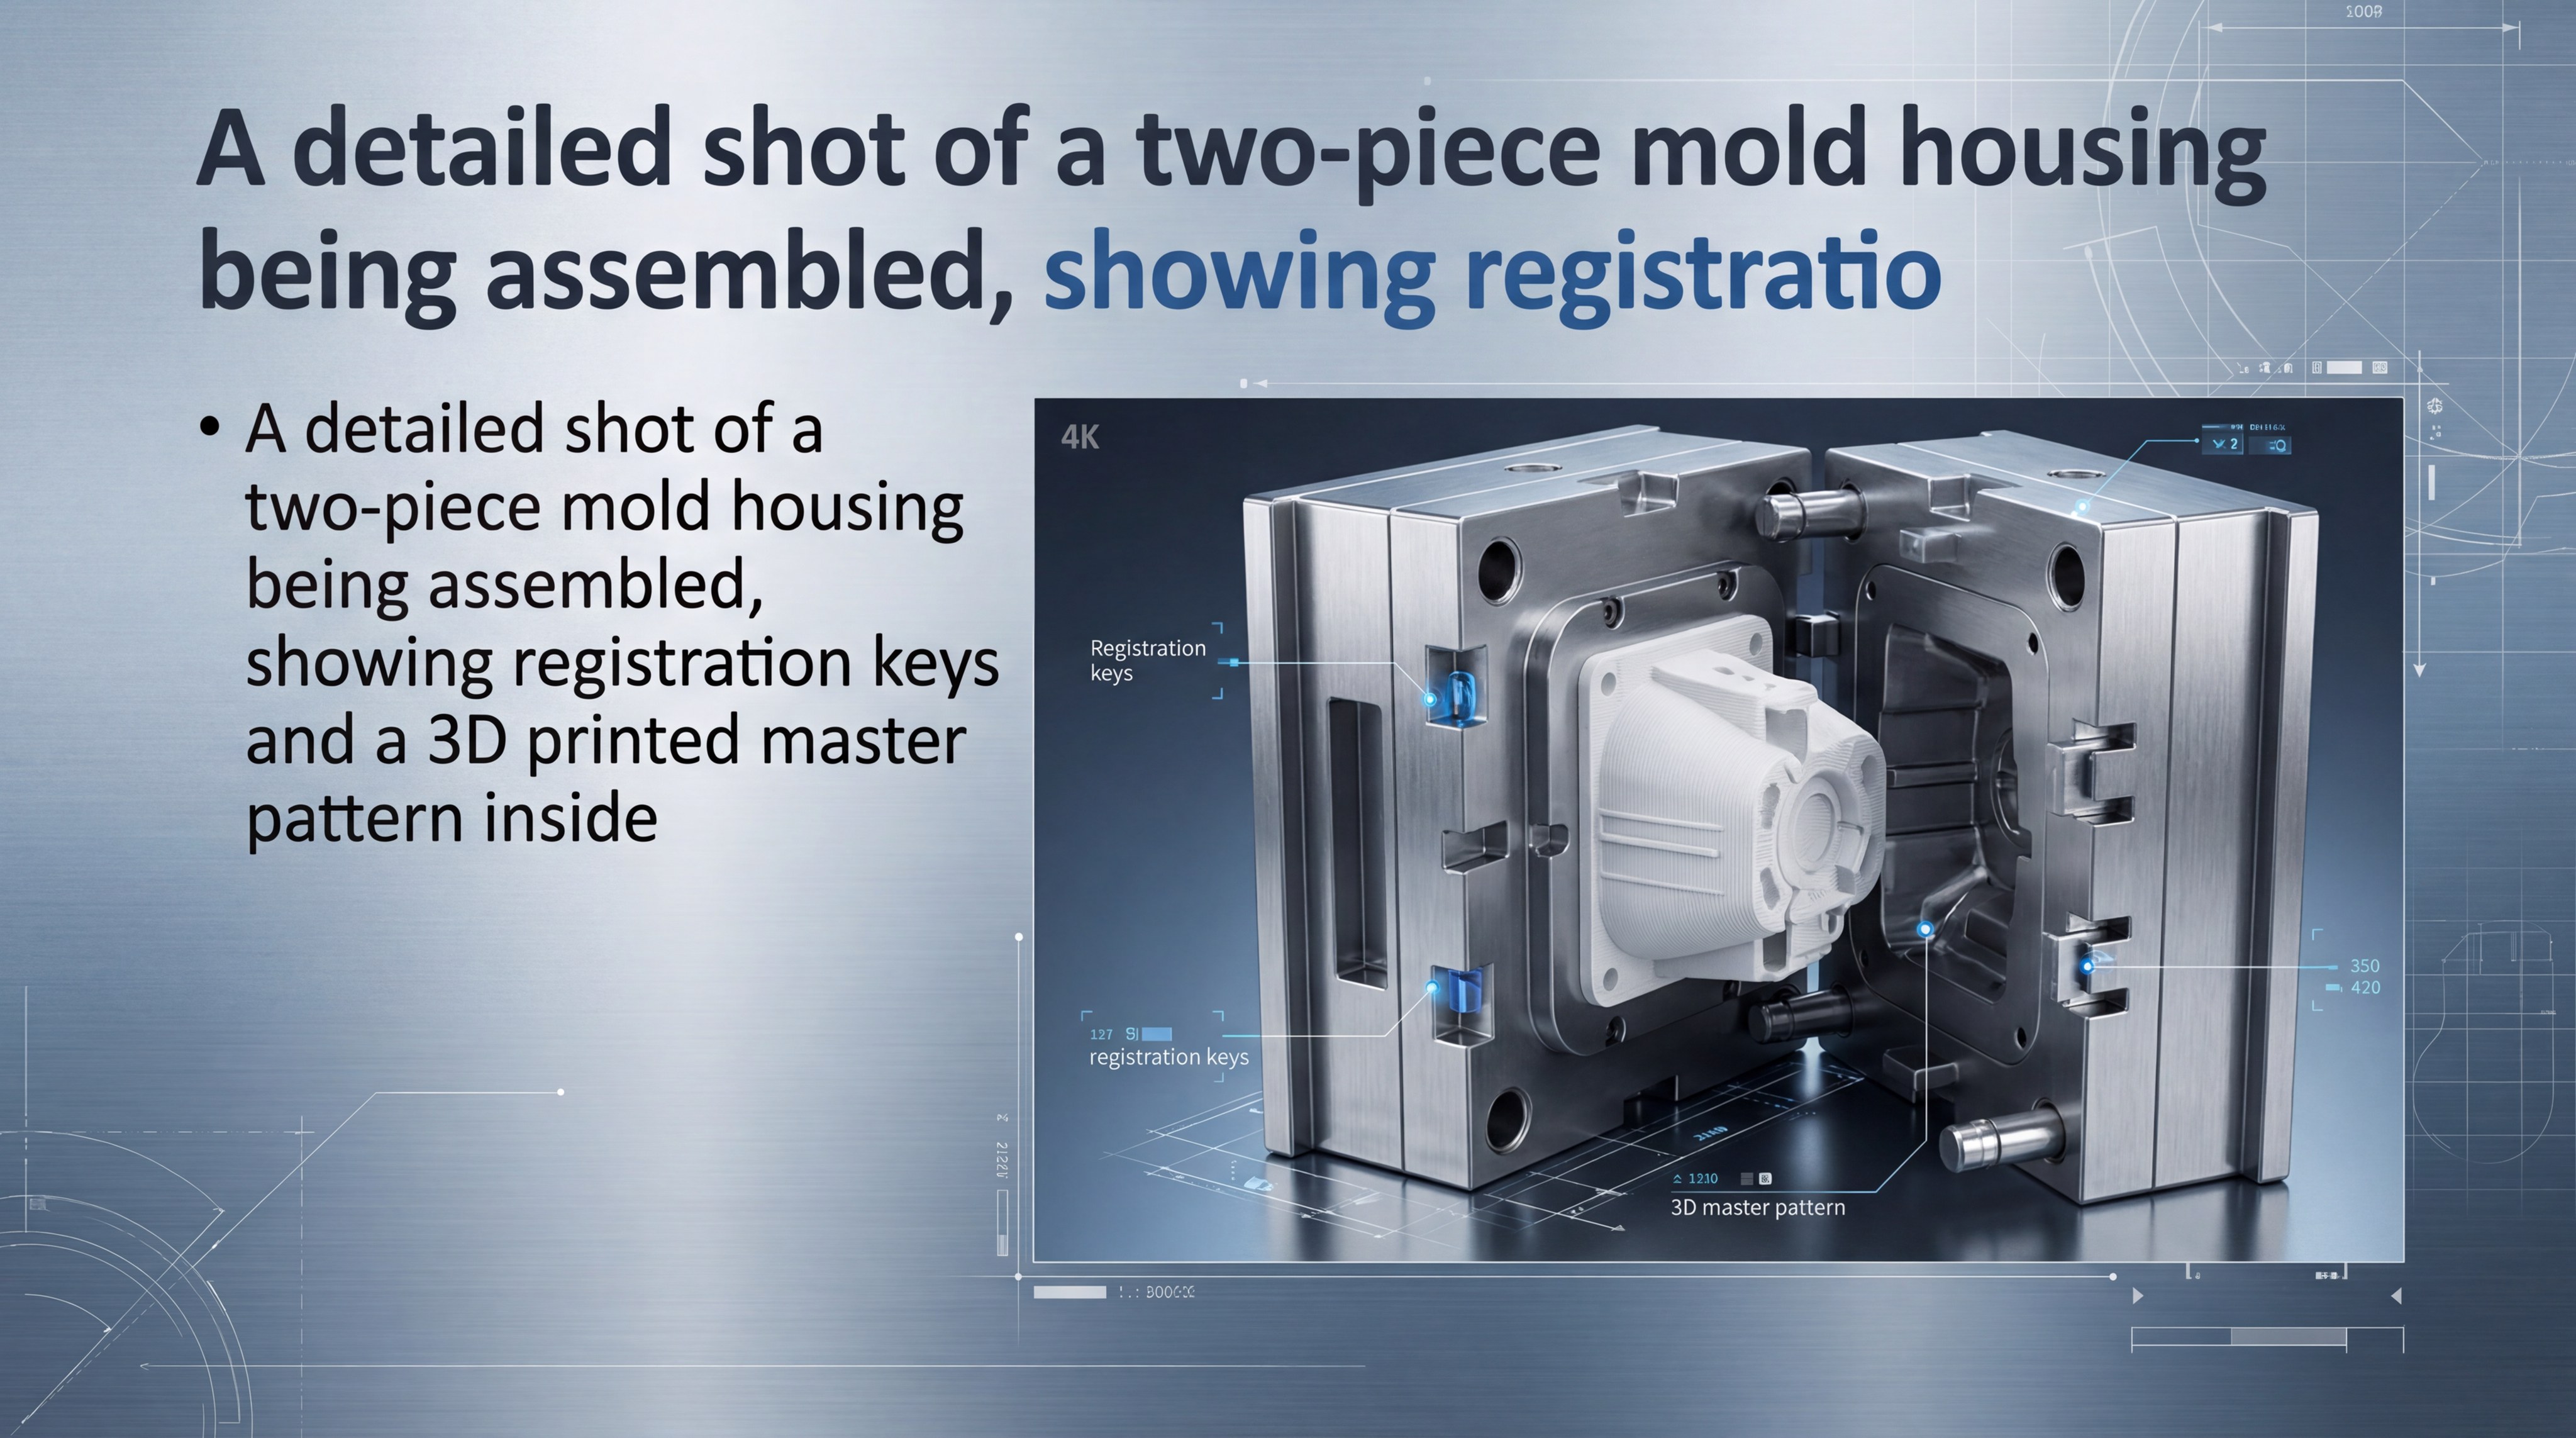
To construct a precise mold box, you must assemble a leak-proof housing that maintains a consistent clearance of at least one centimeter around all sides of your master pattern. In Custom Silicone Manufacturing, the mold box determines the final exterior dimensions of your tool and ensures structural integrity. A well-built housing prevents silicone wastage and provides a stable base for the curing process.
Setting up one-piece vs. two-piece housing
One-piece molds are simpler and work best for parts with a flat side, acting essentially like an open tray. Two-piece molds are required for fully 3D objects and must include registration keys to ensure the two halves align perfectly.
The best part?
- Registration keys prevent shifting during casting.
- Removable walls make demolding much easier.
- Standardized sizes allow for tool reuse.
Applying release agents effectively
A thin, uniform layer of mold release is critical to prevent the liquid silicone from bonding to the housing or the master pattern. You should apply the release agent in light mists and allow it to dry completely before pouring the elastomer.
| Component | Function | Material Choice |
|---|---|---|
| Housing Walls | Containment | Acrylic, MDF, or 3D Resin |
| Base Plate | Flat Foundation | Polished glass or plastic |
| Sealant | Leak prevention | Hot glue or industrial wax |
Precision in the construction of the mold box directly correlates to the ease of use and the lifespan of the finished silicone tool.
Key Takeaway: A secure, well-aligned mold box is necessary to contain the liquid silicone and produce a tool with consistent wall thickness.
How do you mix and pour silicone for best results?

You mix and pour silicone for best results by using a “high-pour” technique to create a thin stream that breaks air bubbles as the material fills the mold box from the bottom up. Following professional Custom Silicone Manufacturing protocols requires you to mix the two parts slowly to avoid introducing excess air. The goal is a steady, laminar flow that gently displaces air around the master pattern’s intricate features.
Degassing techniques for bubble-free molds
Utilizing a vacuum chamber is the only way to guarantee a truly professional, bubble-free mold for high-performance parts. The vacuum pulls trapped air to the surface, causing the liquid silicone to “boil” and collapse into a dense, solid mass.
Ready for this?
- Degassing takes approximately 5 to 10 minutes.
- The silicone volume will expand significantly under vacuum.
- Professional results require at least -29 inches of mercury.
Achieving uniform pouring flow
When pouring, always aim for the lowest point of the mold box and allow the silicone to rise naturally around the master. This technique prevents air from becoming trapped in “blind” holes or sharp recesses that might be present in your design.
| Pouring Step | Objective | Technique |
|---|---|---|
| Thin Stream | Break larger bubbles | Pour from 12+ inches high |
| Bottom-Up | Avoid air pockets | Fill lowest corner first |
| Over-Pouring | Ensure coverage | Cover master by 10mm+ |
Proper pouring technique is a learned skill that separates amateur hobbyist results from professional industrial-grade molding.
Key Takeaway: Combining vacuum degassing with a controlled, high-pour technique ensures your silicone mold captures every detail without surface defects.
How do you demold and prepare for casting?
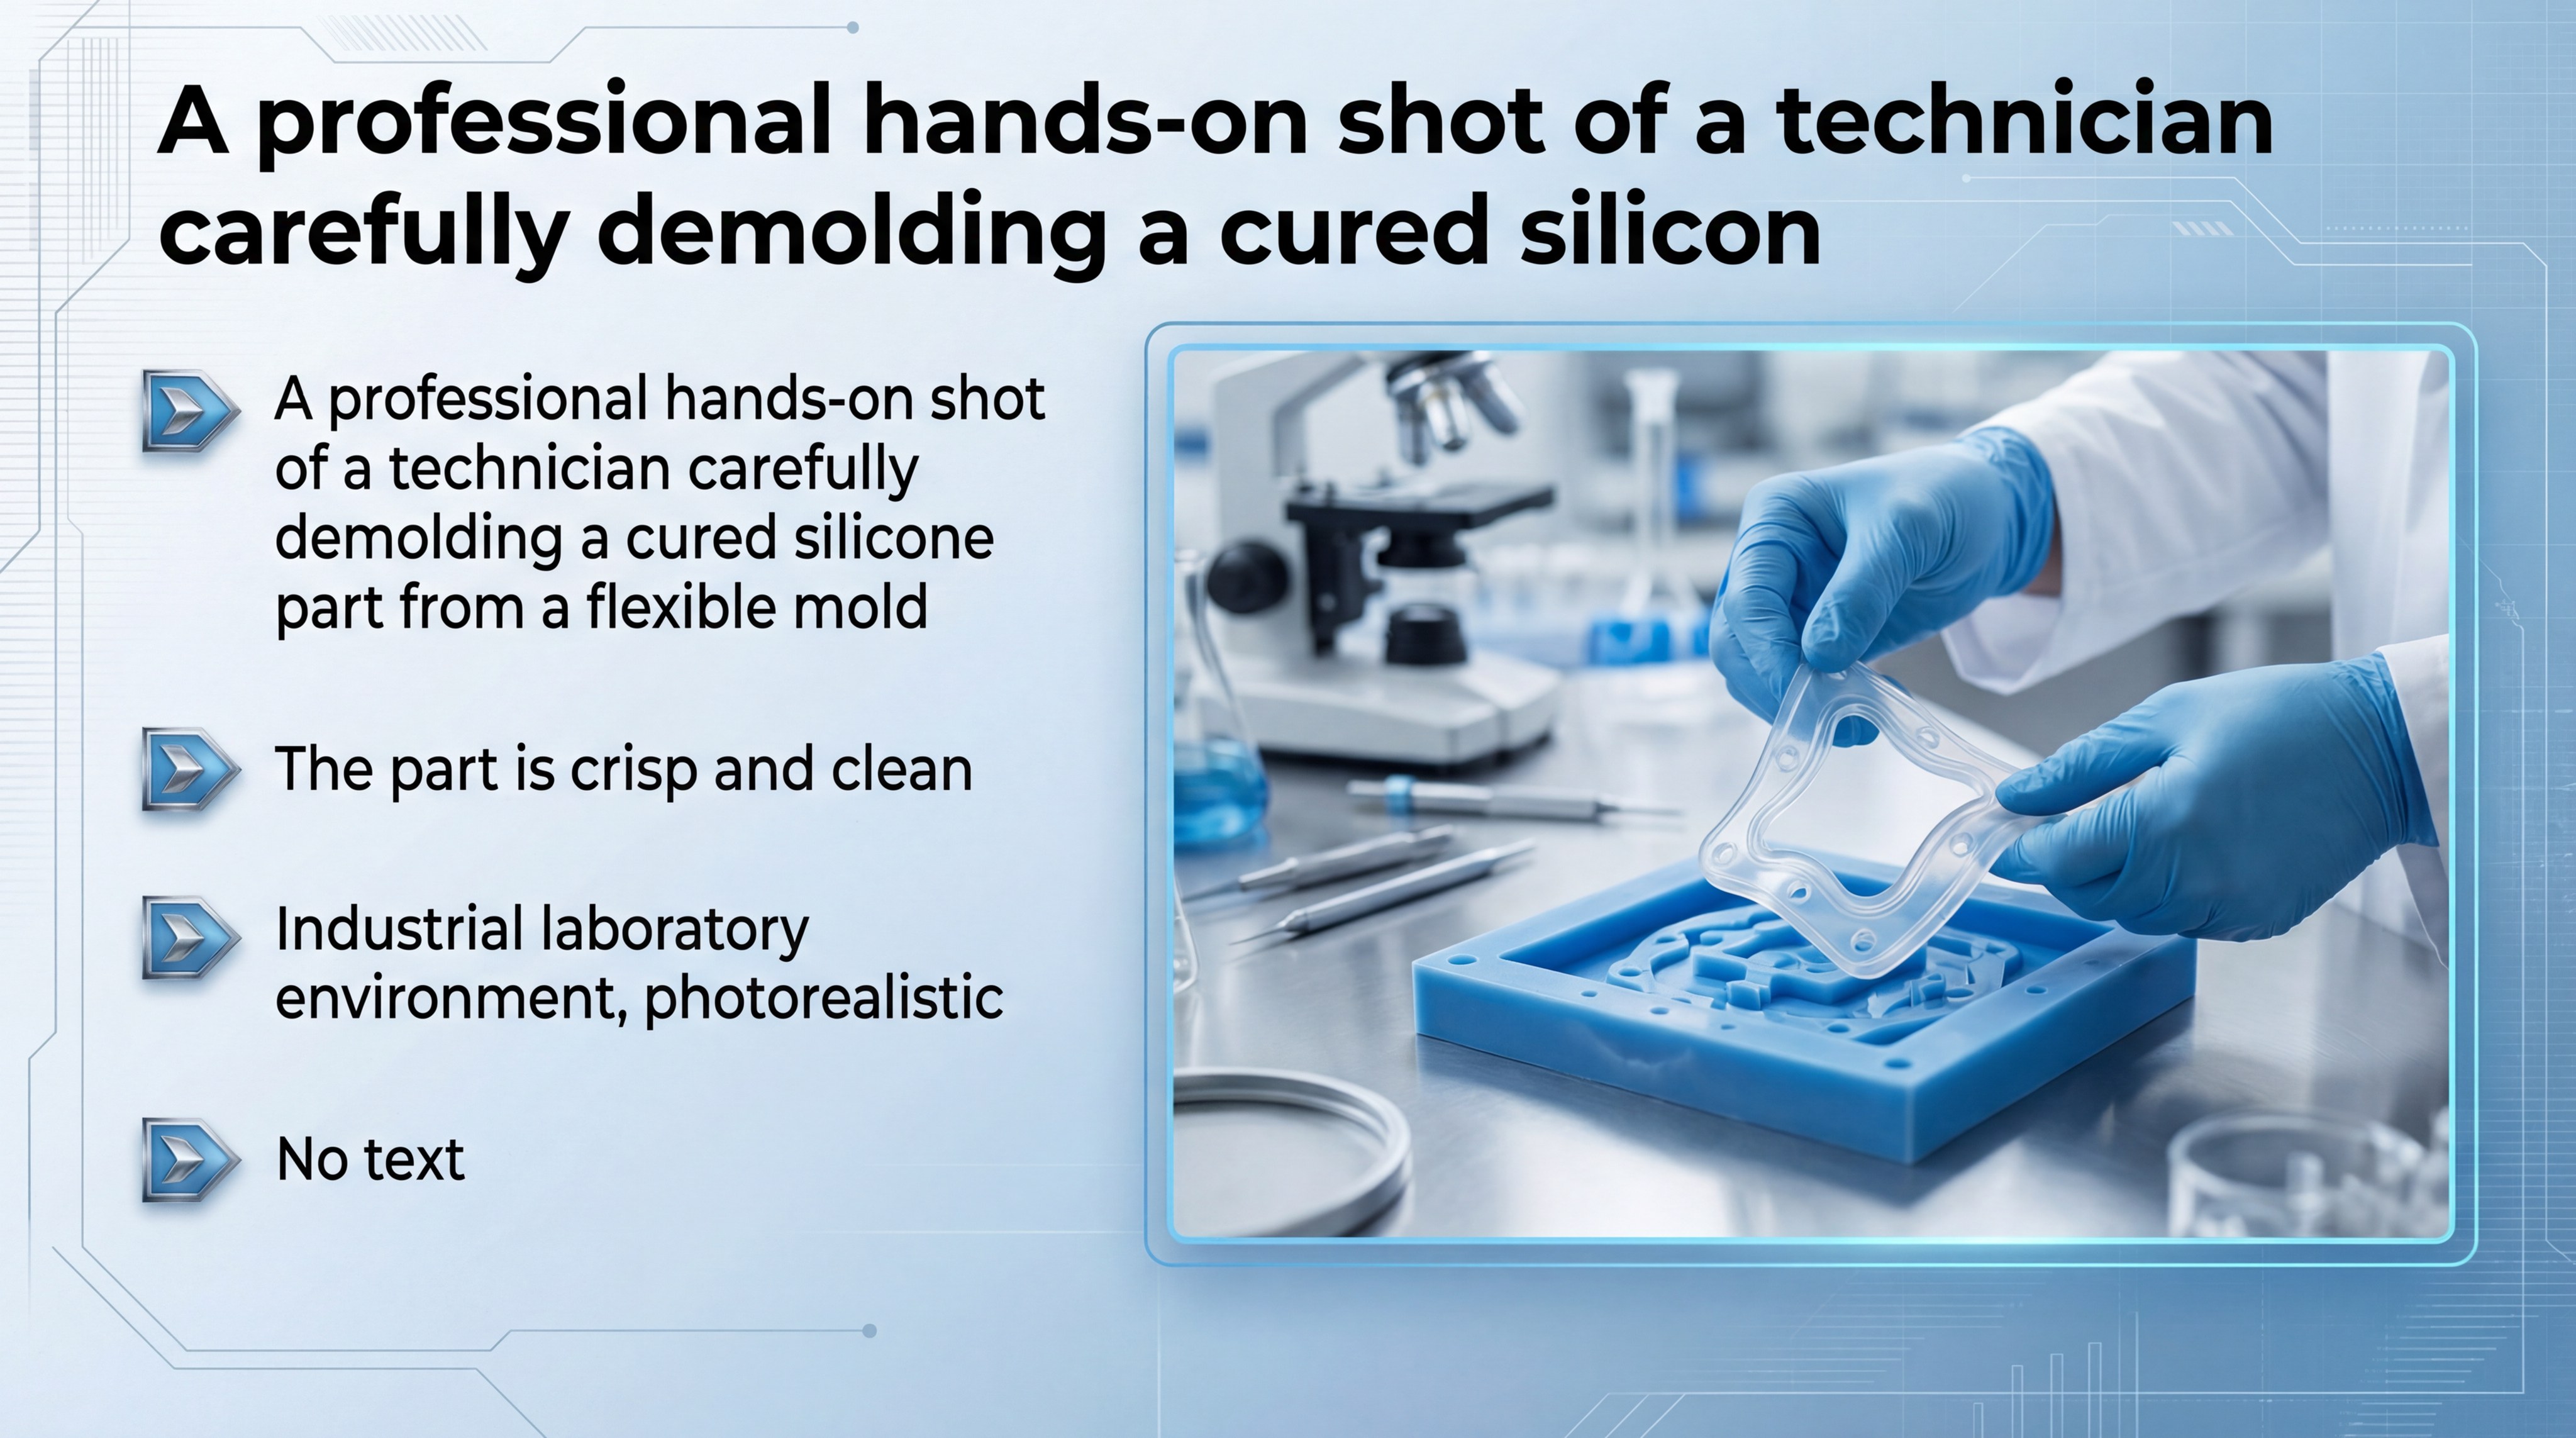
You demold by carefully separating the housing walls and extracting the master pattern once the silicone has reached its full Shore hardness according to the manufacturer’s cure time. In Custom Silicone Manufacturing, the demolding stage is where you verify the integrity of the tool and prepare it for its first production cycle. Careful handling during this phase prevents permanent deformation of the flexible mold.
Safe removal of the master pattern
Start by prying the mold box walls away and then gently flexing the silicone to break the surface tension against the master. If you designed the tool with beveled pry points, you can use a flat tool to assist in the separation of two-piece molds.
Here is why:
- Rushing demolding can cause permanent mold set.
- Compressed air can help separate tight fits.
- Inspecting for defects now prevents wasted casting material.
Mold maintenance and storage
To maximize the number of parts you can produce, you must clean the mold with mild soap and store it in a cool, dry environment. Avoid stacking heavy objects on top of your molds, as prolonged pressure can lead to warped geometries.
| Maintenance Task | Frequency | Benefit |
|---|---|---|
| Cleaning | After every 10 cycles | Removes resin buildup |
| Re-Applying Release | Before every cast | Eases part extraction |
| Flat Storage | Always | Prevents permanent warping |
Proper maintenance protocols can double the effective lifespan of your silicone tooling, significantly lowering your per-part costs.
Key Takeaway: Gentle extraction and disciplined storage habits are the keys to maintaining the dimensional accuracy of your silicone molds over time.
How does custom silicone manufacturing scale production?
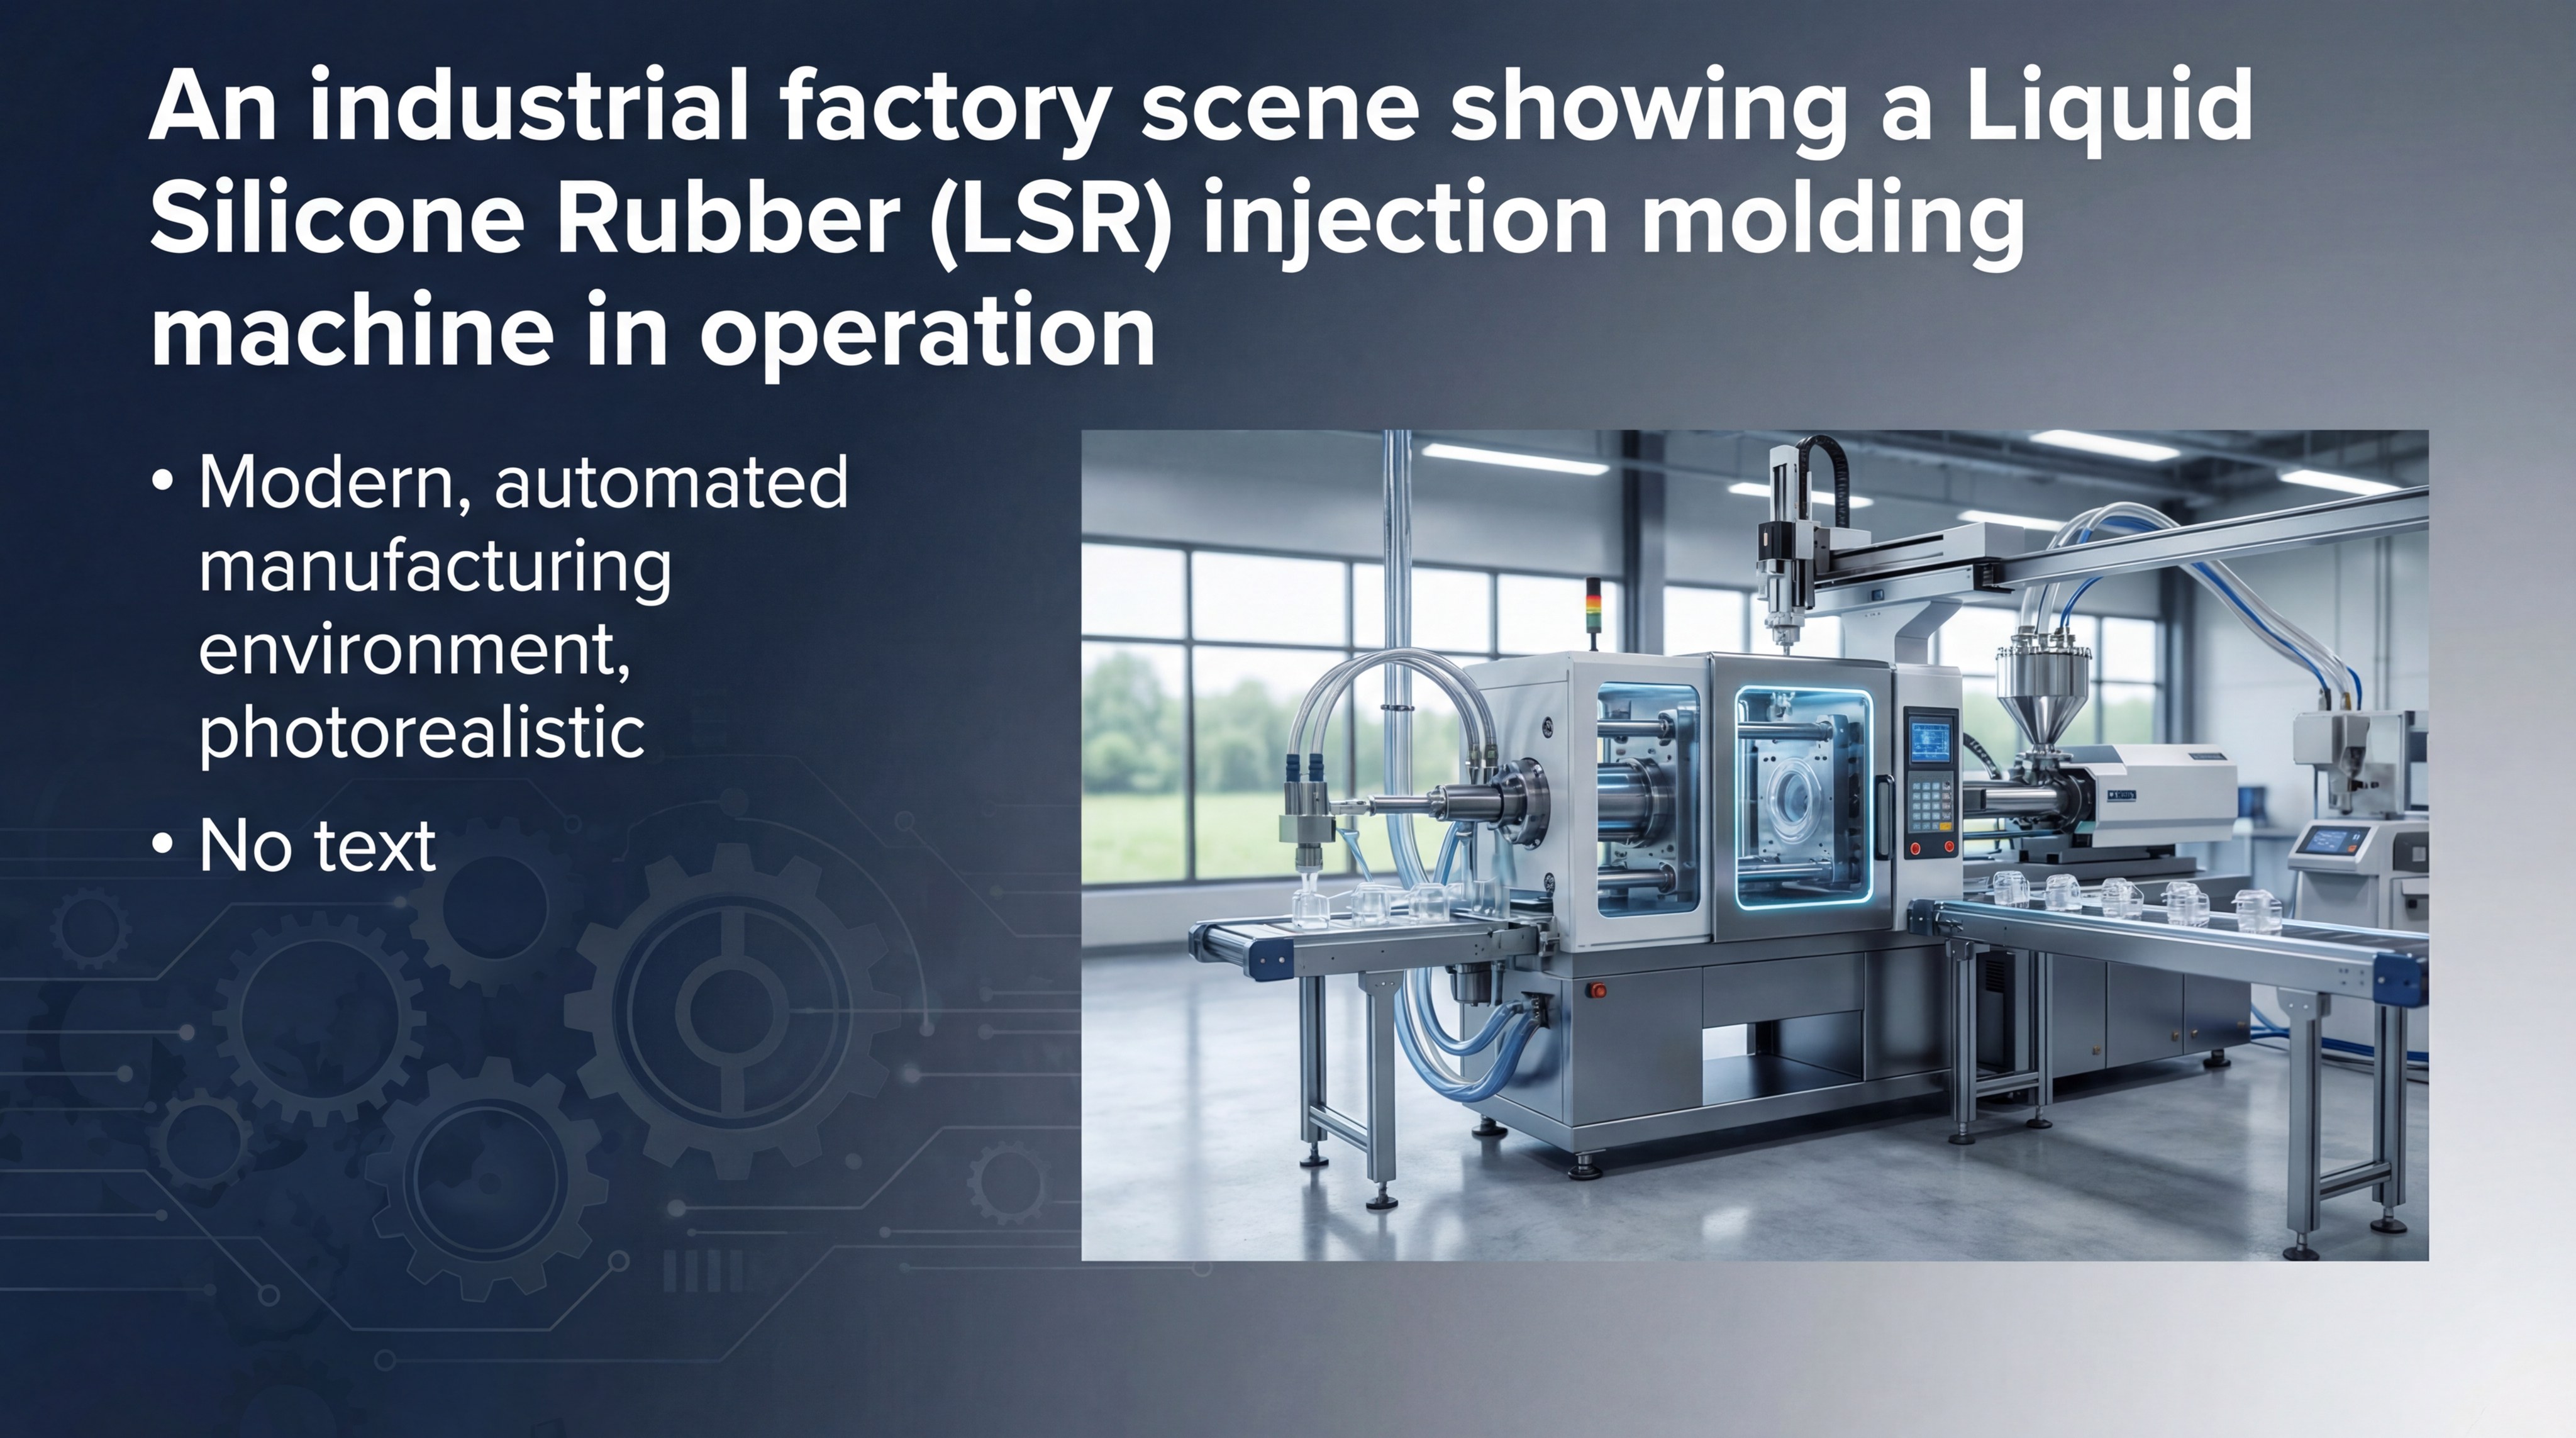
Custom silicone manufacturing scales production by transitioning from manual RTV casting to automated Liquid Silicone Rubber (LSR) injection molding for high-volume requirements. As you read through our Custom Silicone Manufacturing insights, you will see that LSR uses permanent metal tools and high-pressure injection to produce thousands of parts with extreme consistency. This shift allows you to move from prototyping to mass market delivery seamlessly.
Transitioning to LSR injection molding
LSR injection molding uses a two-component liquid system that is pumped through a static mixer into a heated mold cavity. Unlike RTV molding, this process is measured in seconds rather than hours, making it ideal for large-scale production.
The best part?
- Cycle times are incredibly fast.
- Flash is minimized through precision gating.
- Material waste is significantly reduced.
Optimizing multi-cavity tool designs
To further scale, you can utilize multi-cavity molds that produce dozens of parts in a single injection cycle. This optimization drastically lowers the labor cost per unit and maximizes the throughput of the manufacturing facility.
| Production Stage | Volume Range | Primary Method |
|---|---|---|
| Prototyping | 1 – 25 parts | 3D Printed Masters + RTV |
| Bridge Production | 25 – 500 parts | Multi-Cavity RTV Molds |
| Mass Production | 5,000+ parts | LSR Injection Molding |
Scaling requires a deep understanding of how material properties and tooling costs evolve as your production volume increases.
Key Takeaway: Professional manufacturing scales by matching the molding technology to your specific volume and precision requirements.
How do you ensure longevity in custom manufacturing?
You ensure longevity by implementing rigorous quality control protocols, including durometer testing and dimensional verification, to monitor mold fatigue over time. In Custom Silicone Manufacturing, maintaining batch-to-batch consistency is vital for parts used in critical applications like medical or automotive engineering. Regular inspection ensures that every part produced meets the original engineering specifications until the tool reaches its end-of-life.
Managing mold fatigue and wear
Every silicone mold has a finite lifespan, after which the surface may begin to tear or lose its detail fidelity. By tracking the number of cycles and performing visual inspections, you can anticipate when a tool needs replacement before quality drops.
Look at the evidence:
- Surface tackiness indicates chemical breakdown.
- Loss of detail is the first sign of mold wear.
- Increased flash suggests the mold is no longer sealing.
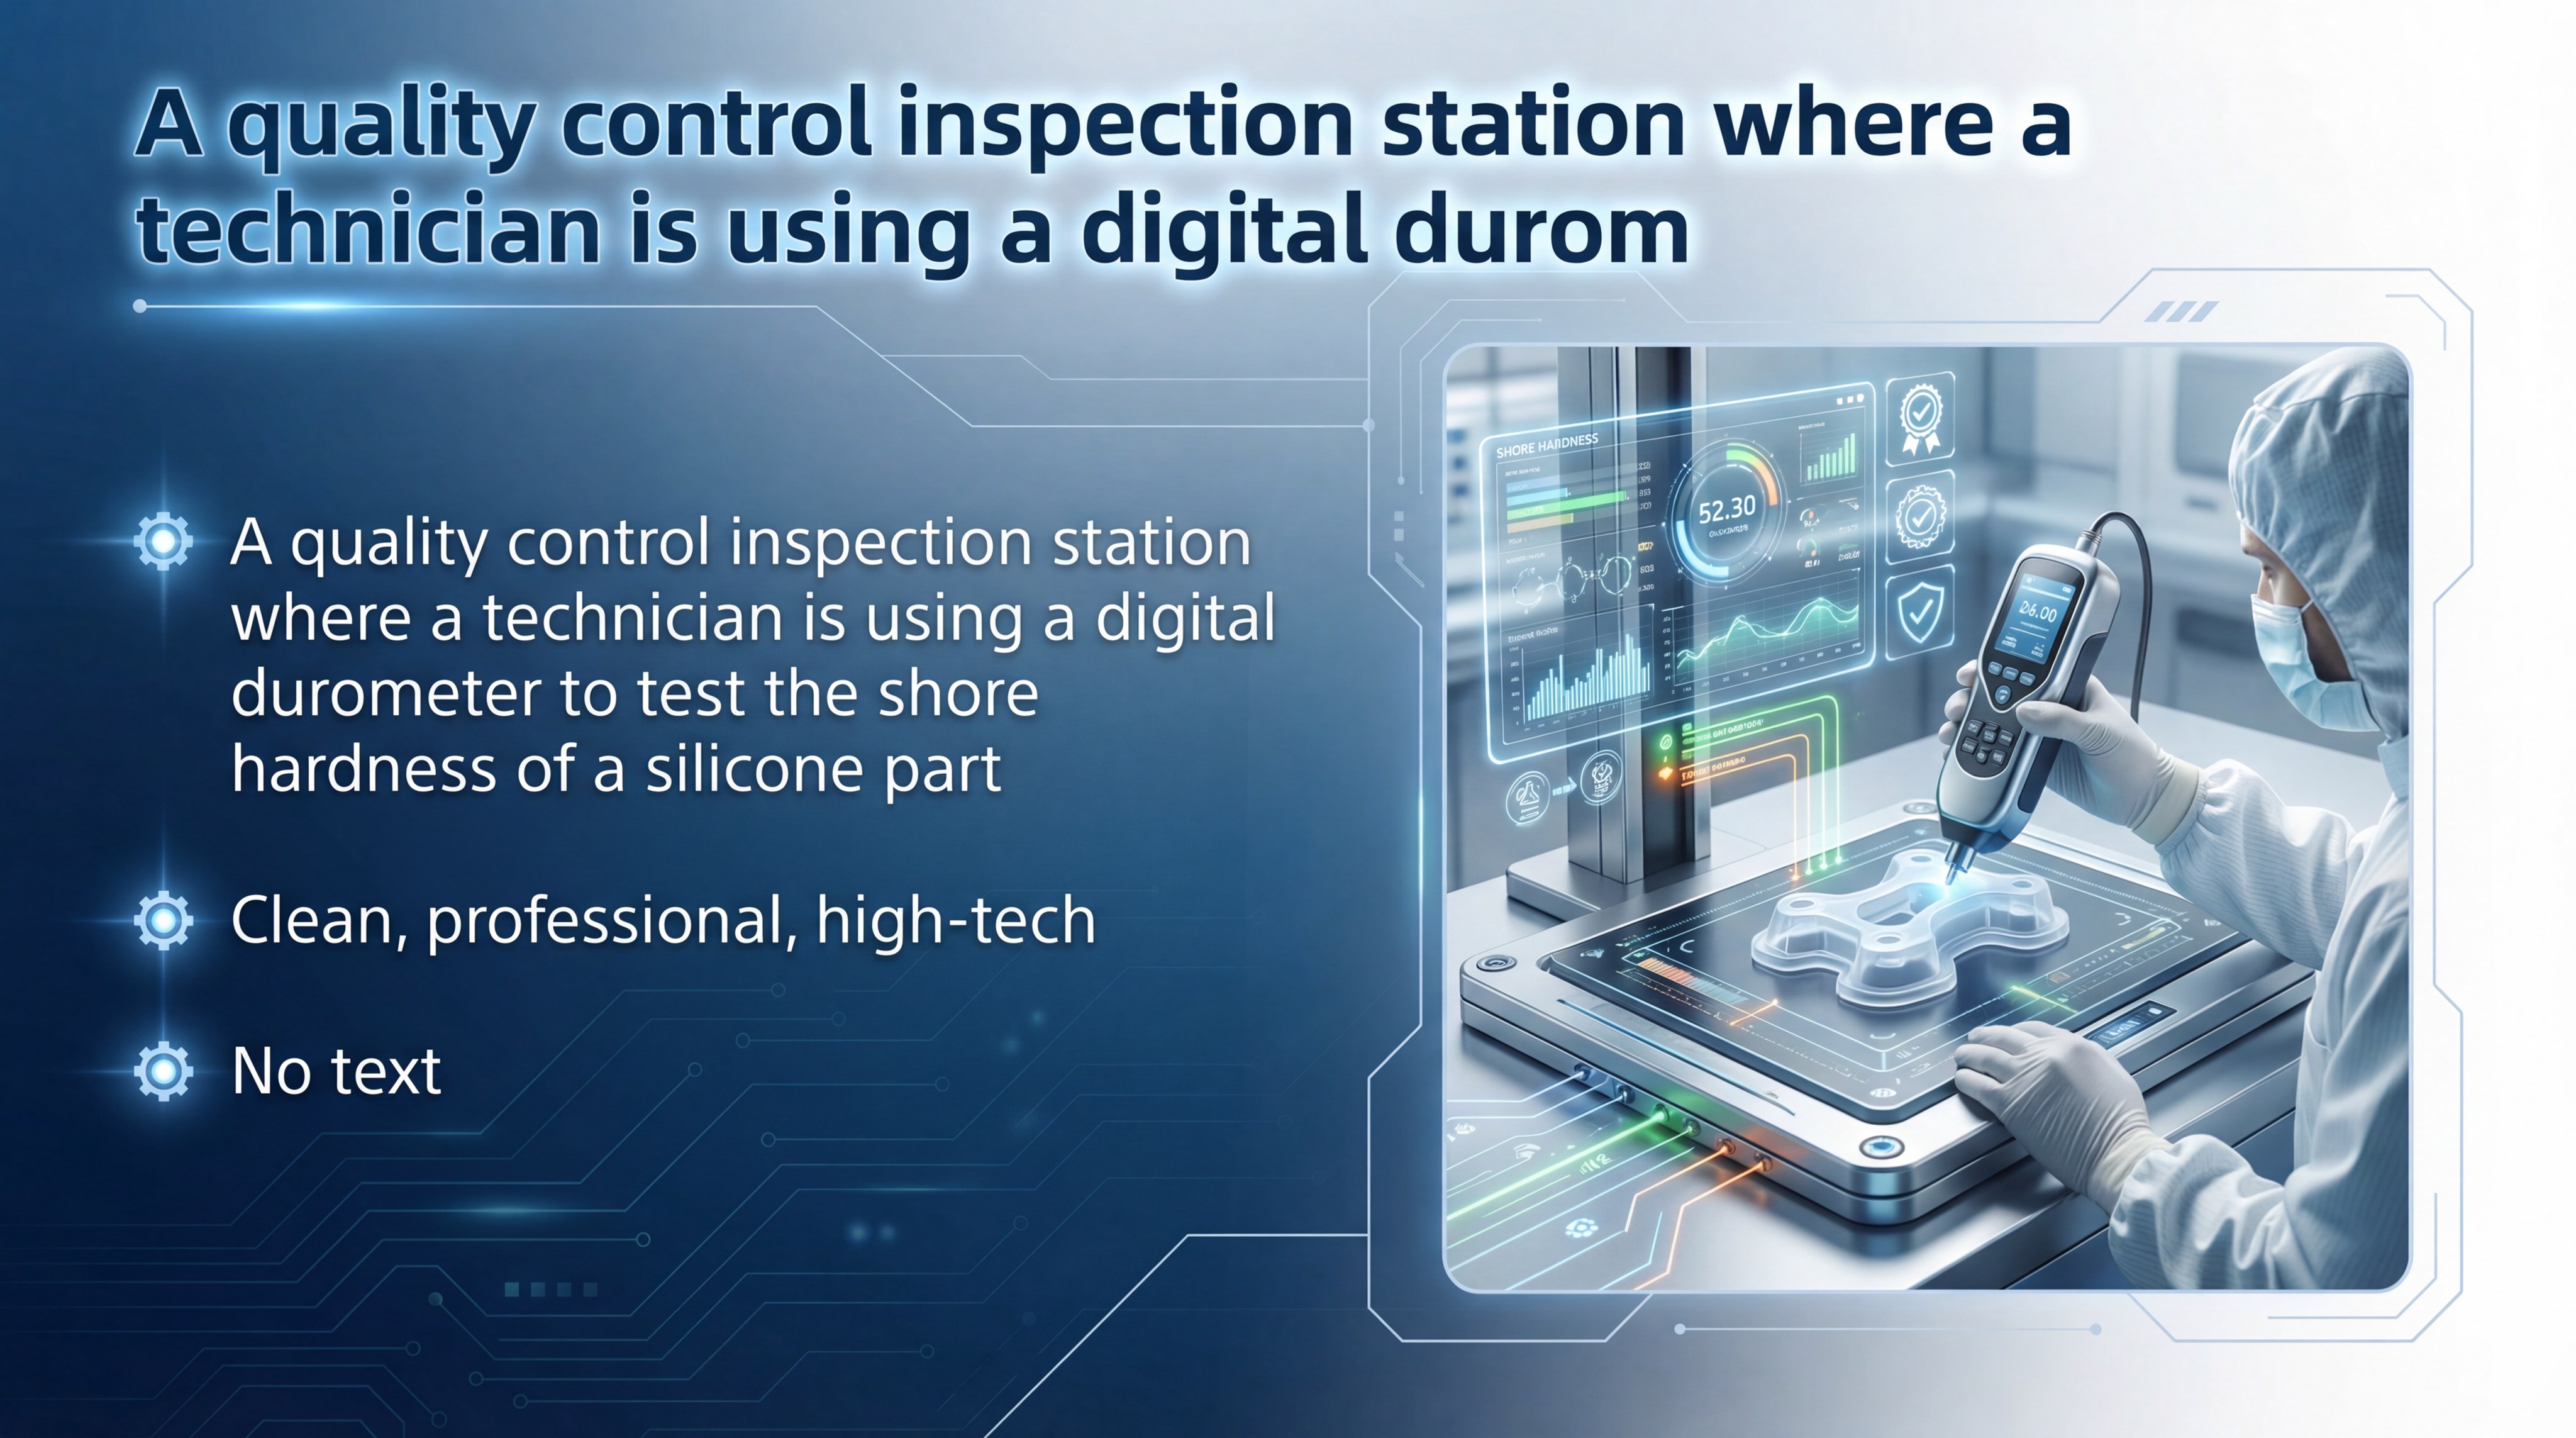
Quality control for batch consistency
Standardizing your inspection process allows you to catch errors early and maintain a high yield for your production runs. Using digital calipers and Shore hardness testers provides the data needed to validate that your manufacturing process remains in control.
| Inspection Metric | Tool Used | Target Outcome |
|---|---|---|
| Shore Hardness | Durometer | Material property validation |
| Tolerances | Digital Calipers | Dimensional accuracy |
| Surface Finish | Visual standard | Aesthetic consistency |
Longevity in manufacturing is the result of disciplined maintenance and a relentless focus on quality data.
Key Takeaway: Consistent monitoring of tool wear and part dimensions is the only way to ensure the long-term success of a custom molding project.
Mastering the Production Cycle
Mastering the silicone molding process empowers your organization to move from initial concept to high-performance physical parts with unparalleled speed. This guide has detailed the critical steps—from designing SLA masters to scaling through Custom Silicone Manufacturing—needed to ensure your hardware projects remain on schedule and within budget. At the heart of our vision is a commitment to reducing engineering risk through precision, transparency, and scalable solutions. To optimize your production workflow and achieve superior part consistency, contact us today for a comprehensive DFM review and expert guidance on your next project.
FAQ
Can I use silicone molds for food or medical products?
Yes, but only if you use platinum-cured silicones specifically certified as food-grade or medical-grade. These materials undergo rigorous testing to ensure they do not leach chemicals or cause adverse reactions.
What’s the best way to avoid bubbles without a vacuum chamber?
The best alternative is the “high-pour” technique, where you pour the silicone in a very thin stream from a height of at least 12 inches. This stretches the liquid and causes many of the larger air bubbles to pop before they reach the master.
How do I know if my mold is fully cured?
Check the surface tackiness and use a durometer to verify the hardness against the manufacturer’s technical data sheet. If the material feels firm and does not leave a fingerprint, it is generally safe to demold.
Can I 3D print directly with silicone?
While specialized silicone printers exist, they are currently limited in resolution and material properties compared to traditional molding. Using 3D printed masters to create silicone molds remains the most reliable method for professional engineering parts.
How many parts can I expect from a single RTV mold?
Typically, you can achieve 25 to 50 high-quality parts before the silicone begins to show signs of fatigue. The exact number depends on the complexity of your part geometry and the aggressiveness of the casting resin used.