
Struggling to replicate a custom part or finding professional molding services prohibitively expensive for your small-scale projects? It is incredibly frustrating to spend hours crafting a master model only to have the final mold fail due to trapped air bubbles or improper curing. If you’ve ever felt the sting of a ruined prototype, you’re not alone. The good news? Mastering the art of making silicone molds is entirely achievable with the right technique and professional-grade insights. This guide provides a foolproof roadmap to creating high-quality, durable molds that deliver perfect replicas every time.
What materials are needed to make silicone molds?
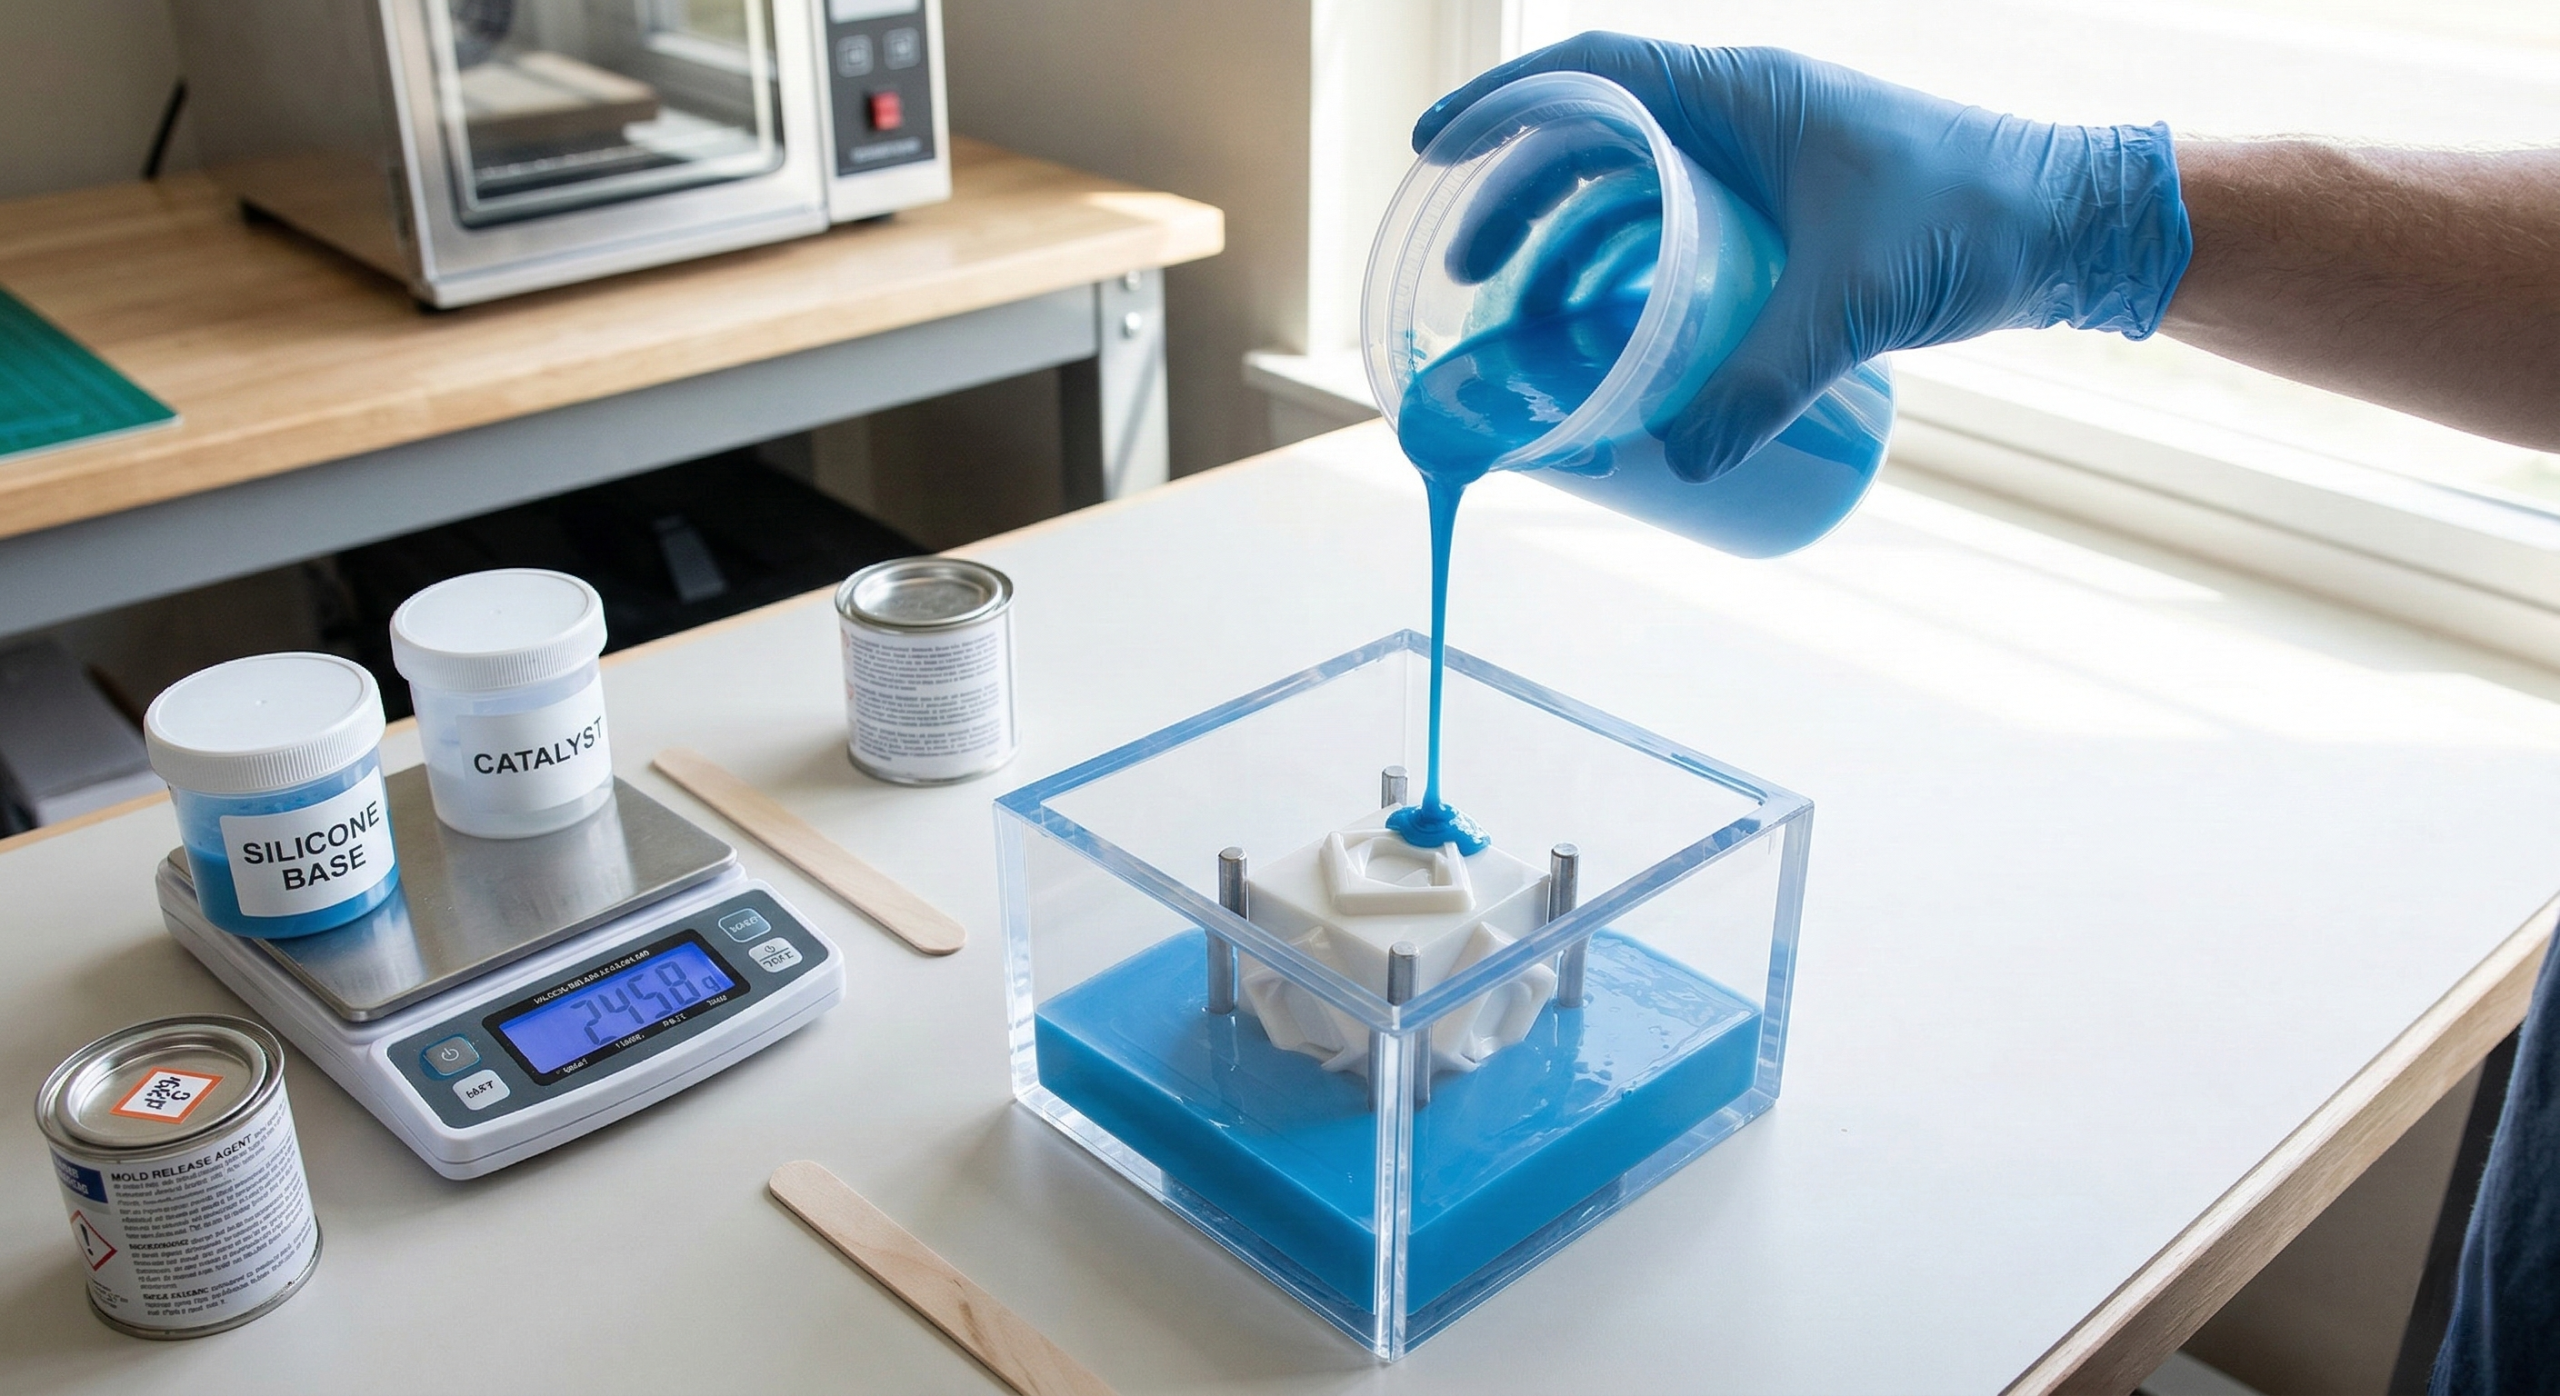
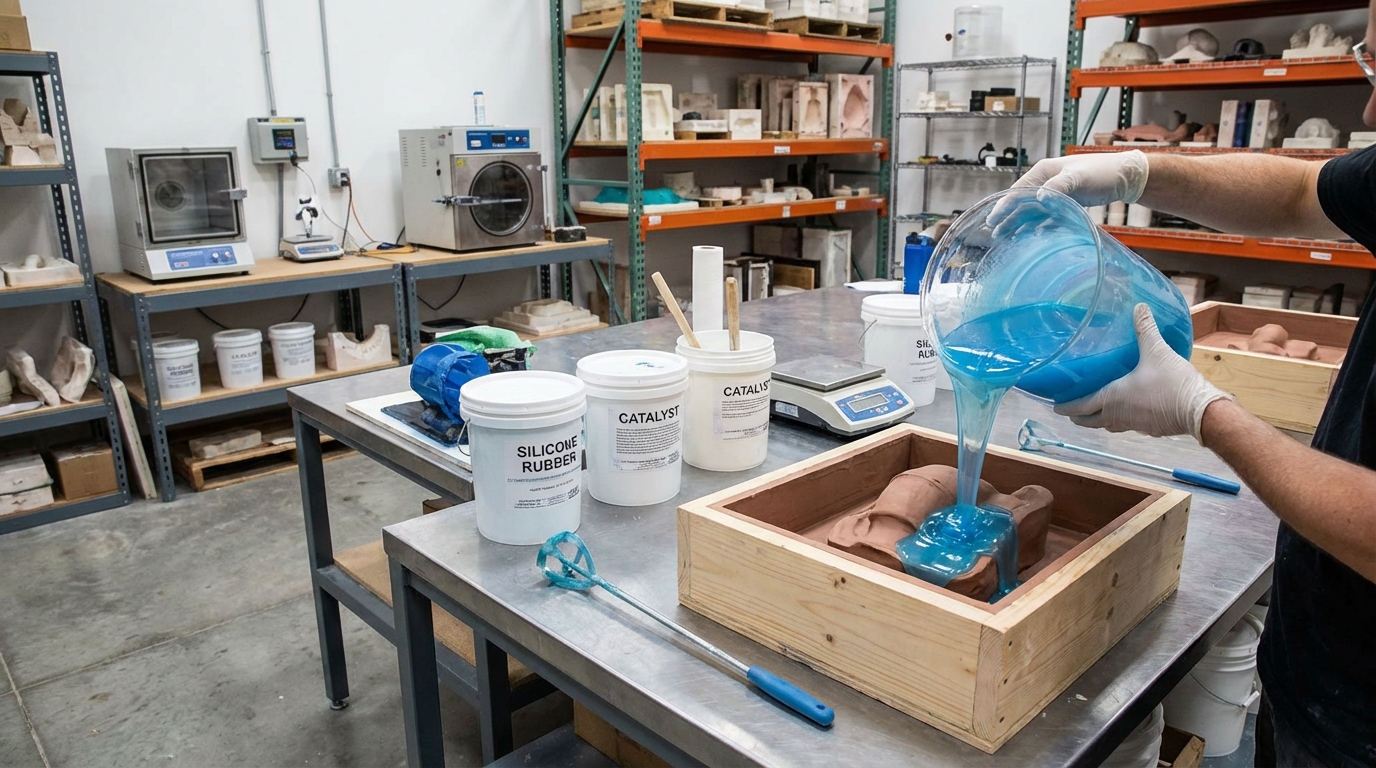
To make silicone molds, you primarily need a silicone rubber compound (liquid or putty), a catalyst or curing agent, a master model to replicate, and a mold box to contain the mixture.
Essential Tools and Supplies
Beyond the core silicone components, you will require mixing containers, stirring tools, a precise digital scale for measurements, and disposable gloves for safety. A high-quality mold release agent is also vital to ensure your model doesn’t bond permanently to the silicone.
Choosing High-Quality Silicone Compounds
Selecting the right grade of material is the foundation of a successful project. For specialized applications, sourcing from a reputable silicone manufacturer ensures you get materials with the correct shore hardness and tear strength for your specific needs.
Key Takeaway: Success starts with preparation. Having all materials ready before mixing prevents “working time” panic.
| Material | Primary Function |
|---|---|
| Silicone Base | The main body of the mold |
| Catalyst | Triggers the chemical curing process |
| Mold Box | Holds the liquid silicone in shape |
| Digital Scale | Ensures exact mixing ratios |
How do you choose the right type of silicone?
You choose the right type of silicone by evaluating the complexity of your object and the intended casting material.
Comparison of Liquid Silicone vs. Putty
Liquid silicone is the gold standard for capturing intricate details and deep undercuts because it flows into every crevice. Silicone putty, on the other hand, is excellent for quick, simple impressions or vertical surfaces where a liquid would pour off.
Matching Silicone to Your Project Needs
Think about it: the material you pour into the mold dictates the silicone you need. If you are creating components for healthcare, you must use medical grade silicone parts to ensure biocompatibility and safety standards are met.
Key Takeaway: Always check the “Shore Hardness” rating; lower numbers are softer and more flexible, while higher numbers are stiffer.
| Silicone Type | Best For | Benefit |
|---|---|---|
| Tin-Cure | General crafting | More affordable, forgiving of inhibitors |
| Platinum-Cure | Medical/Food grade | High stability, no shrinkage, long-lasting |
| Putty | Rapid prototyping | No mold box needed, very fast cure |
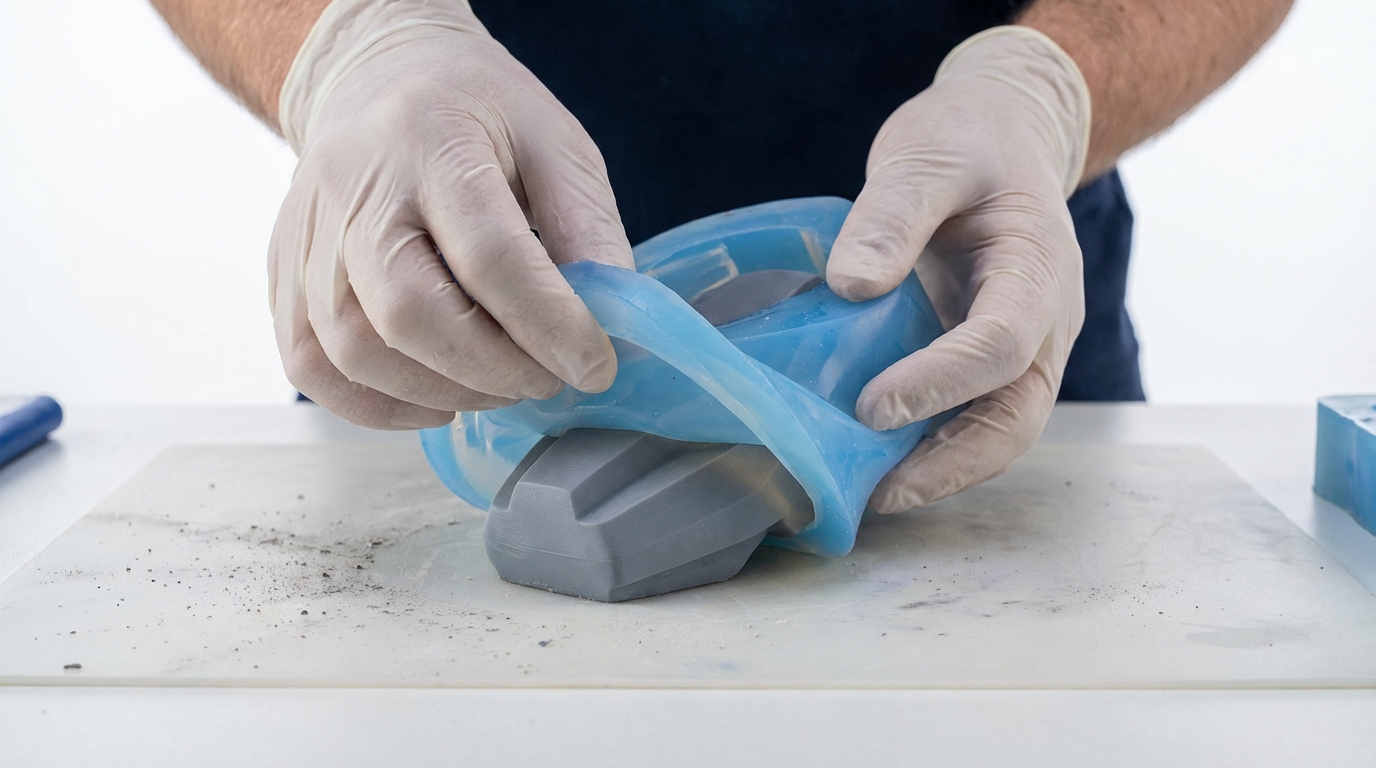
What is the step-by-step process for making a silicone mold?
The process involves five main stages: preparing the master, building a container, mixing the silicone, pouring the mixture, and demolding the finished product.
Preparing the Master Model and Mold Box
First, clean your model thoroughly and secure it to the base of your mold box using a tiny amount of adhesive. Ensure the box walls are at least half an inch away from the model on all sides to provide adequate mold thickness.
Mixing, Pouring, and Curing
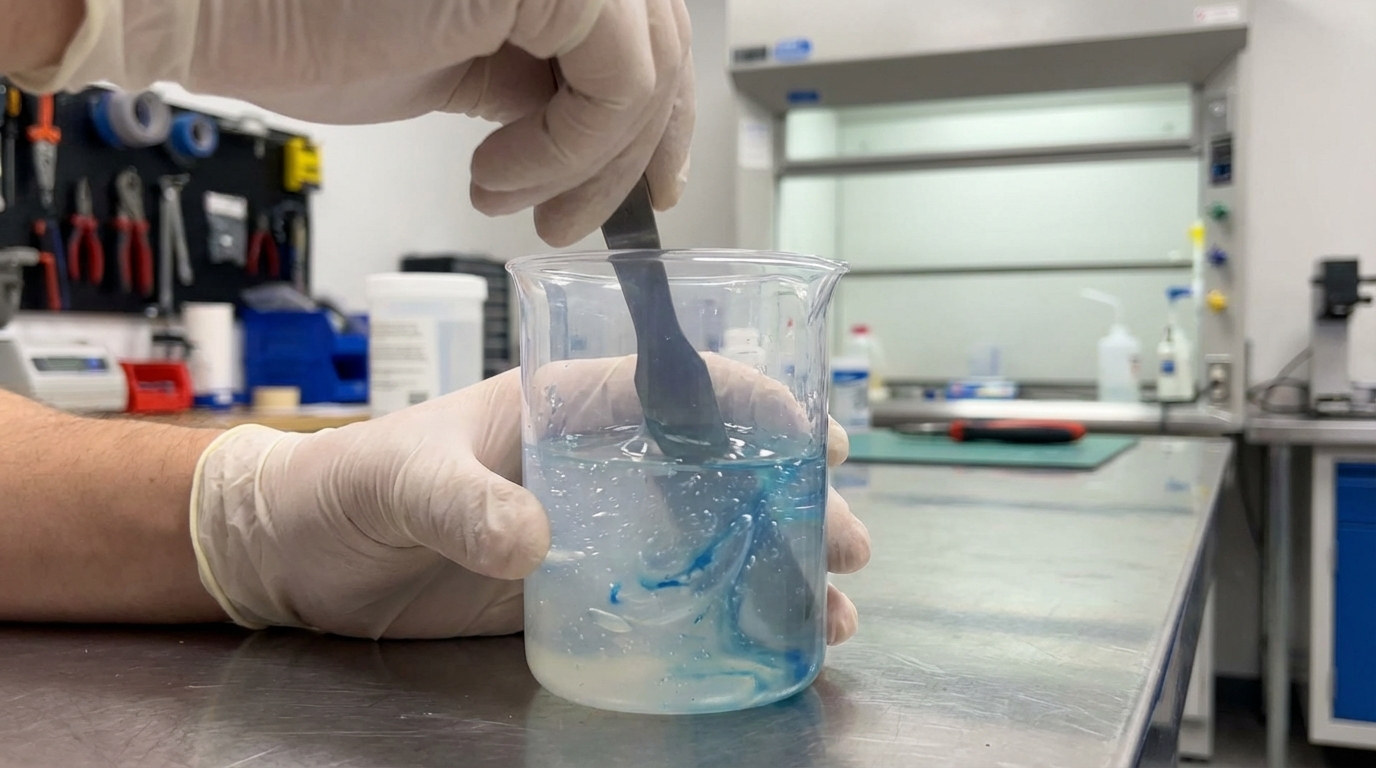
Here’s the deal: mixing is where most people fail. You must stir slowly and thoroughly to avoid folding in excess air. Once mixed, pour the silicone in a long, thin stream into the lowest point of the mold box, allowing it to rise naturally around the model.
Key Takeaway: Patience is your best friend during the curing phase; never rush the demolding process before the time specified by the manufacturer.
| Step | Action | Critical Tip |
|---|---|---|
| 1. Prep | Secure model & apply release agent | Use a leak-proof mold box |
| 2. Mix | Combine base and catalyst | Scrape the sides of the bucket |
| 3. Pour | Fill mold box from the bottom up | Pour in a thin, high stream |
| 4. Cure | Wait for the chemical reaction | Keep at room temperature |
How can you prevent air bubbles in silicone molds?
To prevent air bubbles, you should use a vacuum degassing chamber or employ the “high pour” technique to break surface tension as the silicone enters the mold.
Degassing Techniques and Vacuum Chambers
Professional setups often utilize a vacuum chamber to pull all air out of the mixture before pouring. This causes the silicone to expand and collapse, leaving a perfectly clear, bubble-free liquid ready for the mold box.
Proper Pouring Methods for Smooth Finishes
But wait, there’s more. If you don’t have a vacuum, pouring from a height of 12-18 inches creates a very thin “ribbon” of silicone. This naturally stretches out any air bubbles, causing them to burst before they ever reach your master model.
Key Takeaway: Eliminating bubbles is the difference between a professional replica and a failed project.
| Method | Equipment Needed | Effectiveness |
|---|---|---|
| Vacuum Degassing | Vacuum pump & chamber | 100% (Best for professionals) |
| High Pour | Tall workspace | 80% (Best for DIY) |
| Pressure Casting | Pressure pot | 95% (Cures bubbles into insignificance) |
Why is a mold release agent necessary?
A mold release agent is necessary because silicone is naturally adhesive to many surfaces, and without it, the mold may bond permanently to your master model or the mold box.
Benefits of Using Release Sprays
Using a release agent preserves the fine details of your master model and significantly extends the life of your mold. It creates a microscopic barrier that allows the cured silicone to slide off effortlessly.
How to Apply Release Agents Effectively
Want to know the secret? Less is more. A light, even mist is better than a heavy coat, which can pool and obscure fine details in your custom silicone parts. After spraying, use a soft brush to ensure the agent reaches every corner of the model.
Key Takeaway: Never skip this step unless you are certain the materials are naturally non-bonding.
| Surface Type | Recommended Release |
|---|---|
| Porous (Wood/Stone) | Sealer + Universal Release |
| Non-Porous (Plastic/Metal) | Silicone-to-Silicone Release |
| Highly Detailed | Fine Mist Spray |
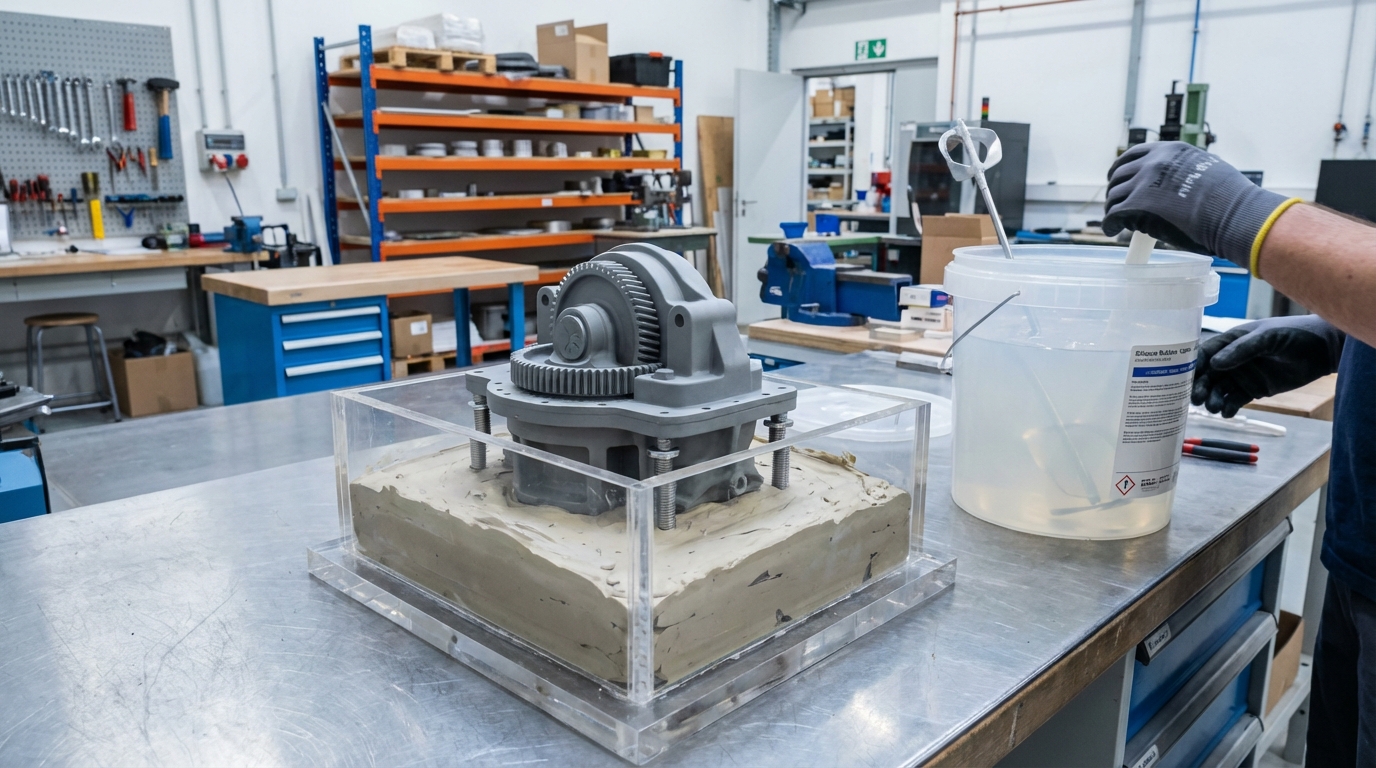
How do you handle complex or 3D objects?
For complex or 3D objects, you must create a two-part mold to ensure the finished piece can be removed without damaging the silicone.
Creating Two-Part Silicone Molds
This involves embedding half of your model in clay, pouring the first half of the silicone, then flipping it over and pouring the second half. This creates a “seam” that allows the mold to open like a clamshell.
Aligning Keys and Seams for Precision
It gets better: you need to create “registration keys” (small divots) in the first half of the mold. These ensure that the two halves of the pet products or custom tools you are molding align perfectly every time you use them.
Key Takeaway: Two-part molds require more time but allow for the replication of almost any 3D shape imaginable.
| Feature | Purpose |
|---|---|
| Parting Line | Where the two halves meet |
| Registration Keys | Ensures perfect alignment |
| Pour Spout | The entry point for casting material |
| Air Vents | Allows air to escape during casting |
What are the safety precautions for silicone molding?
Safety precautions include working in a well-ventilated area, wearing nitrile gloves, and using eye protection to prevent irritation from catalysts.
Personal Protective Equipment (PPE) Essentials
While most modern silicones are relatively safe, the catalysts can be irritating to skin and eyes. Always wear gloves to avoid “silicone hands”—the sticky residue that is notoriously difficult to wash off.
Working Environment and Ventilation
Working in a temperature-controlled environment is crucial. If the room is too cold, the silicone may never cure; if it’s too hot, it might “flash cure” before you finish pouring.
Key Takeaway: A clean, organized workspace is a safe and productive workspace.
| Hazard | Protection |
|---|---|
| Skin Contact | Nitrile Gloves |
| Eye Splatter | Safety Goggles |
| Fumes | Ventilation or Mask |
| Spills | Plastic Table Covers |
How can you extend the life of your silicone molds?
You extend the life of silicone molds by cleaning them with mild soap and water after each use and storing them in a cool, dry place away from direct sunlight.
Proper Cleaning and Storage Practices
Resin and other casting materials leave behind oils and residues that can degrade silicone over time. After cleaning, ensure the mold is completely dry before storing it. Avoid stacking molds, as the weight can cause them to deform.
Recognizing Signs of Mold Degradation
Eventually, even the best molds will wear out. If you notice the surface becoming “chalky” or the edges tearing easily, it’s time to contact a professional for high-volume manufacturing solutions.
Key Takeaway: Using a “mold saver” or conditioner spray can significantly increase the number of pulls you get from a single mold.
| Action | Result |
|---|---|
| Use Mold Release | Reduces friction and tearing |
| Clean After Use | Prevents chemical buildup |
| Store Flat | Maintains original shape |
| Dust with Talc | Prevents mold halves from sticking |
What materials can be cast into a silicone mold?
Silicone molds are incredibly versatile and can be used to cast resins, wax, plaster, concrete, and even low-melt metals like tin.
Common Casting Resins and Plasters
Epoxy and polyurethane resins are the most popular choices for hobbyists. They capture the fine detail of the mold and cure into hard, durable parts suitable for everything from jewelry to industrial components.
Food-Grade and Medical-Grade Considerations
Important: If you intend to cast food or medical tools, you must ensure the mold was made from certified materials. Using medical-grade silicone parts is the only way to guarantee the final product meets strict safety regulations.
Key Takeaway: Match the heat resistance of your silicone to the “exotherm” (heat produced during curing) of your casting material.
| Casting Material | Silicone Compatibility |
|---|---|
| Epoxy Resin | Excellent (standard) |
| Polyurethane | Good (requires release) |
| Wax/Chocolate | Must use Food-Grade silicone |
| Concrete | High-tear strength silicone needed |
When should you use a professional silicone manufacturer?
You should use a professional silicone manufacturer when your project requires high-volume production, extremely tight tolerances, or specialized material certifications that cannot be achieved at home.
Scaling Up to Mass Production
While DIY molding is great for prototyping, industrial manufacturing utilizes Liquid Silicone Rubber (LSR) injection molding. This process produces thousands of parts with identical precision and significantly lower costs per unit.
Benefits of Industrial Precision
Professional manufacturers offer DFM (Design for Manufacturing) support, helping you optimize your part for mass production. This ensures your final product is not only functional but also cost-effective to produce at scale.
Key Takeaway: Transitioning from manual molds to industrial production is a major milestone for any product launch.
| Factor | DIY Mold | Professional Manufacturing |
|---|---|---|
| Volume | 1 – 50 parts | 1,000 – 1,000,000+ parts |
| Precision | Variable | Micron-level accuracy |
| Cost | High per unit | Low per unit |
| Speed | Slow (manual) | Fast (automated) |
*
Frequently Asked Questions
Can I use household items as mold release?
While some people use cooking spray or petroleum jelly, it is not recommended for professional results as these can react with the silicone or leave a greasy residue on your final casting.
What’s the best way to speed up the curing process?
The safest way is to slightly increase the ambient temperature of the room, as heat accelerates the chemical reaction. However, never exceed the manufacturer’s recommended temperature limits.
How do I know if my silicone is fully mixed?
You should mix until there are no visible streaks and the color is perfectly uniform. Many professionals use a “double-bucket” method—mixing in one container, then pouring into a second and mixing again to ensure no unmixed material from the sides remains.
Can I reuse a silicone mold for different materials?
Yes, but you must clean it thoroughly between uses. Be aware that some materials, like high-exotherm resins, can “cook” the mold and make it more brittle over time.
How do I know if I need a vacuum chamber?
If your model has extremely fine details, deep crevices, or “under-cuts” where air can get trapped, a vacuum chamber is highly recommended to ensure a perfect, bubble-free mold.