A Silicone Button is a flexible, elastomeric interface component designed to bridge the gap between a user’s touch and an electronic circuit. In the competitive world of hardware manufacturing, a failing interface can lead to costly product recalls and a tarnished brand reputation. You cannot afford to have your customers struggle with unresponsive or fragile controls that degrade after only a few months of use. By integrating a high-quality Silicone Button, you ensure a durable, tactile, and moisture-resistant solution that enhances the user experience and protects your internal electronics.
What is a Silicone Button?
A Silicone Button is a custom-molded elastomeric switch cap that provides a tactile response and creates a seal for underlying electronic components. These components are typically made from high-consistency rubber (HCR) that is cured under heat and pressure to take on specific shapes. You will find them in everything from remote controls to heavy-duty industrial machinery.
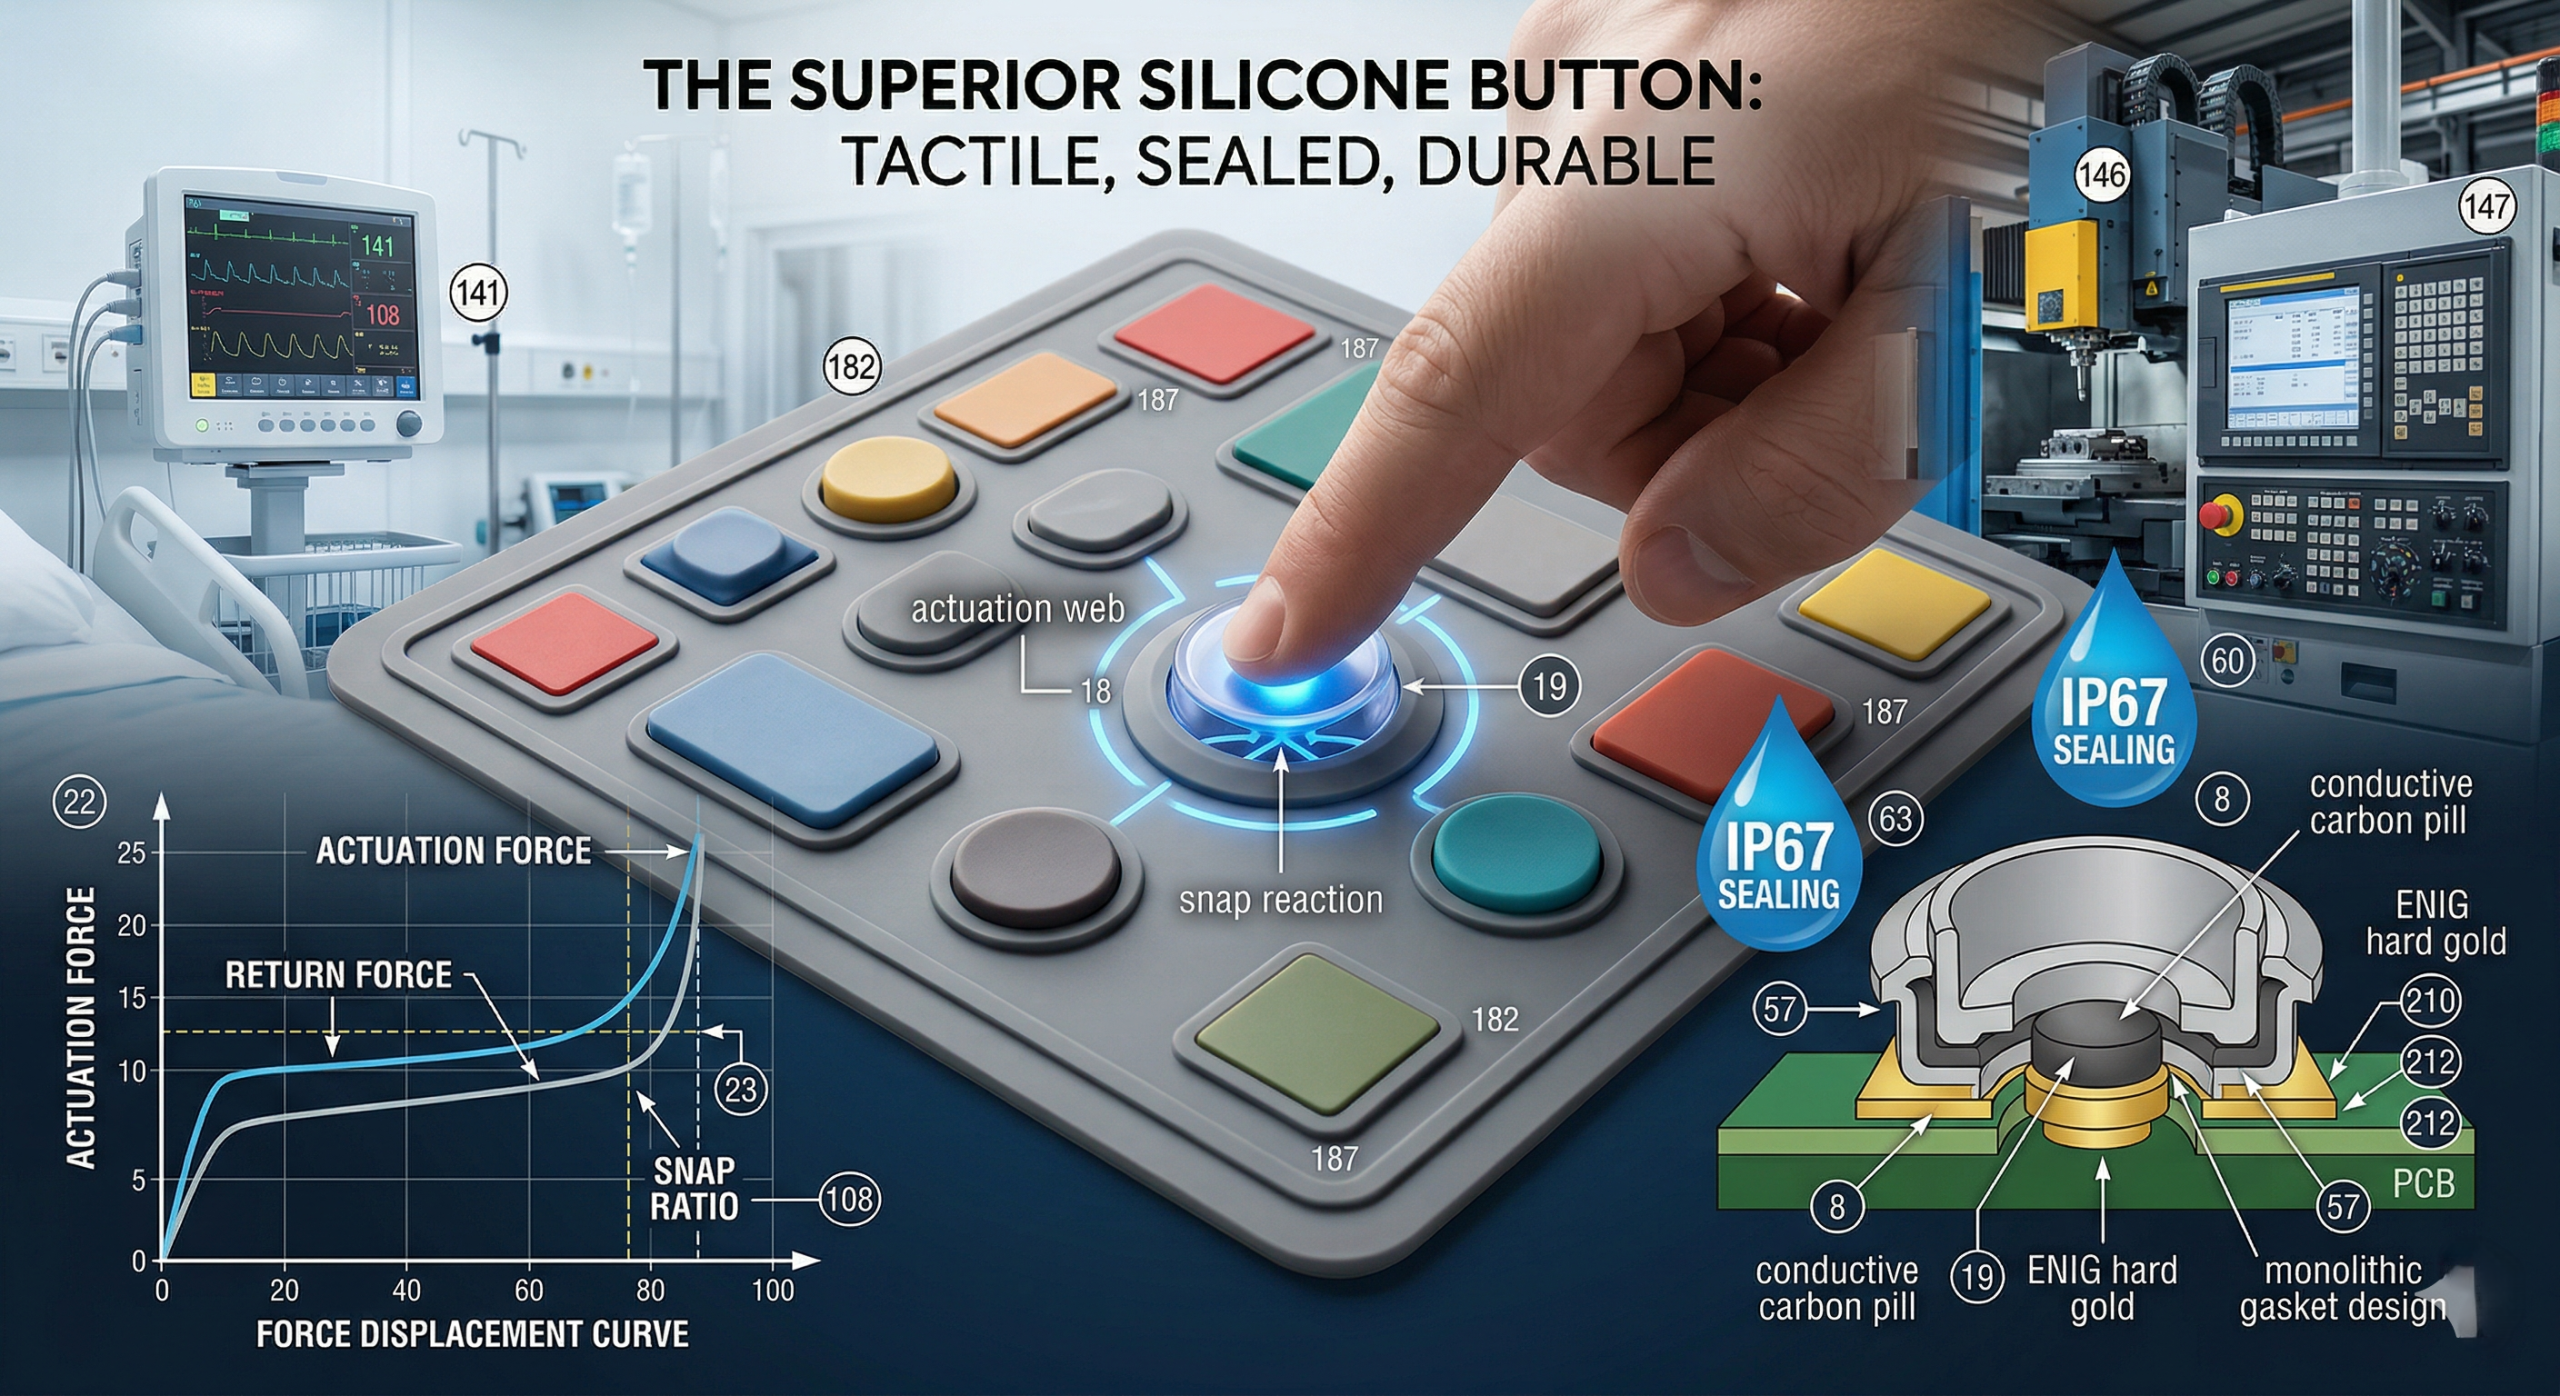
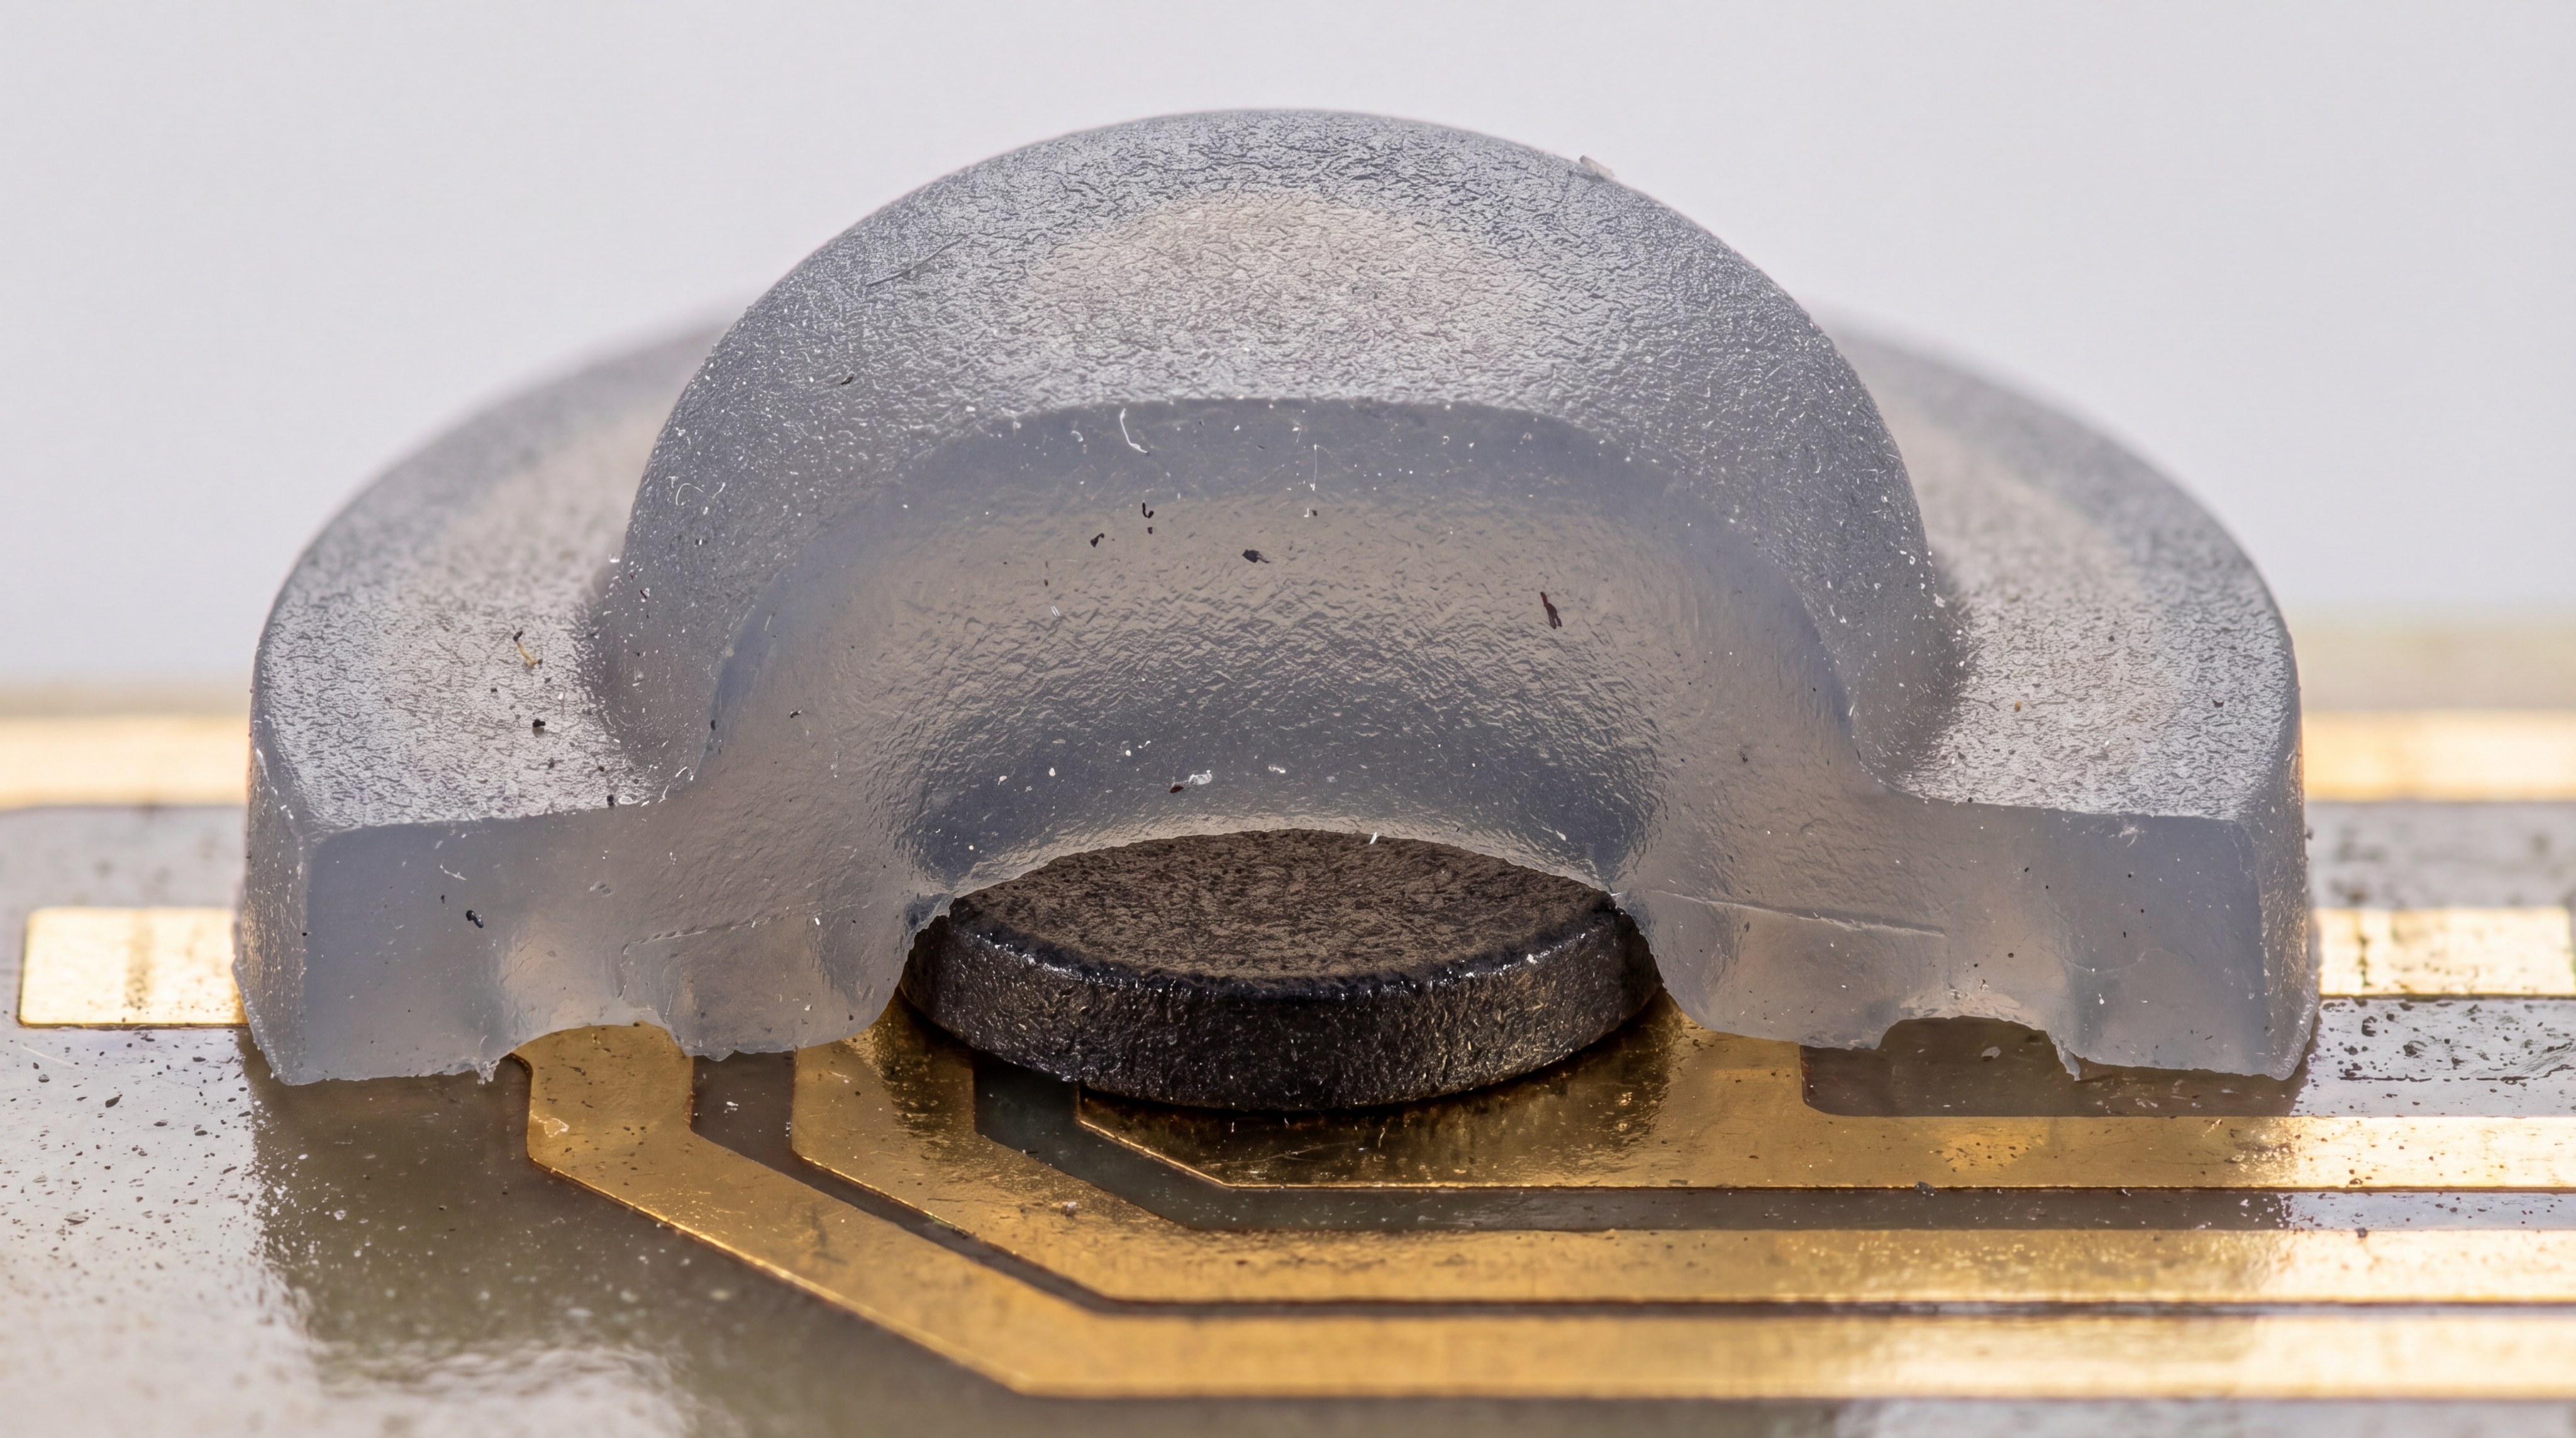
The internal structure often includes a conductive carbon pill or a gold-plated contact to complete the circuit on a PCB. Because the material is naturally flexible, the button can be designed with a “web” that collapses under pressure. This collapse provides the distinct “click” or tactile feel that users expect during operation.
Material Composition and Properties
The raw material used in a silicone button is usually a high-grade silicone polymer mixed with various curing agents. You need to understand that the hardness of the material is measured on the Shore A scale, which dictates how rigid or soft the button feels. Most buttons fall within the 30 to 70 Shore A range for optimal flexibility.
- High thermal stability ranging from -40°C to 250°C.
- Excellent dielectric properties for electrical insulation.
- Resistance to UV radiation and ozone degradation.
- Biocompatibility for medical-grade applications.
Think about this:
If you are designing for a medical environment, the material must resist harsh cleaning chemicals without swelling. The inherent chemical inertness of silicone makes it the premier choice for these demanding scenarios.
Tactile Web Design
The tactile feel of a silicone button is determined by the geometry of the “actuation web” surrounding the button center. When you apply pressure, the web reaches a peak force and then snaps downward to provide feedback. This engineering ensures that the user knows exactly when the command has been registered by the device.
- Linear travel for soft-touch applications.
- Snap ratio calculations for crisp tactile feedback.
- Over-travel protection to prevent contact damage.
- Force displacement curves for precision engineering.
Here is the deal:
Getting the snap ratio right is a balancing act between user comfort and mechanical longevity. A higher snap ratio feels better but might shorten the fatigue life of the silicone material.
Key Takeaway: A silicone button serves as both a mechanical actuator and a protective barrier, making it indispensable for modern electronic interfaces.
| Feature | Description | Benefit |
|---|---|---|
| Material | Shore A Silicone | Durability and flexibility |
| Feedback | Tactile Web | User confirmation |
| Sealing | Monolithic Design | Water and dust protection |
The integration of these features allows you to create a seamless interface that performs reliably over millions of cycles.
How is a Silicone Button manufactured for scale?
Manufacturing a Silicone Button involves precision compression molding techniques where raw silicone is pressed into heated steel molds to achieve the desired geometry. This process is highly efficient for high-volume production while maintaining tight tolerances for critical dimensions. You can produce thousands of units per day with consistent quality across every batch.
The process begins with the preparation of the silicone compound, which is pigmented to your specific color requirements. Once the material is placed in the mold, it undergoes a cross-linking process known as vulcanization. This transforms the gummy substance into a resilient, rubbery button that can withstand repeated use.
The Compression Molding Sequence
Compression molding is the most common method for producing these buttons because it allows for multi-cavity tools. You place a pre-measured “perform” of silicone into the lower mold half before the press closes. Under high heat, the silicone flows into every corner of the cavity to form the button and the surrounding mat.
- Tooling setup with CNC-machined steel plates.
- Pre-heating the silicone to ensure proper flow.
- Curing cycles lasting from 30 to 120 seconds.
- Manual or automated de-molding of the finished sheet.
But wait, there’s more:
While compression molding is standard, it requires careful flash management to ensure the edges are clean. Excess material is usually trimmed away using die-cutting or cryogenic deflashing methods.
Secondary Finishing and Inspection
Once the silicone button is molded, it often undergoes secondary processes like screen printing or laser etching. You must ensure that the legends are applied using silicone-based inks to guarantee a permanent bond with the surface. After printing, a protective coating is often applied to prevent wear from finger oils.
- Silk-screen printing for multi-color legends.
- Laser etching for backlit transparency.
- PU or Epoxy coating for abrasion resistance.
- Automated optical inspection for defect detection.
You might be wondering:
How do we ensure the legends don’t fade after a million presses? The answer lies in the chemical bond formed between the silicone ink and the cured button surface.
Key Takeaway: Precision molding combined with secondary finishing creates a professional and durable interface suitable for any B2B application.
| Process Step | Tooling Used | Objective |
|---|---|---|
| Molding | Steel Compression Mold | Form the physical shape |
| Printing | Screen or Laser | Add visual information |
| Coating | Spray or Dip | Protect the surface |
High-volume manufacturing relies on these structured steps to deliver cost-effective solutions without sacrificing the integrity of the button.
Why should you prioritize a Silicone Button over mechanical switches?
Choosing a Silicone Button provides an unparalleled level of design flexibility and environmental protection that individual mechanical switches cannot match. Unlike mechanical switches that require separate caps and gaskets, a silicone interface is often a single, unified piece. You save significant assembly time and reduce the number of potential failure points in your product design.
The monolithic nature of a silicone mat means that it acts as its own gasket. When you clamp the silicone sheet between the device housing and the PCB, you create a natural seal. This eliminates the need for expensive O-rings or adhesives to achieve an IP65 or IP67 rating.
Enhanced Environmental Sealing
A silicone button mat covers the entire interface area, preventing liquids and dust from reaching the electronics. If your product is used in outdoor or industrial settings, this level of protection is non-negotiable. You can literally pour water over a well-designed silicone interface without any risk of a short circuit.
- Protection against liquid ingress (IP67/IP68).
- Resistance to dust and particulate accumulation.
- Chemical resistance to oils and industrial solvents.
- Seamless integration with plastic or metal housings.
The best part?
Even if the outer housing is damaged, the silicone mat continues to protect the sensitive PCB underneath. It acts as a secondary line of defense for your most critical components.
Cost-Effective Customization
When you use mechanical switches, customization often requires expensive custom-molded plastic keycaps. With a silicone button, the color, shape, and tactile feel are all determined by a single mold. This allows you to create unique designs that match your brand identity without skyrocketing your bill of materials.
- Custom translucent colors for backlighting.
- Variable travel distances for different functions.
- Integrated light pipes molded directly into the silicone.
- Multiple button shapes on a single unified mat.
Look at this:
By combining several functions into one molded part, you reduce your inventory management from dozens of parts to just one. This simplification is a major advantage for lean manufacturing operations.
Key Takeaway: Silicone buttons offer a superior balance of environmental sealing and cost-efficient customization compared to traditional mechanical switch assemblies.
| Advantage | Silicone Button | Mechanical Switch |
|---|---|---|
| Sealing | Built-in gasket | Requires extra parts |
| Tooling | Single mold for many keys | Multiple molds required |
| Assembly | Fast, drop-in | Slower, individual placement |
This analysis shows that silicone is the optimal choice for projects where durability and ease of assembly are top priorities.
What are the essential types of Silicone Button finishes?
The surface of a Silicone Button can be enhanced using various LSR molding techniques and coatings to improve the user’s tactile experience and visual clarity. These finishes are not just for aesthetics; they provide vital protection against the environment. You can choose from matte, gloss, or even specialized textures to suit your specific application.
Without a proper finish, silicone can have a “tacky” feel that attracts dust and lint. Applying a clear coating changes the surface energy of the button, making it smooth to the touch and easy to clean. This is particularly important for consumer electronics and medical devices.
Protective Coatings and Textures
The most common finish for a silicone button is a Polyurethane (PU) or Silicone spray coating. These layers provide a barrier against abrasion and chemical contact, ensuring the printed legends remain legible for years. You can also opt for an epoxy resin “dripping” finish, which gives the button a hard, plastic-like feel on top while maintaining its flexible base.
- PU Coating for high-gloss or matte looks.
- Epoxy Coating for a premium “3D” effect.
- Anti-microbial additives for healthcare use.
- Soft-touch matte finish to reduce friction.
Believe it or not:
A simple matte coating can increase the abrasion resistance of a button by over 500%, extending the product’s life significantly. This is a small investment that pays huge dividends in product longevity.
Backlighting and Laser Etching
If your device needs to be used in low-light conditions, laser etching is the preferred finishing method for a silicone button. You start with a translucent silicone base and paint it with multiple layers of opaque ink. A laser then removes the top layer of paint to reveal the translucent material in the shape of your icons.
- Internal LED light pipes for focused illumination.
- Multi-color paint layers for complex icon designs.
- Diffused light paths for even brightness across the key.
- Negative etching for “glow-in-the-dark” effects.
Here is the deal:
Laser etching allows for incredibly fine detail that traditional screen printing cannot achieve. This gives your interface a modern, high-tech appearance that appeals to professional users.
Key Takeaway: Surface finishes transform a raw silicone button into a high-performance interface that resists wear and supports advanced lighting features.
| Finish Type | Durability | Aesthetic Appeal |
|---|---|---|
| PU Spray | High | Matte/Satin |
| Epoxy Cap | Extreme | Glossy/Hard |
| Laser Etch | High | High (Backlit) |
Selecting the right finish ensures that your product remains functional and visually appealing throughout its entire lifecycle.
How do you define the tactile response of a Silicone Button?
The tactile response of a Silicone Button is a result of the engineering behind the actuation force and the travel distance of the center pillar. You must specify these parameters during the design phase to ensure the user receives a satisfying “click” sensation. If the button is too mushy, users will be unsure if the press was successful; if it is too stiff, it causes finger fatigue.
Engineers use a “Snap Ratio” to quantify this feel, which is the relationship between the actuation force and the return force. A higher snap ratio generally results in a crisper feel. You can customize this by thinning or thickening the walls of the silicone web.
Force Displacement Parameters
When you design a silicone button, you are essentially designing a spring. The force displacement curve shows exactly how the button behaves from the moment a finger touches it until it hits the contact point. You need to define the peak force, which is the maximum resistance the user feels before the button “snaps.”
- Actuation Force (Fa): The force required to collapse the web.
- Return Force (Fr): The force the button exerts to return to its original position.
- Travel Distance: The physical distance the button moves downward.
- Contact Force: The pressure exerted on the PCB once the button is depressed.
Think about this:
Most industrial buttons use an actuation force between 100g and 200g. For high-speed data entry, you might want a lower force, while for safety switches, a higher force prevents accidental activation.
Achieving the Perfect “Click”
The sound and feel of a silicone button can be further tuned by adding metal domes or polydomes under the silicone mat. While the silicone web provides its own snap, a metal dome adds a very sharp, audible click that many professional users prefer. You get the sealing benefits of silicone combined with the tactile precision of a mechanical switch.
- Metal dome integration for high-tactile feedback.
- Polydome sheets for a balanced cost-to-performance ratio.
- Air-venting design to prevent “air-trap” mushiness.
- Gold-plated contacts for low-resistance electrical switching.
The best part?
Silicone is an excellent dampener, so you can actually control the acoustics of the click. This allows you to design a “silent” button for quiet environments like libraries or bedrooms.
Key Takeaway: Mastering the snap ratio and travel distance is essential for creating a silicone button that feels high-quality and reliable.
| Metric | Typical Range | User Experience |
|---|---|---|
| Actuation Force | 50g – 300g | Resistance level |
| Snap Ratio | 40% – 60% | Crispness of click |
| Travel | 0.5mm – 3.0mm | Depth of press |
An optimized force displacement curve ensures that every interaction with your device feels intentional and professional.
What industries benefit most from a Silicone Button?
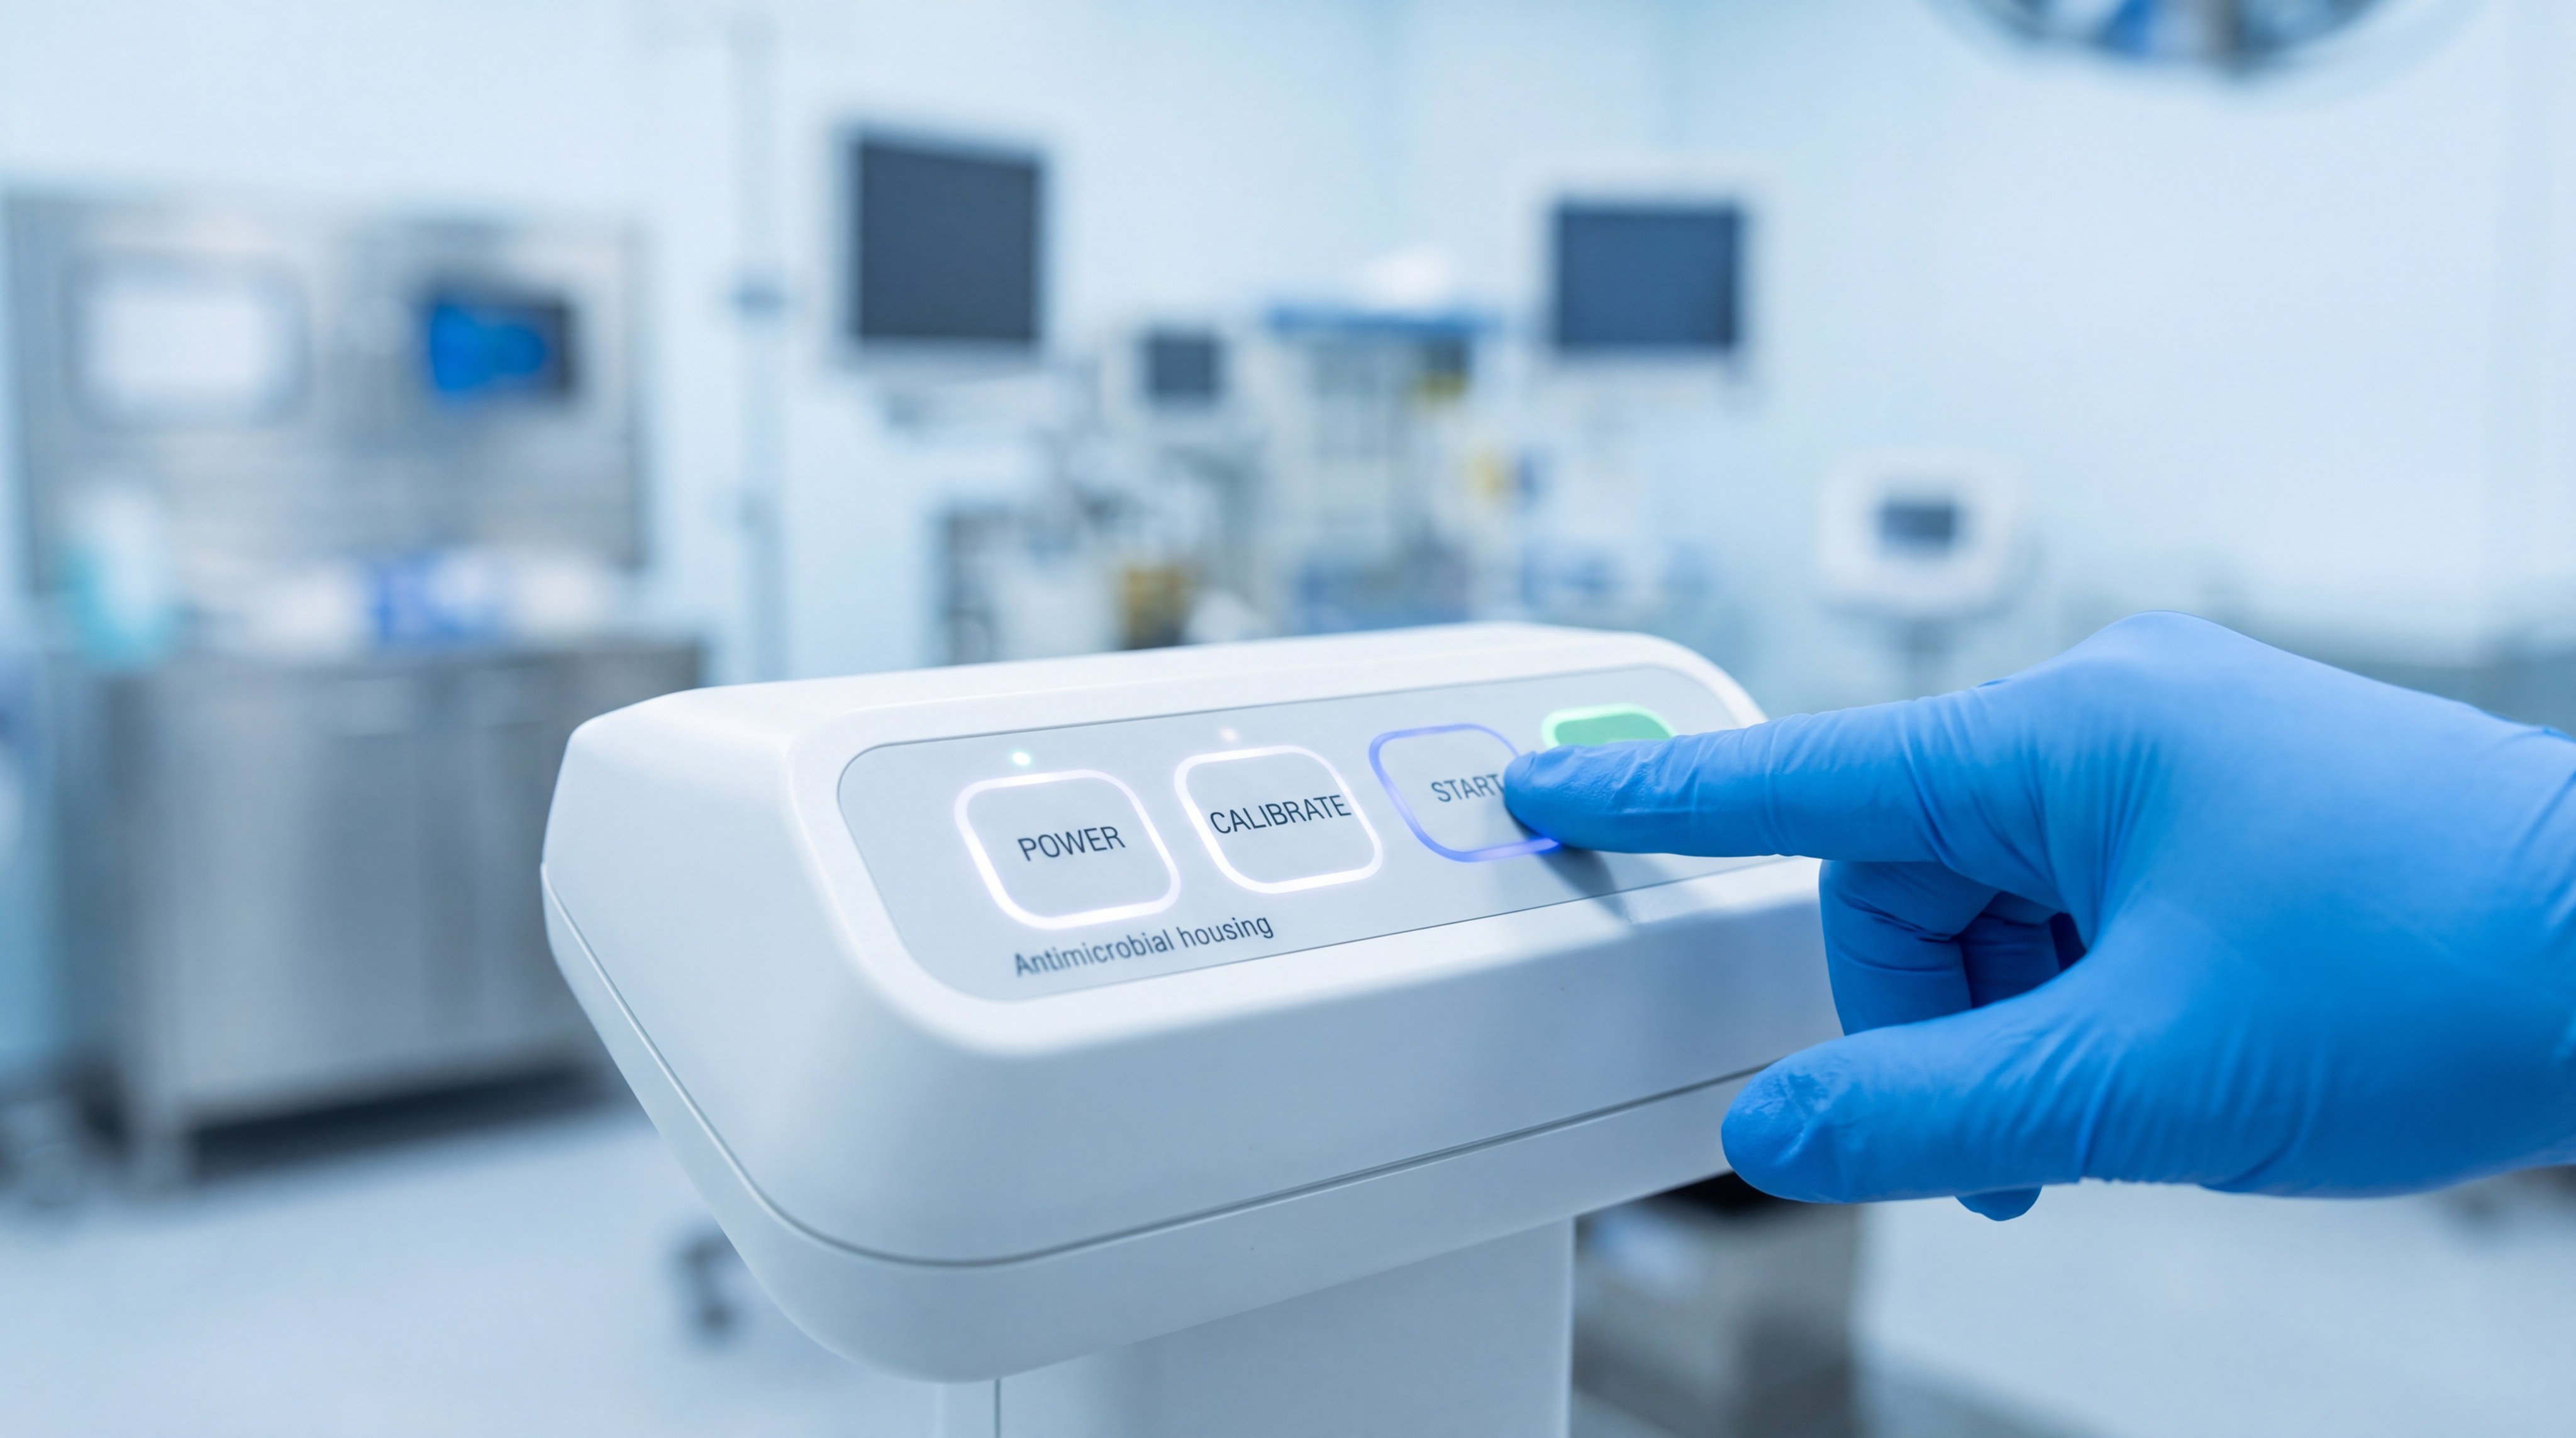
A Silicone Button is the preferred choice for industries requiring ruggedized, long-lasting user interfaces, such as the silicone keypad markets in healthcare and heavy industry. You will find these components in any environment where reliability is a critical safety factor. From the sterile halls of a hospital to the dusty floor of a factory, silicone performs where other materials fail.
The versatility of the material allows it to be molded into complex shapes that fit into tight enclosures. This makes it ideal for portable handheld devices that must survive drops and spills. Because silicone is non-porous, it also prevents the growth of bacteria and mold.
Medical and Healthcare Applications
In the medical field, a silicone button must withstand frequent sterilization with isopropyl alcohol and other harsh disinfectants. You need a material that won’t crack or become brittle over time when exposed to these chemicals. Silicone’s biocompatibility also ensures that it is safe for repeated skin contact in patient-monitoring devices.
- Ventilators and infusion pump controls.
- Handheld diagnostic tools and scanners.
- Hospital bed remote controls.
- Wearable medical monitoring patches.
Look at this:
Because silicone can be molded as a single sheet, it eliminates gaps where germs can hide. This “cleanable” design is a major selling point for B2B procurement officers in the health sector.
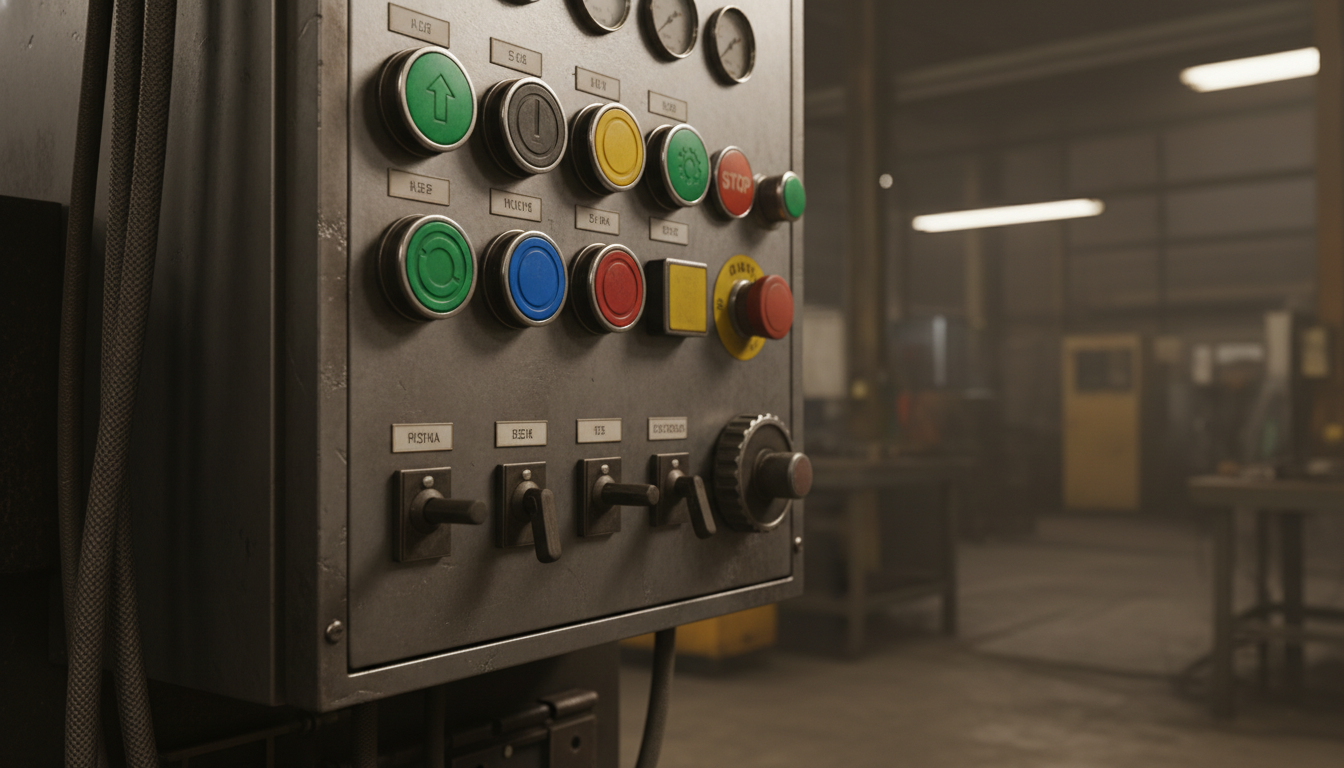
Industrial and Automotive Control
The automotive and industrial sectors value the silicone button for its ability to operate in extreme temperatures. Whether it’s a dashboard control in a car sitting in the sun or a control panel in a cold-storage warehouse, the button remains functional. You don’t have to worry about the material melting or freezing under normal operating conditions.
- Heavy machinery control panels.
- Automotive steering wheel and HVAC buttons.
- Aerospace cockpit instrumentation.
- Agricultural equipment interfaces.
Here is the deal:
The vibration-damping properties of silicone also protect internal electronics from mechanical stress. In a high-vibration environment like a tractor or a jet, the silicone mat acts as a shock absorber.
Key Takeaway: The unique physical properties of silicone make these buttons the gold standard for medical, industrial, and automotive applications.
| Industry | Primary Requirement | Silicone Benefit |
|---|---|---|
| Medical | Hygiene/Sterilization | Non-porous & Chemical resistant |
| Industrial | Durability | Shock absorption & Dust sealing |
| Automotive | Temp Resistance | Stable from -40°C to 200°C |
By selecting silicone for these sectors, you ensure your product meets the rigorous standards required for professional-grade equipment.
How does a Silicone Button resist harsh environments?
A Silicone Button is inherently resistant to environmental stressors such as UV rays, ozone, and extreme moisture, making it far superior to thermoplastic alternatives. You can trust that the material will not yellow or become brittle even after years of direct sunlight exposure. This stability is due to the silicon-oxygen backbone of the polymer, which is much stronger than the carbon-carbon bonds found in most plastics.
Furthermore, silicone is naturally hydrophobic, meaning it repels water. When you use a silicone button mat, you are creating a barrier that prevents humidity from corroding the copper traces on your PCB. This is vital for electronics used in tropical or marine environments.
Temperature and Chemical Stability
One of the most impressive feats of a silicone button is its ability to maintain its mechanical properties across a massive temperature range. You will find that the tactile feel remains consistent whether the device is in a sub-zero environment or a high-heat industrial zone. Additionally, silicone resists many common industrial oils and greases that would dissolve other rubbers.
- Operational range from -50°C to +250°C.
- Resistance to salt spray and marine corrosion.
- Minimal swelling when exposed to hydraulic fluids.
- Flame retardancy (UL 94 HB or V-0 rated silicone).
But wait, there’s more:
If your application involves contact with fuels, specialized fluorosilicone buttons can be used. These offer all the benefits of standard silicone with enhanced resistance to petroleum-based chemicals.
Longevity and Fatigue Resistance
The life cycle of a silicone button is measured in millions of actuations. You can expect a standard button to last between 1 million and 10 million cycles depending on the design and material grade. This fatigue resistance ensures that the “snap” doesn’t disappear over the life of the product.
- High elongation at break (up to 600%).
- Excellent compression set (returns to shape).
- Resistance to “set” or permanent deformation.
- Long-term color stability without fading.
You might be wondering:
How does it stay so resilient? The cross-linked molecular structure acts like a microscopic net that snaps back into place every time the pressure is released.
Key Takeaway: The chemical and thermal stability of a silicone button ensures long-term reliability in the most punishing environmental conditions.
| Stressor | Impact on Silicone | Result |
|---|---|---|
| UV Light | Negligible | No cracking or yellowing |
| Heat | Stable up to 250°C | No melting or loss of feel |
| Moisture | Repelled | Protects internal circuits |
This environmental resilience makes silicone the only logical choice for outdoor and high-reliability B2B hardware.
What customization options are available for a Silicone Button?
Customization of a Silicone Button allows you to tailor every aspect of the interface, from the base material to the finished product‘s aesthetic details. You are not limited to standard shapes or sizes; every button can be engineered to fit your specific PCB layout and housing design. This allows for a truly bespoke user experience that differentiates your brand in a crowded market.
You can choose from thousands of Pantone colors for the silicone body itself. Additionally, you can request different levels of translucency to manage how light from internal LEDs is diffused through the button.
Visual and Sensory Options
Beyond simple colors, you can add specialized fillers to the silicone to change its properties. For example, you can use phosphorescent pigments to create glow-in-the-dark buttons for emergency equipment. You can also incorporate metallic flakes or different textures to give the button a premium, high-end feel.
- Custom Pantone and RAL color matching.
- Translucent and transparent grades for backlighting.
- Integrated “light pipes” molded into the mat.
- Multi-colored keys on a single monolithic mat.
Think about this:
You can even mold “braille” or raised icons directly into the surface of the silicone button. This increases accessibility for visually impaired users without adding any additional manufacturing steps.
Electrical and Functional Customization
The functional side of a silicone button is just as customizable as the visual side. You can choose different types of conductive contacts based on your electrical requirements and budget. Carbon pills are the most common, but for high-end applications, gold-plated contacts offer the lowest possible contact resistance.
- Conductive carbon pills for standard circuits.
- Silver or Gold pills for low-resistance needs.
- Scissor-switch compatibility for low-profile designs.
- Integrated EMI/RFI shielding layers.
Here is the deal:
If you need to prevent electromagnetic interference, you can specify a conductive coating on the back of the silicone mat. This creates a grounded shield that protects your sensitive electronics from noise.
Key Takeaway: Extensive customization options for silicone buttons allow for the creation of unique, highly functional, and brand-aligned user interfaces.
| Feature | Options | Purpose |
|---|---|---|
| Illumination | Laser etching / Translucency | Visibility in the dark |
| Contact | Carbon / Gold / Silver | Electrical reliability |
| Texture | Matte / Gloss / Soft-touch | User comfort and grip |
The ability to mix and match these options ensures that your final product meets both the functional and aesthetic requirements of your target audience.
How do you integrate a Silicone Button into your PCB?
Integrating a Silicone Button requires a precise alignment between the molded button mat and the contact pads on your Printed Circuit Board (PCB). You must design your PCB with specific “comb” or “interdigital” patterns for the conductive contact of the button to close the circuit effectively. This mechanical-to-electrical interface is the heart of your device’s control system.
The silicone mat is usually held in place by the device’s housing or through integrated mounting holes on the mat itself. You ensure a secure fit by designing “bosses” or alignment pins that prevent the mat from shifting during use.
PCB Pad Design and Plating
The design of the traces on your PCB is critical for the long-term reliability of a silicone button. You should use a hard gold or carbon ink finish on the PCB pads to prevent oxidation and ensure a low-resistance connection. If the pads oxidize, the button will become intermittent or fail entirely, causing user frustration.
- Interdigital pad patterns for maximum contact area.
- Hard gold plating (ENIG) for high-end reliability.
- Carbon ink printing for cost-sensitive projects.
- Minimum pad spacing to prevent accidental shorts.
The best part?
A well-designed PCB pad pattern allows for a large “sweet spot,” meaning the button will work even if the user presses it slightly off-center. This tolerance makes your product feel more robust and forgiving to the touch.
Mechanical Mounting and Sealing
To ensure the silicone button stays aligned, you typically use a “sandwich” construction. The silicone mat is placed over the PCB, and the top housing is screwed down to compress the edges of the mat. This compression not only aligns the buttons but also creates the environmental seal discussed earlier.
- Alignment pins molded into the silicone mat.
- Compression ribs for enhanced IP-rated sealing.
- Air channels to allow air to escape during actuation.
- Retaining walls in the housing to prevent side-play.
Look at this:
If you don’t include air channels in your design, the air trapped under the button will act like a cushion. This “air-trap” effect makes the button feel mushy and can even prevent the contact from touching the PCB.
Key Takeaway: Successful integration relies on the synergy between PCB pad design, mechanical alignment, and proper air-venting.
| Component | Design Requirement | Goal |
|---|---|---|
| PCB Pad | Gold/Carbon Plating | Reliable electrical contact |
| Silicone Mat | Alignment Bosses | Precise positioning |
| Housing | Compression Ribs | Environmental sealing |
By following these integration guidelines, you create a durable and responsive interface that stands the test of time.
What are the primary drivers of Silicone Button costs?
Understanding the cost drivers of a Silicone Button project is essential for B2B procurement managers looking to balance quality with budget constraints, especially when considering the silicone keypad design complexity. You need to account for both the non-recurring engineering (NRE) costs and the per-unit price. Tooling is the largest upfront investment, and its complexity scales with the number of buttons and colors in your design.
While silicone is generally more affordable than complex mechanical switch assemblies, the initial mold costs can be significant. However, once the mold is created, the marginal cost per button is very low, making it ideal for high-volume production.
Tooling and Mold Complexity
The mold for a silicone button is typically made from high-grade steel to withstand the heat and pressure of thousands of cycles. You will pay more for molds that have complex geometries, multiple cavities, or side-actions for undercuts. A multi-cavity mold is more expensive initially but drastically reduces the per-piece price by increasing throughput.
- Steel grade (P20 vs. NAK80) for mold longevity.
- Number of cavities (1-cavity vs. 64-cavity).
- Complexity of the parting line and button shapes.
- Precision required for tactile web tolerances.
Here is the deal:
Investing in a higher-quality steel mold is often cheaper in the long run because it requires less maintenance and produces fewer defects. This “pay now, save later” strategy is common in high-volume B2B manufacturing.
Materials and Secondary Processes
The type of silicone and the number of secondary processes also impact the final price. If you require medical-grade silicone or specialized fluorosilicone, your material costs will rise. Similarly, each additional color in screen printing or each layer of coating adds labor and material costs to the production line.
- Specialty silicone grades (Medical, Flame Retardant).
- Number of printed colors and legend complexity.
- Specialized coatings (Epoxy, PU, Anti-microbial).
- Quality control requirements and testing protocols.
You might be wondering:
How do we ensure the legends don’t fade after a million presses? The answer lies in the chemical bond formed between the silicone ink and the cured button surface.
Key Takeaway: Cost is driven by a combination of upfront tooling investment, material selection, and the number of secondary finishing steps.
| Cost Factor | Impact on NRE | Impact on Per-Unit |
|---|---|---|
| Tooling | High | Low |
| Material Grade | Low | Medium |
| Finish/Coating | Medium | High |
Careful planning during the design phase allows you to optimize these factors to meet your project’s financial goals without compromising on interface quality.
*
Conclusion
A high-quality silicone button is the cornerstone of a reliable and user-friendly interface. Whether you are building medical devices, industrial controllers, or consumer electronics, understanding the nuances of material, tactile response, and manufacturing is key to your success. Our vision is to empower global innovators with precision-engineered elastomeric solutions that bridge the gap between humans and technology. If you are ready to elevate your product’s user experience with a custom-designed interface, please contact us today to discuss your project requirements and receive a detailed consultation from our engineering team.
Frequently Asked Questions
Can I get a silicone button in any color?
Yes, you can specify any Pantone or RAL color for the silicone base, and we can even match colors for translucent backlighting effects to ensure brand consistency across your entire product line.
What’s the best way to clean a silicone button interface?
The best way to clean these buttons is by using a damp cloth with mild soap or isopropyl alcohol, as the silicone material is naturally resistant to most common cleaning chemicals and disinfectants.
How do I choose between carbon pills and gold contacts?
You should choose carbon pills for standard, cost-sensitive consumer applications, while gold-plated contacts are better suited for critical industrial or medical devices where the lowest possible contact resistance is required.
Can I add backlighting to an existing silicone button design?
Yes, you can add backlighting by switching to a translucent silicone base and using laser-etched legends, though this usually requires a redesign of the internal LED placement on your PCB.
How long does it take to manufacture a custom silicone button mold?
The manufacturing of a custom steel mold typically takes between 15 to 25 days, depending on the complexity of the design and the number of cavities required for your production volume.